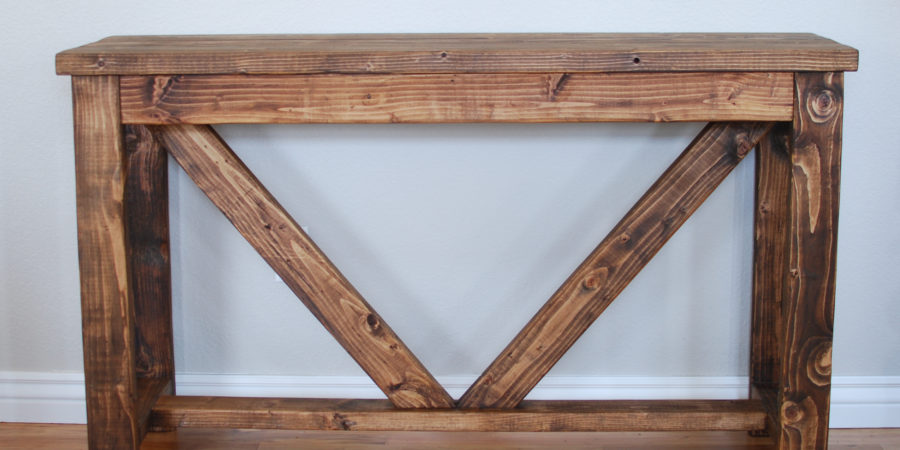
I recently had the privilege to build a console table and coordinating bench for my church’s remodel. This was a fun and fairly quick project.
It would have been much quicker, had I not had my little people “helping” me, but that is what this blog is about; doing projects amidst the ordinary and crazy of your life. I don’t have whole weeks or even weekends full of uninterrupted time. I don’t even have hours of uninterrupted time, most days. That’s life.
This may not be my best and most thorough tutorial, since I often had to stop to get snacks for the kids or resolve conflict, etc. I debated even posting this tutorial at all, since I did not document my steps well along the way. Hopefully, you can follow okay.
Alright time to get started.
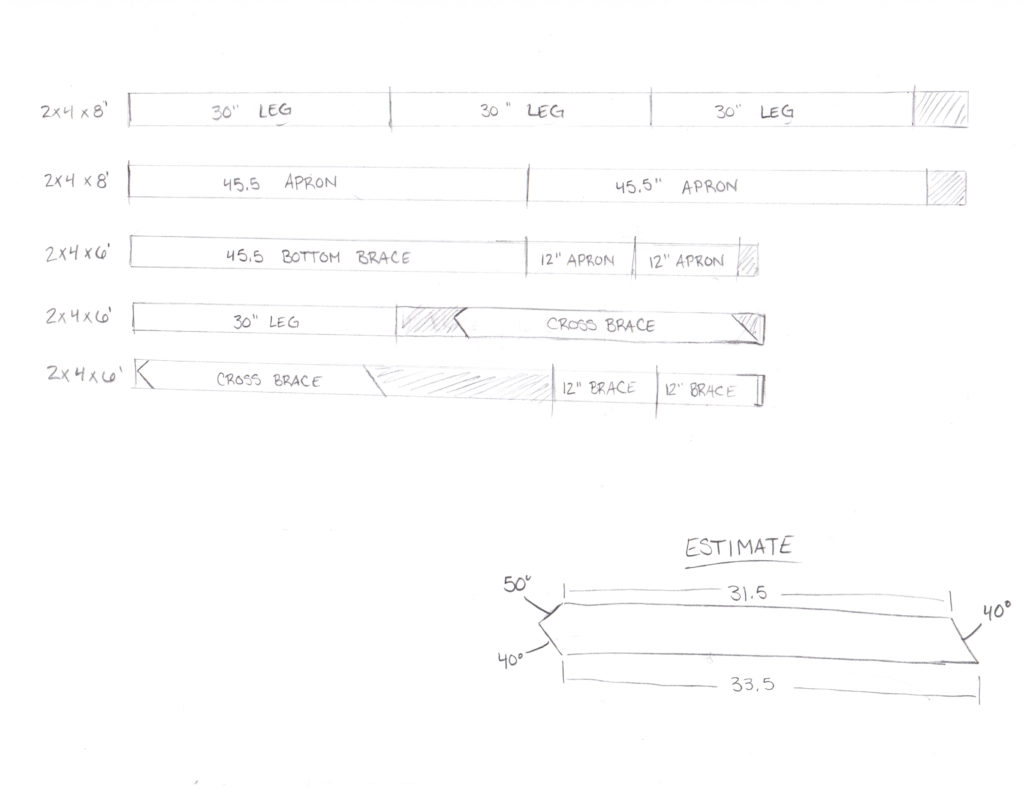
(note: because I needed this table to be a certain length to work for the space, the cuts do not utilize the material as best they could. If you adjusted your table length to 48″ instead of 54″ I believe you would have less waste. )
Supplies:
- (2) 2x4x8′
- (3) 2x4x6′
- (1) 2x6x10′
- (1) 2x6x8′ (if you plan on building the matching bench I would get another 10′ piece so you can use the other half for the bench)
- 2.5″ kreg course screws
- (4) 2.5″ wood screws
- Wood glue
- Minwax wood conditioner (optional)
- Minwax Provincial Stain
- Minwax Helmsman Spar Urethane
Tools:
- Saw
- Tape measure
- Kreg jig with bit and driver
- Drill
- 1/8″ drill bit
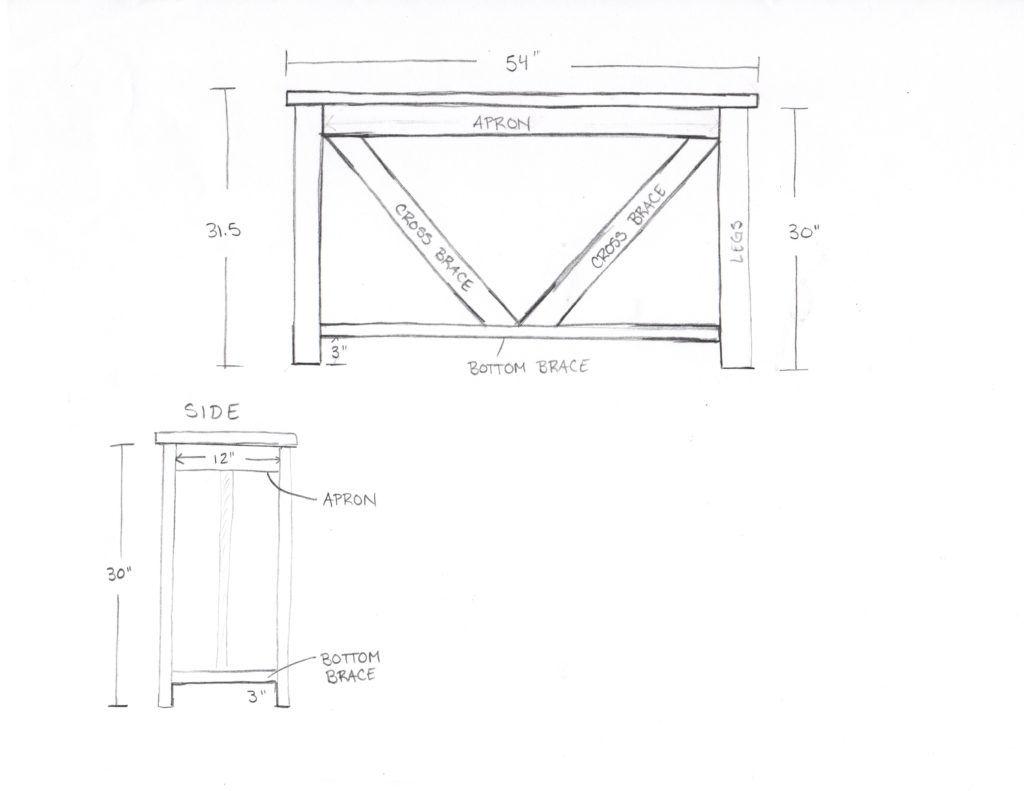
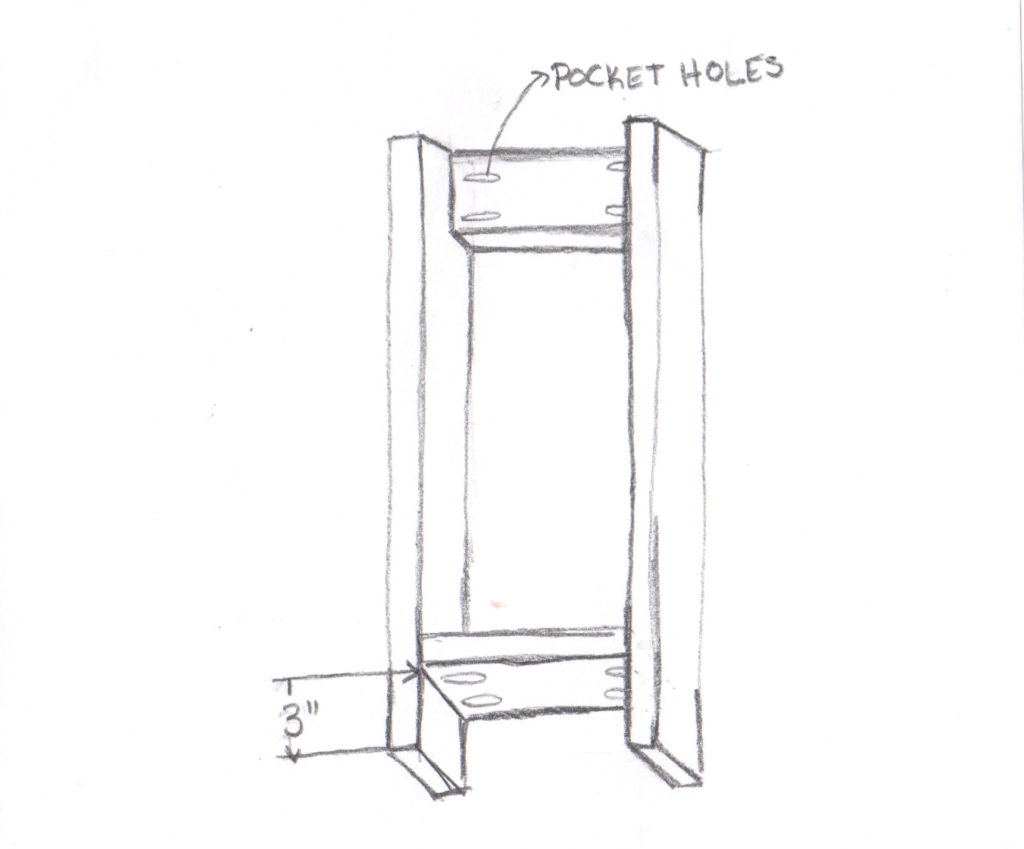
Below is a sketch of the overall design and dimensions. You can use this as a reference. I have also included a cut list sheet, so you know what pieces to cut out of the same piece of wood.
STEPS:
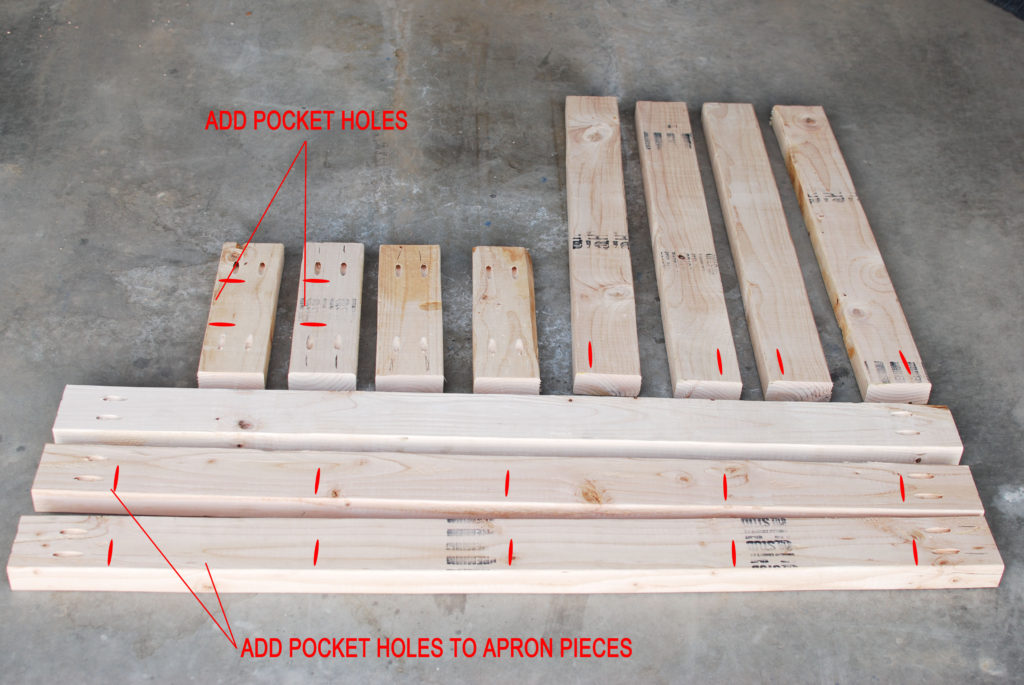
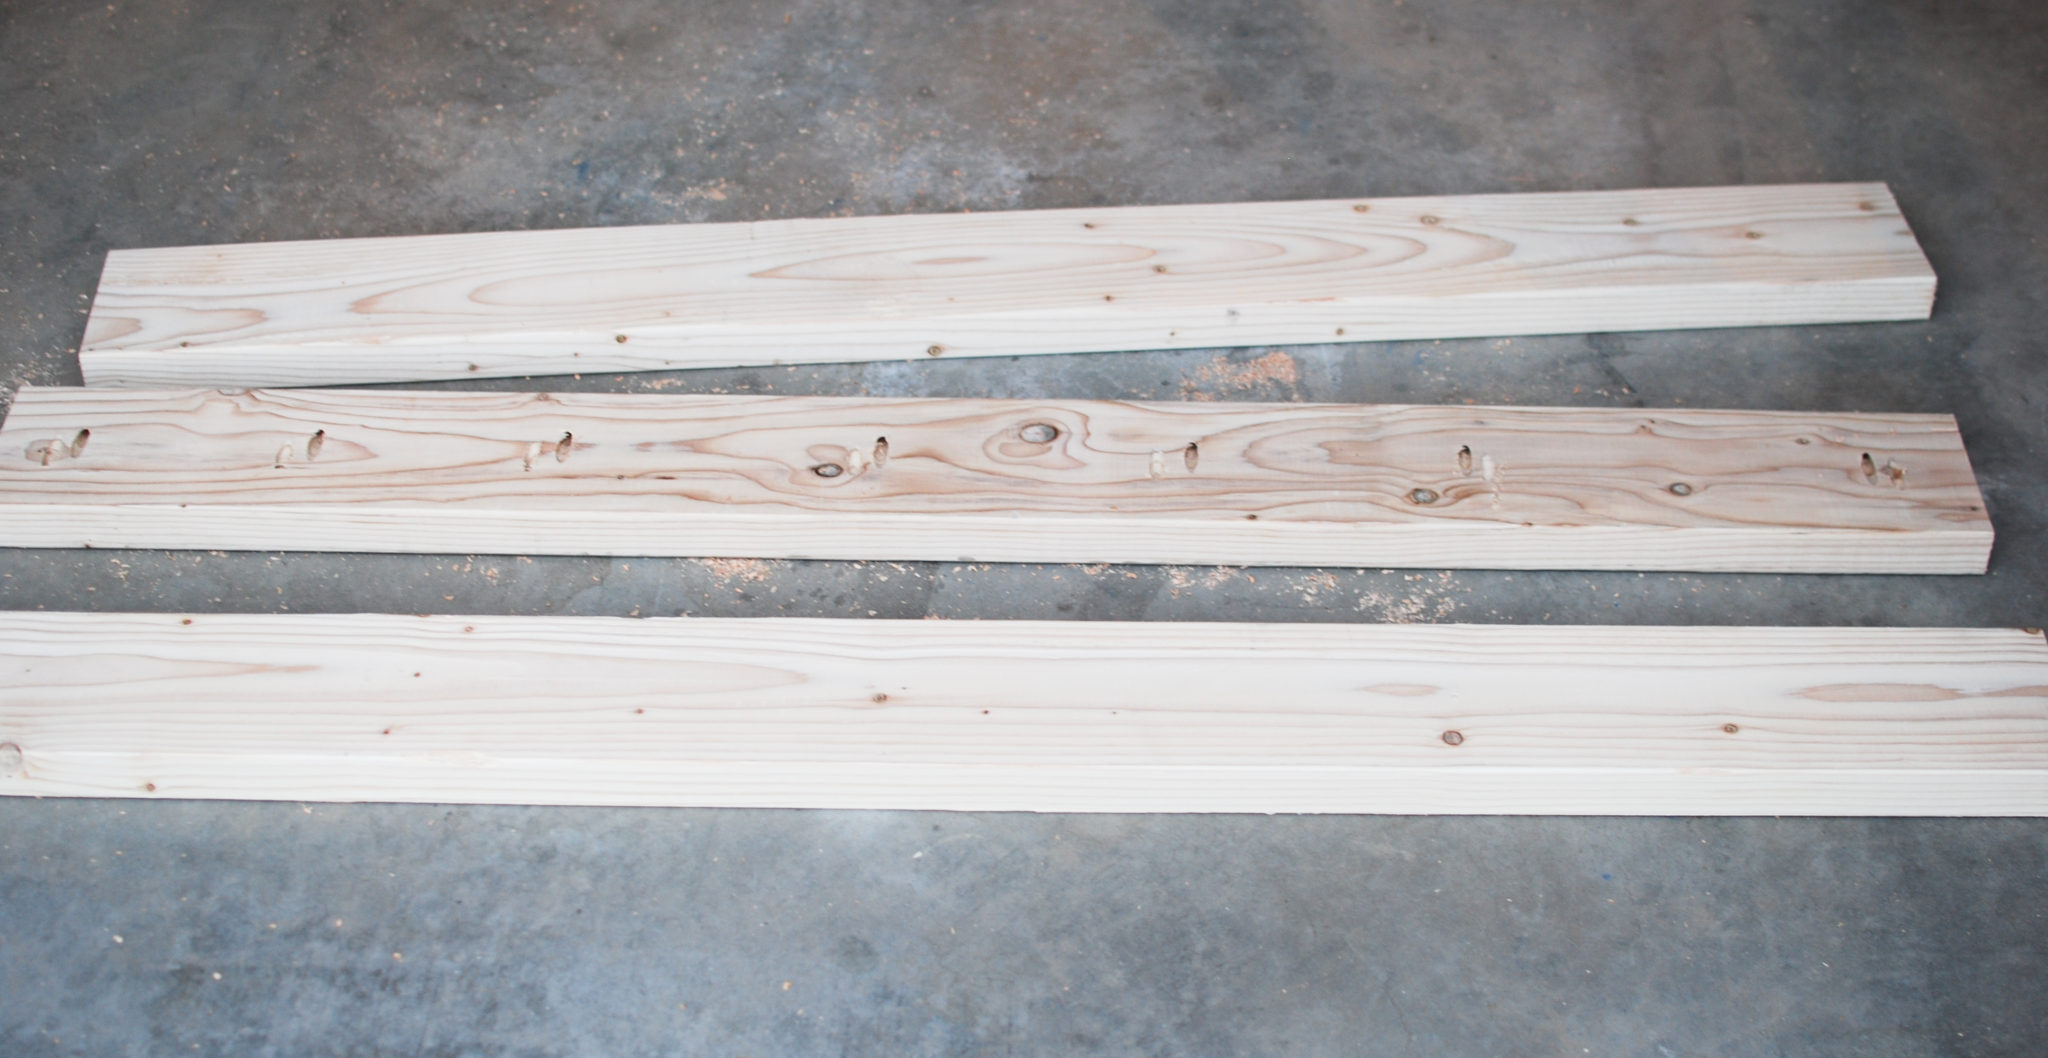
1. Cut wood. You can follow my cut diagram, to make sure you utilize your wood as best you can.
- Cut (3) 2 x 4 x 45.5″ (2 for apron and 1 for bottom brace)
- Cut (4) 2 x 4 x 12″ (2 for apron and 2 for bottom brace pieces)
- Cut (4) 2 x 4 x 30″ (legs)
- Cut (2) 2 x 4 x 33.5″ (this piece has multiple angles to cut. Wait until you have assembled the table before cutting these 2 pieces. I will explain how later)
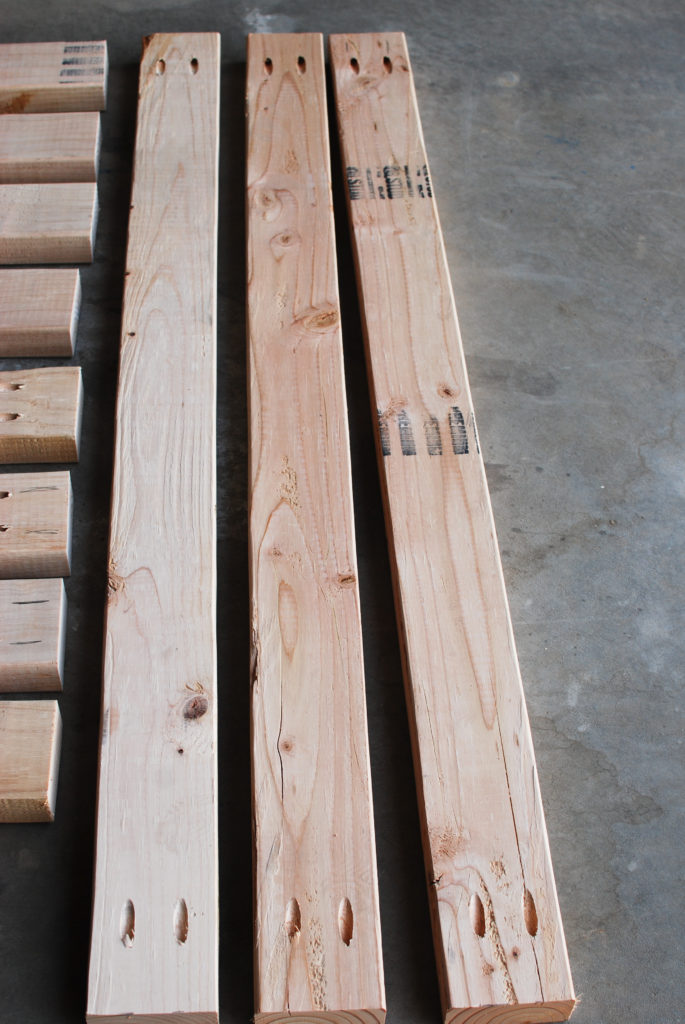
- Cut (3) 2 x 6 x 54″ (top pieces. Not shown on cut sheet)
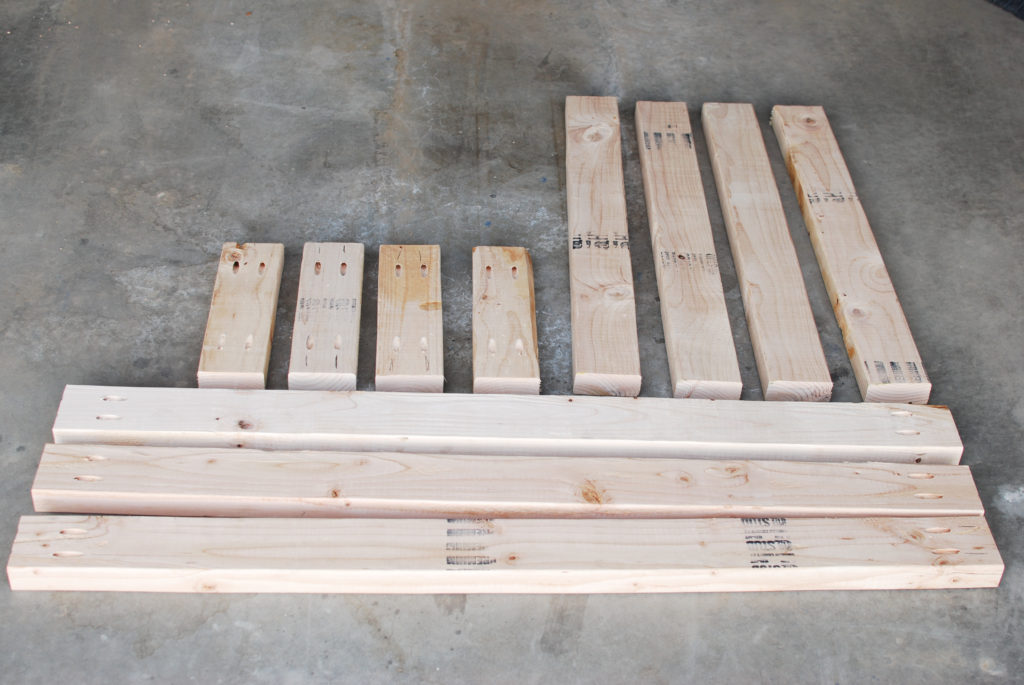
(This picture does not show the 2×6 top pieces)
2. Drill pocket holes. If you do not have a Kreg jig yet, I highly suggest you invest in one. It seems like I use mine for almost all my projects these days. It is well worth the investment!!!
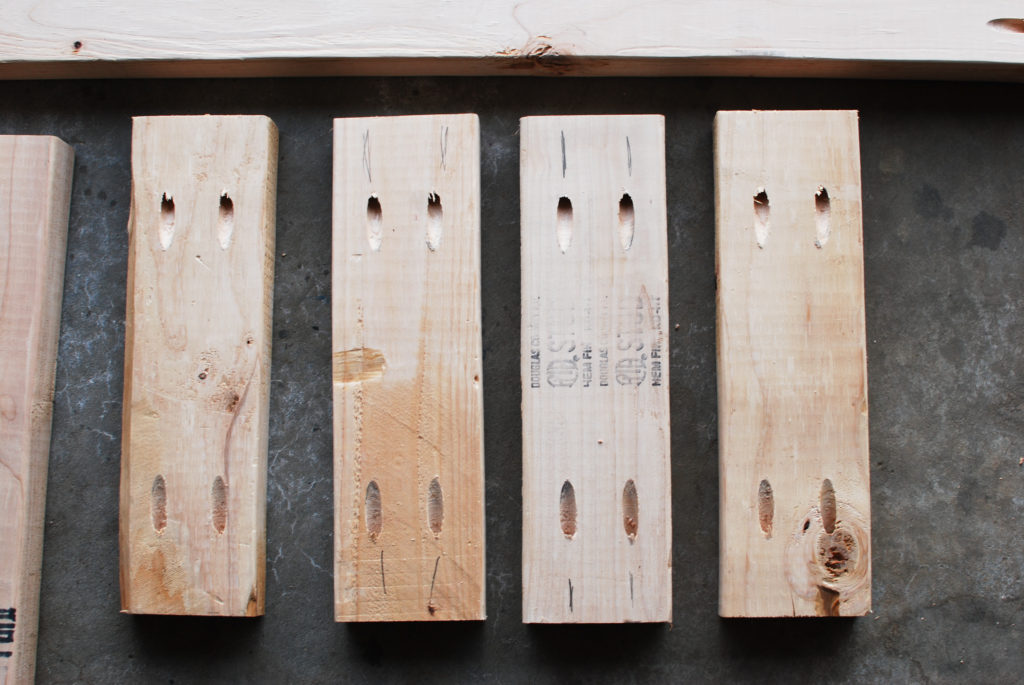 Drill 2 holes in each end of the 12″ pieces. (4 holes total for each piece). I pick the ugliest side to drill the holes in.
Drill 2 holes in each end of the 45.5″ pieces.
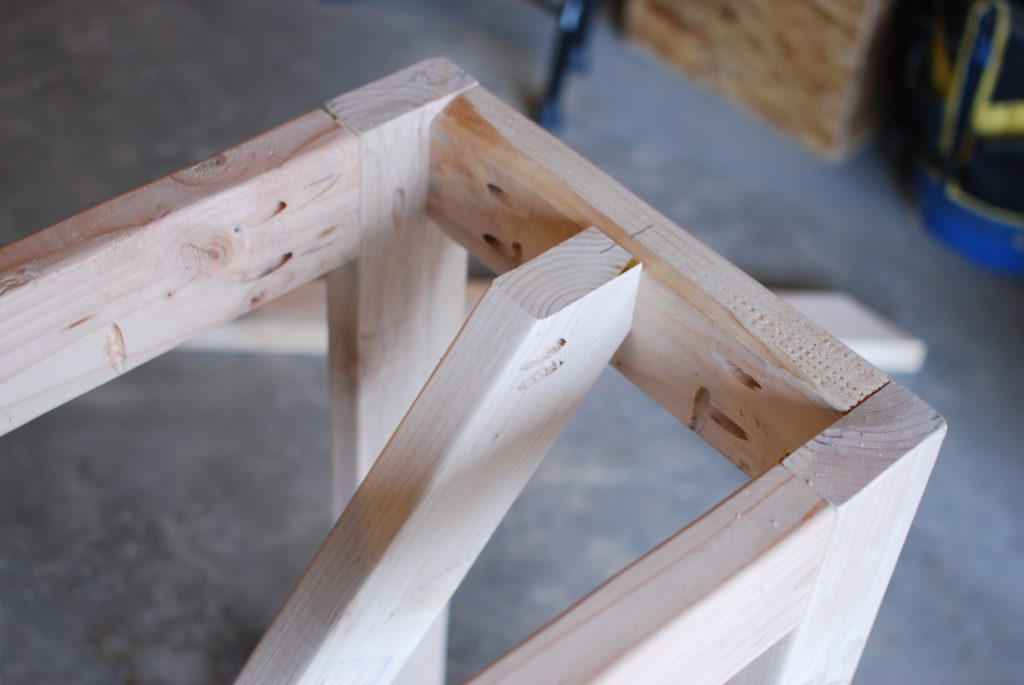
NOTE: Not shown in the above pictures are the other pocket holes you will need to add to the apron pieces and legs. You will need to drill pocket holes in all 4 apron pieces, to attach the top and 1 hole in the top of each leg.
I forgot to drill these BEFORE I assembled the table and had to add them later, which is doable, but just not as easy as drilling them before. Take a look at the picture below. I marked the other pocket holes you need to drill.
-About 5 holes on the 2 long apron pieces
-2 holes on the 2 short apron pieces
-1 hole in the top corner of each leg. Drill on whatever side you want to be the inside and pick whatever end you want to be the top. Drill on the left side on 2 pieces and the right side on 2 pieces.
3. Sand. I sanded all my pieces before assembling, but you could do it after as well.
4. Assemble ends. Take (2) legs and (2) 12″ pieces. Lay the legs on their sides and one 12″ apron piece flat between them. I used a quick grip clamp to hold in place while I put in the screws.
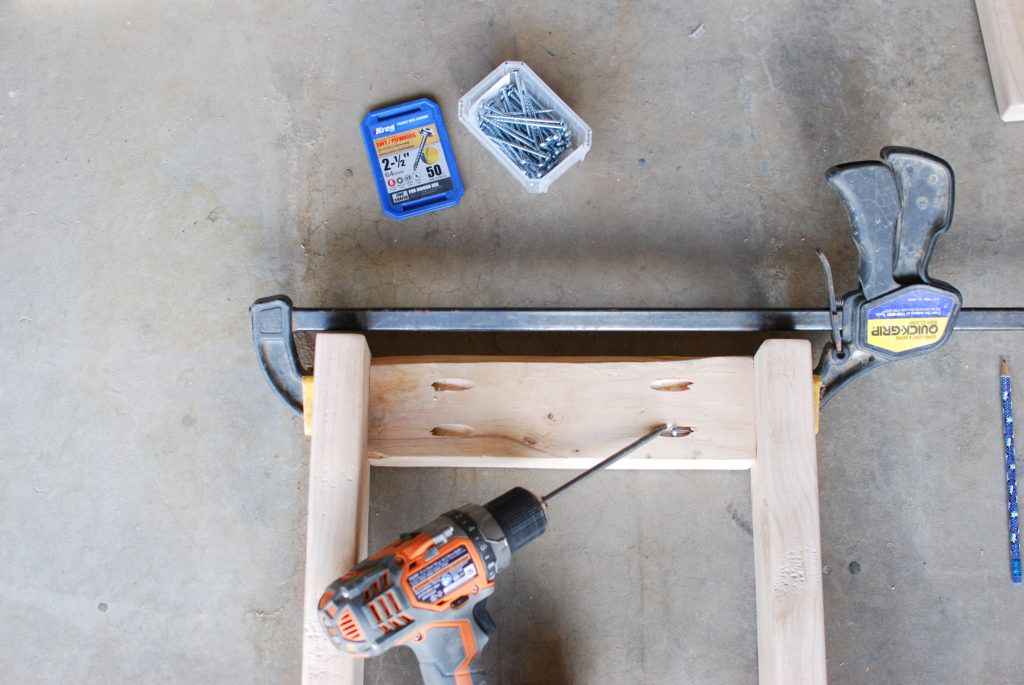
This is the 12″ apron piece. It is laying flat on the ground and the legs are on their side. Make sure the tops are all flush.
Next is adding the bottom 12″ brace, and I am sorry I did not get a good photo. First, measure 3″ up from the bottom on each leg and make a mark. You are going to line up the bottom of the brace to the line.
 Repeat these steps for the other end piece.
5. Connect leg ends. Lay your assembled end pieces on their side, and place one 45.5″ apron piece between them. Use your already drilled pocket holes to connect apron to legs. Repeat with other apron piece.

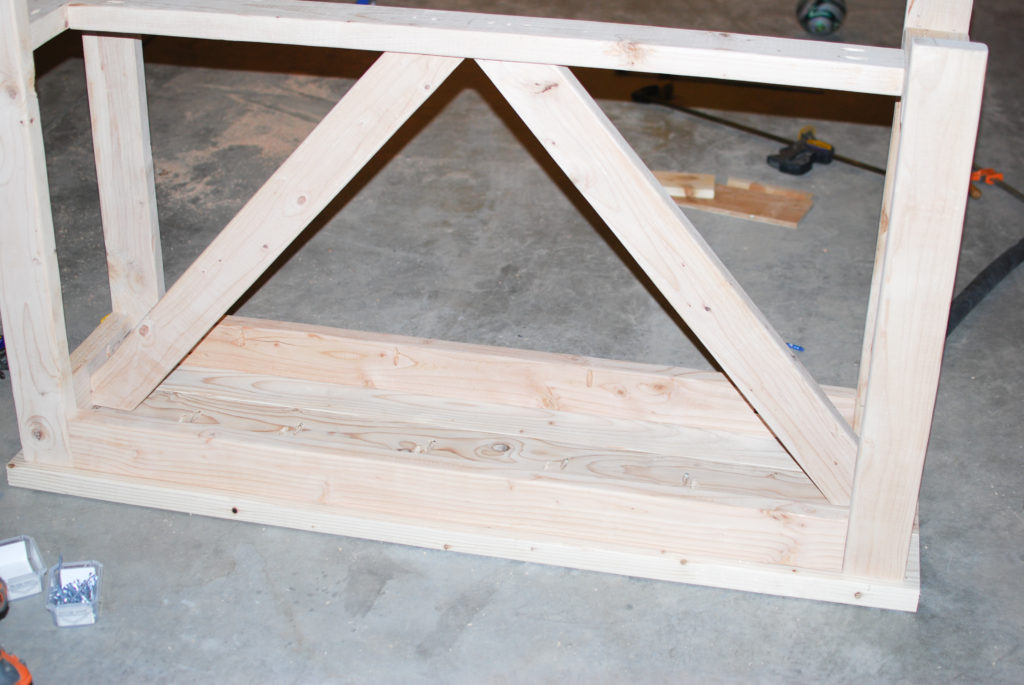
6. Add bottom brace. Flip table upside down, so that the bottom of the legs are in the air. It is now time to attach the bottom brace. You may need someone to help you hold this piece in place if you do not have a large clamp.
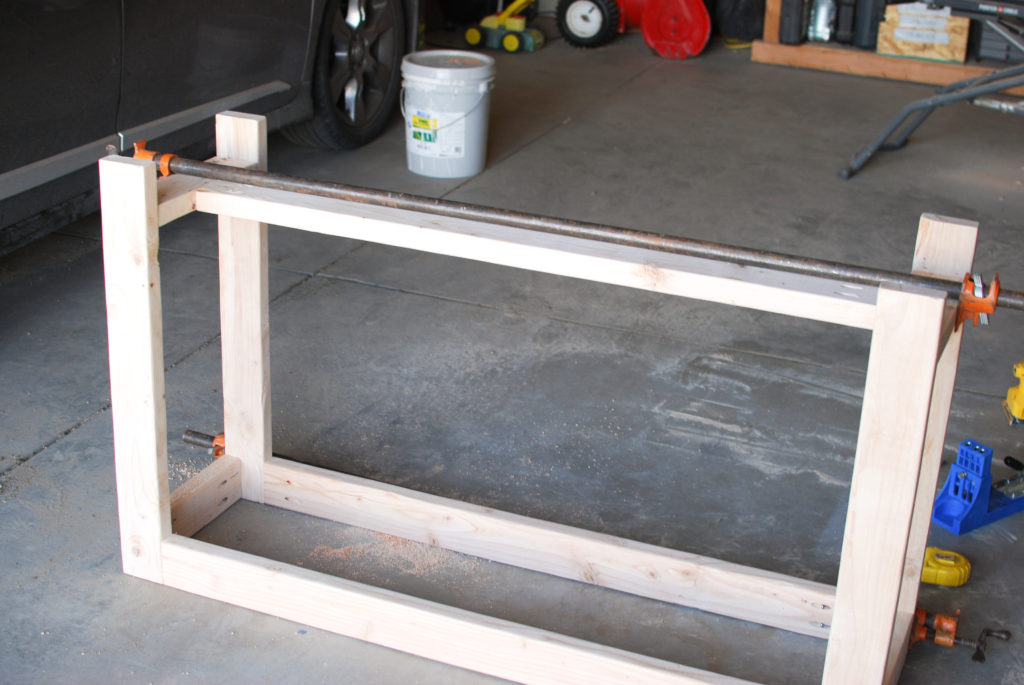
Center the brace on each end, clamp(or hold) in place, while you add screws to the existing pocket holes.
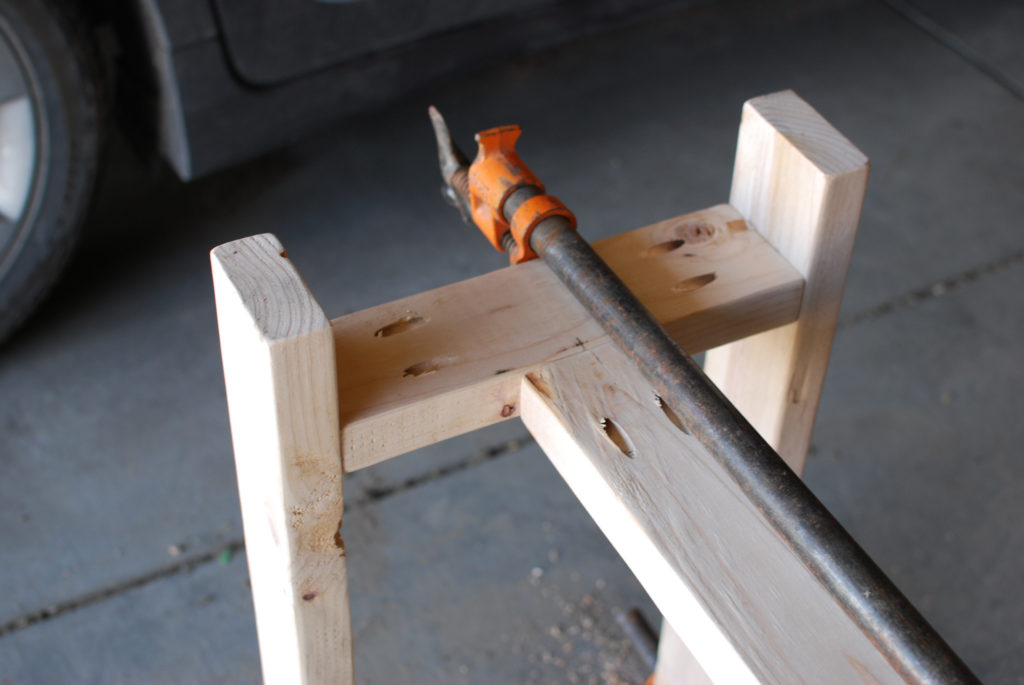
Here is a closeup of what I just explained. You can see I made a little center mark on the 12″ piece and a center mark on the long brace piece to ensure I was centered.
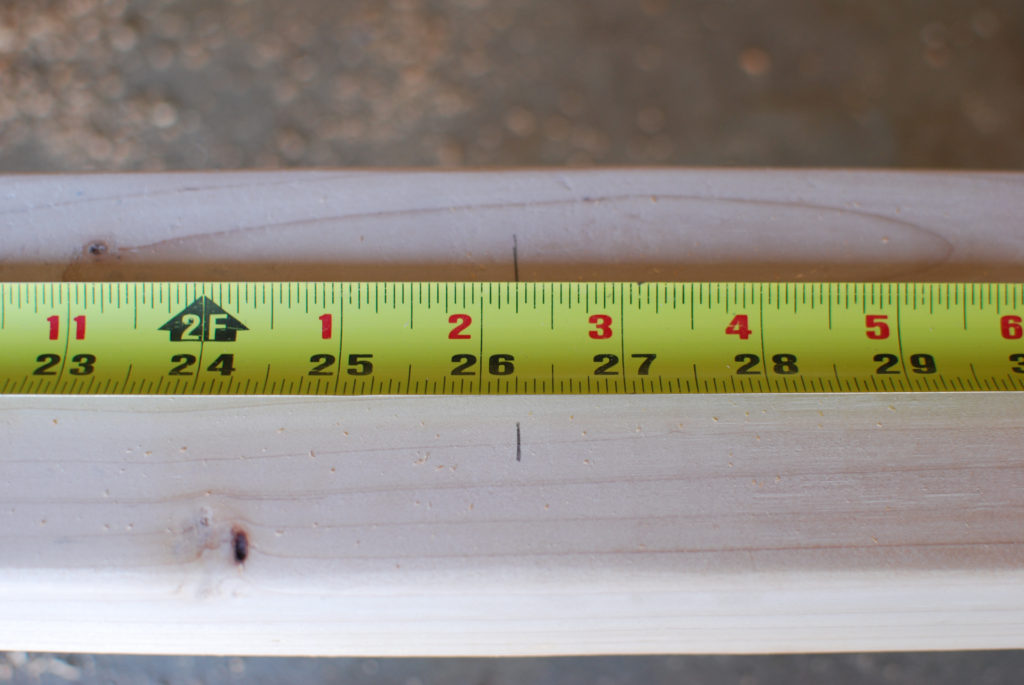
7. Mark center of brace. We are getting ready to add the angled cross braces, so flip the table back over, so its right side up. First, we need to get a center mark. Measure the total length of the bottom brace (including the end pieces). Should be 52.5″ or close to it. Make a center mark at 26.25″.
Once again, I did not get a good photo of this step. Think about marking the center of where the two angled braces are going to meet, like shown in the second photo.
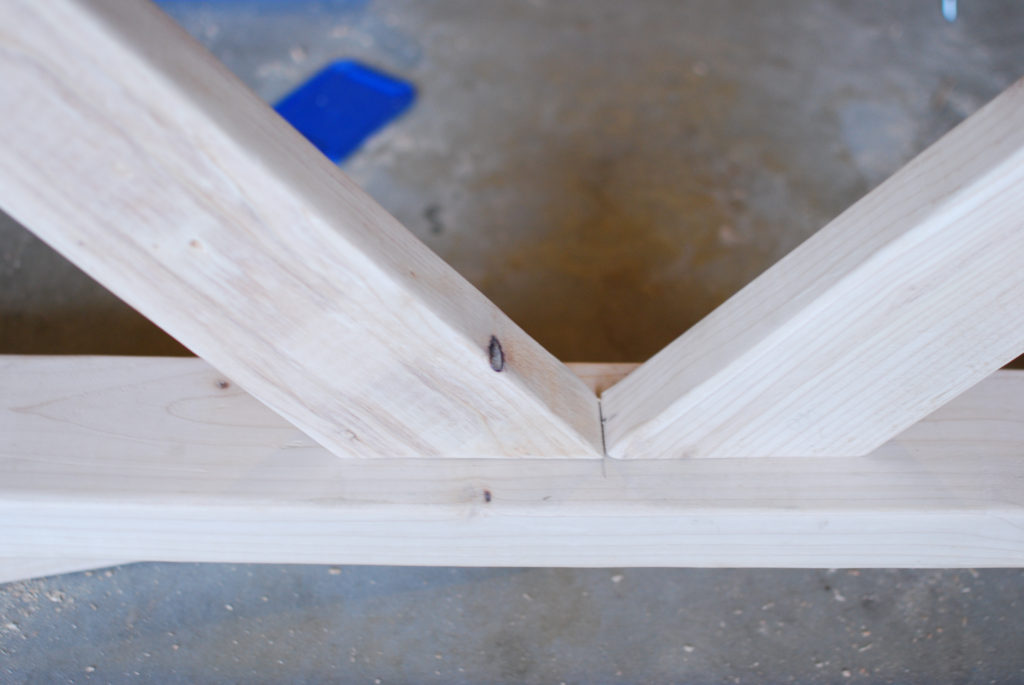
8. Cross braces. I recommend cutting these pieces a little on the long side initially. (so instead of 33.5″, start with maybe 34″) You can always take a little more off, as you adjust the fit of each piece. Cut a 40 degree angle on one end and 50 degree angle on the other end. You can look back at the cut sheet diagram to see what I am talking about.
Once you cut those two angles, test the fit. When you are happy with the fit (hits center mark and reaches the inside of apron) you can cut a 40 degree angle to trim off the top and make it flush, with the top of the apron. This top part does not have to be perfect, since it will be hidden.
Drill 2 pocket holes in the top end, as shown in the photo above.
Now flip the table over again, because we are going to add screws through the bottom brace to secure the bottom of each angled cross brace.
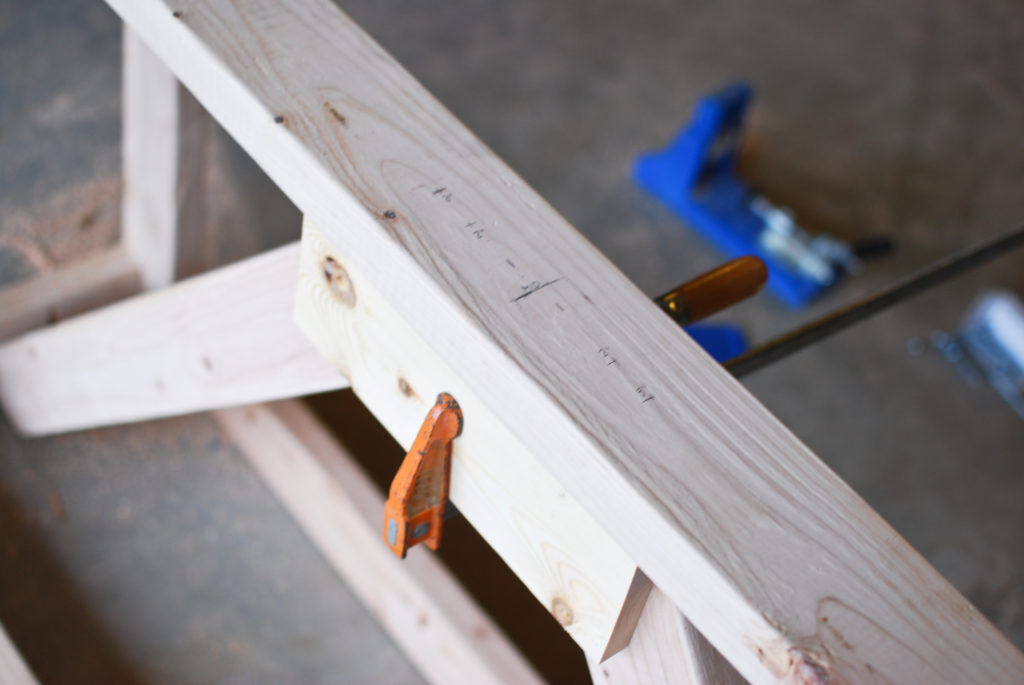
Mark the center, then marked a 2″ and 3″ point on each side of the center mark. Now use the 1/8″ drill bit to drill holes on those points. The reason I drill before I put in the screws is often times, wood will split or crack if you do not do this. Screw in the 2.5″ wood screws.
I did not have someone helping me hold the cross braces in place so I used a clamp and two scrap pieces of wood to “sandwich” the cross braces, keeping them centered while I inserted my screws.
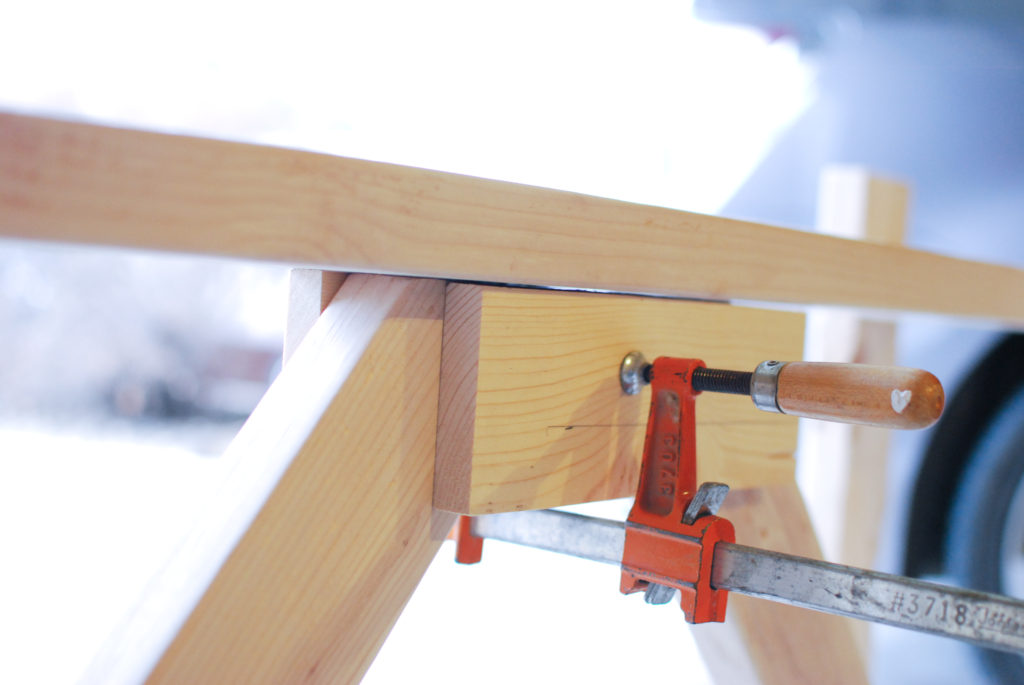
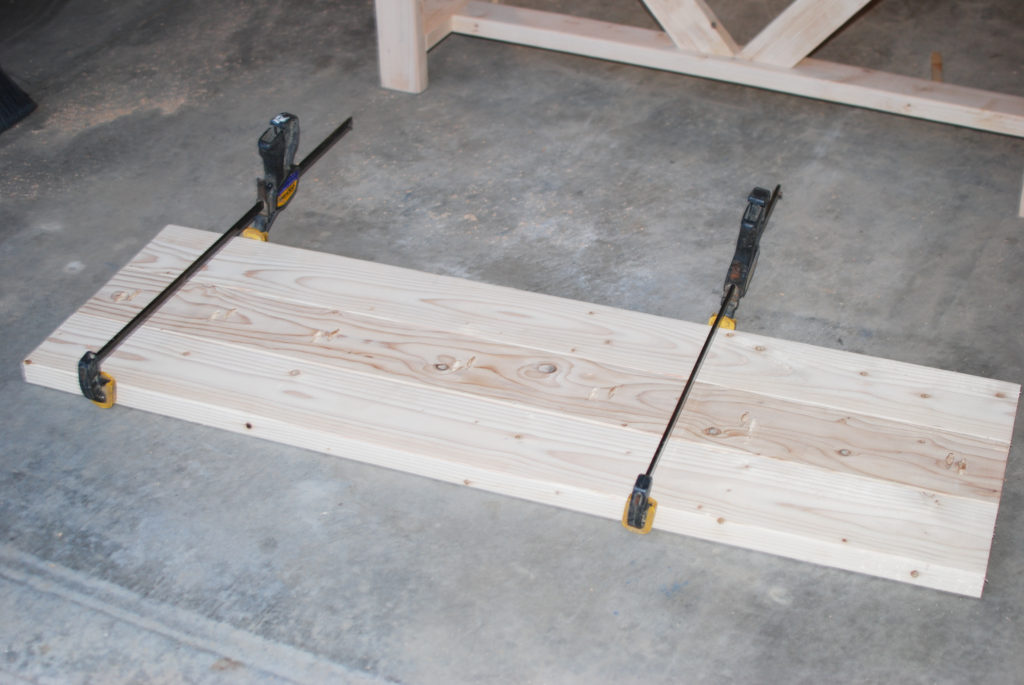
9. Assemble top. Cut (3) 2x6x54″ for the top and drill pocket holes in one piece (middle piece) along both sides of that piece. I made sure I had one hole going each way at each end and then spaced holes roughly 8″ apart. (about 7 holes on each side)
Once again, I did not have someone helping me, so I used some clamps to hold the 3 pieces together while I put the screws in. I did use some wood glue on this part. Just run a little bit on each side of the middle piece.
10. Attach top. Last step of assembly is to attach the top. Lay the top (right side down), then put the bottom half on it. You should roughly have a 3/4″ edge all the way around.
When you are happy with the placement, find the pocket holes you already drilled and screw them in. (When I got to this step I realized I had forgotten to drill these holes. Ooops!)
That’s it for assembling! Now for some stain and a topcoat!
11. Wood Conditioner. I did a quick check to make sure I did not need to sand any more spots or edges. I chose to apply wood conditioner to this project because I wanted to get a more even look with the stain. I also knew I was going to be building a coordinating bench and wanted to try to get them to match as well as I could. This is an optional step.
12. Stain. I applied Minwax Provincial wood stain. You can see how I like to apply stain in this video: How to Stain
13. Finish. For the finish I used Minwax Helmsman Spar Urethane, which is in a spray can. Normally I would use Minwax Polycrylic Spray in satin, but I had some cans of the Helmsman laying around. You could also brush on a polycrylic. I have had good success with the spray on polycrylic in the past. Make sure you apply outside on a nice day.
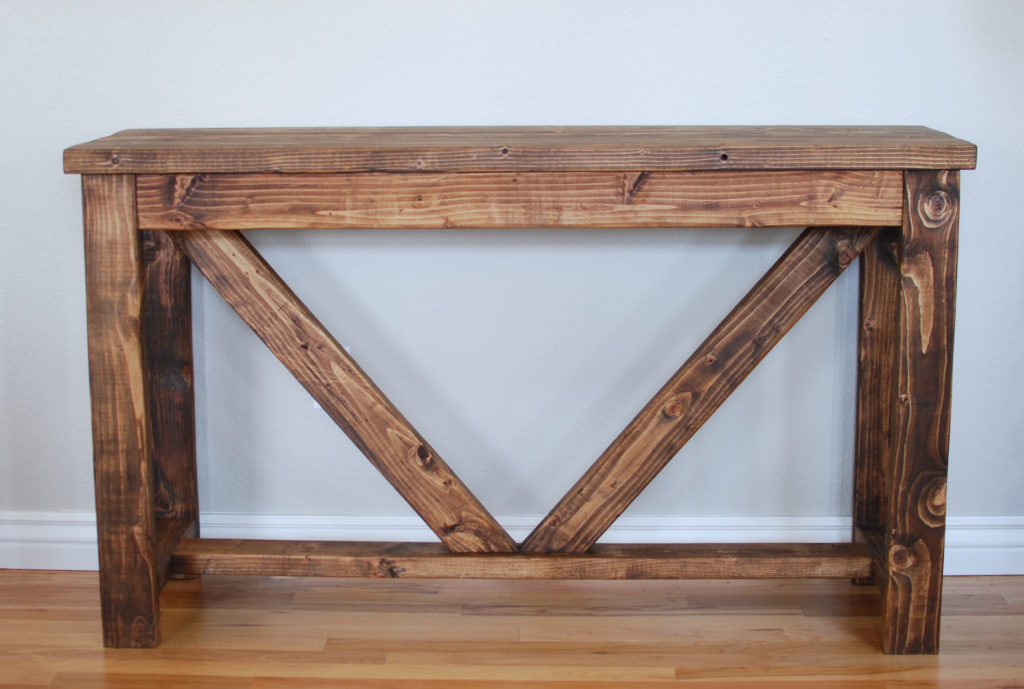
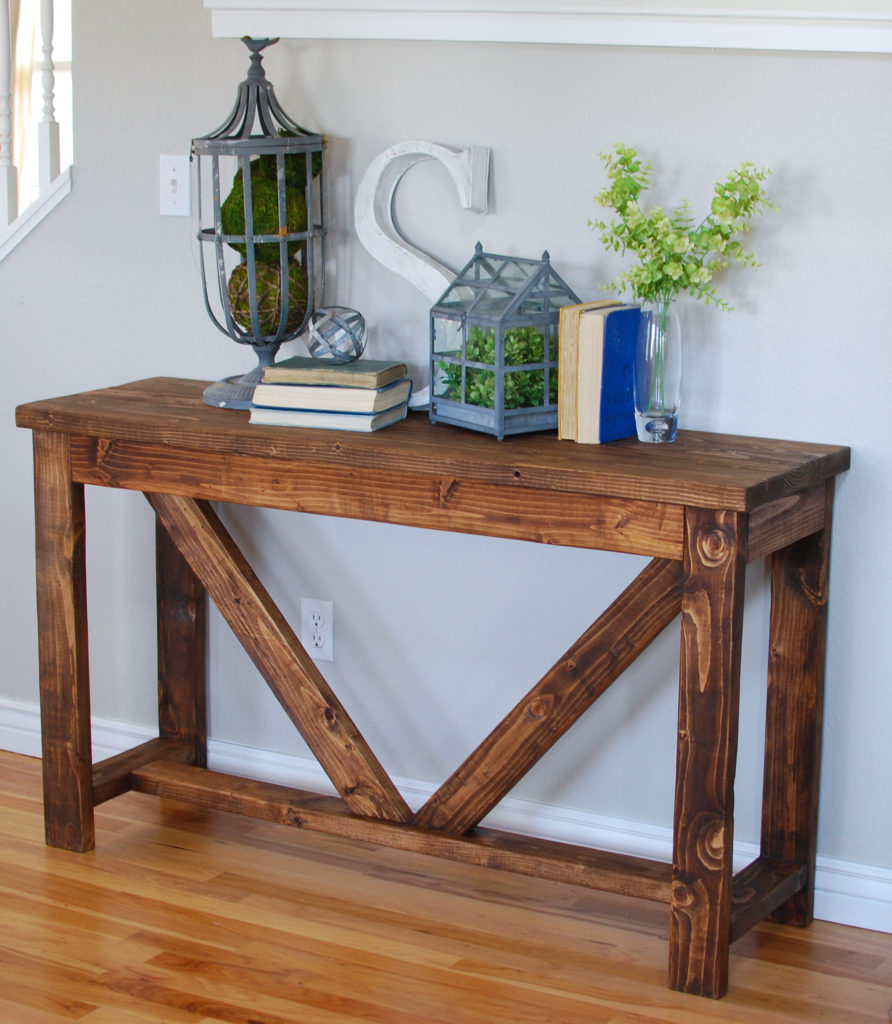
I love the simple design and lines of this table! I will share a little later how I built a coordinating bench.
I am so excited to see this piece in the new welcome center at church. I will post photos of the table in place once the renovation is done. Until then, it will sit in my front room where my kiddos can crawl all over it.
If you have questions about this project let me know!
Emily
Help!!!! So I shortened the table to 48” from the original 54” to fit in my space and now I cannot for the life of me figure out the cross bracket pieces… I’ve wasted a good $100 in wood trial and erroring it, used websites for angles, tried eye balling it, no success! I’m beyond frustrated and ready to throw the entire thing in our fire pit… any suggestions or help before I do that? Are the cross braces necessary? Ugh please help!
Hi! So sorry to hear that the angles have been giving you trouble, they can be annoying. Couple ideas…
1. From a strength and support perspective I don’t think you need the supports. They are more for looks.
2. Don’t worry as much about the top angle being a perfect fit, since it should be concealed at the top.
3. Try using some of the pieces you have already cut to not waste any more and don’t have the pieces meet in exact middle.I will try to attach a picture of a bench I did with a similar concept. Still have the supports but they don’t join at the center-making it possible to use shorter pieces. (still have to figure the angle so I will try to explain that below)
4. To work out angles that are giving me trouble I often ditch my measuring tape and try to just lay my pieces out and trace/transfer the angle. Hard to explain…but I would maybe cut my brace extra long then lay it over the bottom support so it overhangs, then use a pencil to mark the angle where the brace and bottom piece meet.