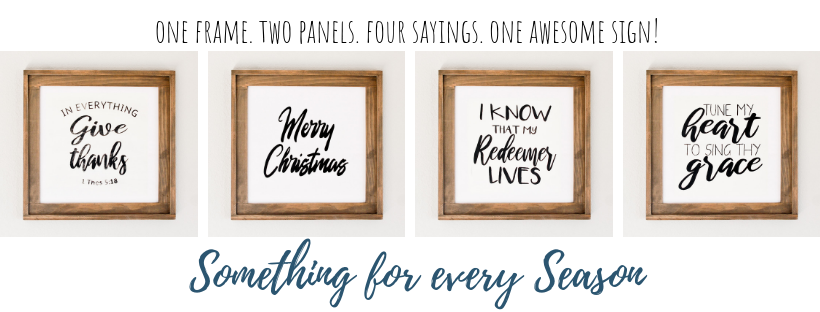
Have you been thinking about making your own wood sign? They are everywhere in the stores or online! Today I am sharing a very Simple DIY Wood Sign! And this one may be my favorite so far because…it is FOUR SIGNS IN ONE! That’s right! ONE frame with interchangeable pieces!
 I have shared many tutorials already on this blog, showing how to make a variety of different signs. Each one is a little unique in the design and cost. You can check them out under the Home Decor tab.
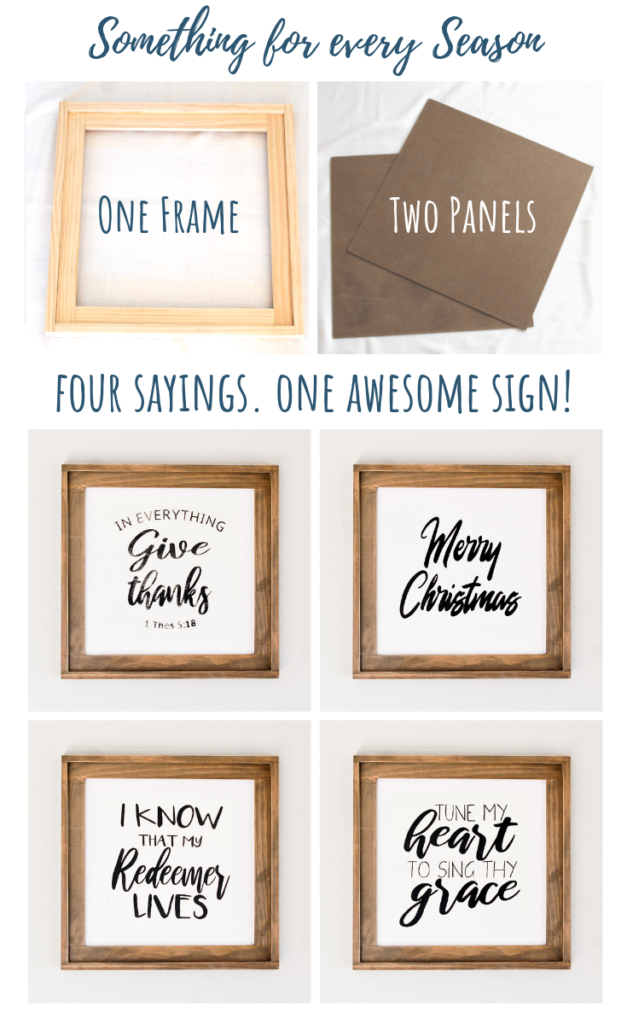
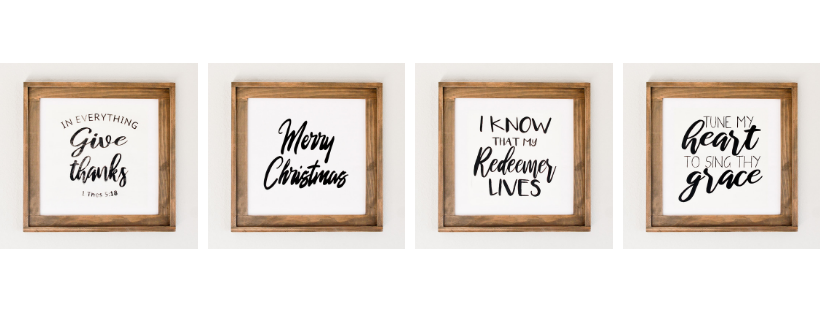
But, I may be the most excited about this one today! I love efficiency, so getting FOUR simple DIY wood signs in ONE is perfect! It’s four different sayings, one for each season, but it is all in one, so no having to store multiple signs somewhere!
This is super easy to make and would be a great addition to your home, or a great gift to give!
How much will this cost?
Like all my other sign tutorials, you can look at my cost estimate sheet, to give you an idea of what you might spend. I try to give the best estimate, but I may miss some things along the way.
This sign cost me about $12 to make. I think on average it will cost most people…$20 depending on what supplies you have on hand. Twenty bucks is pretty amazing considering you are really making FOUR signs in one! Simple DIY Wood Sign Cost Sheet
Simple DIY Wood Sign: Something for every Season
Materials
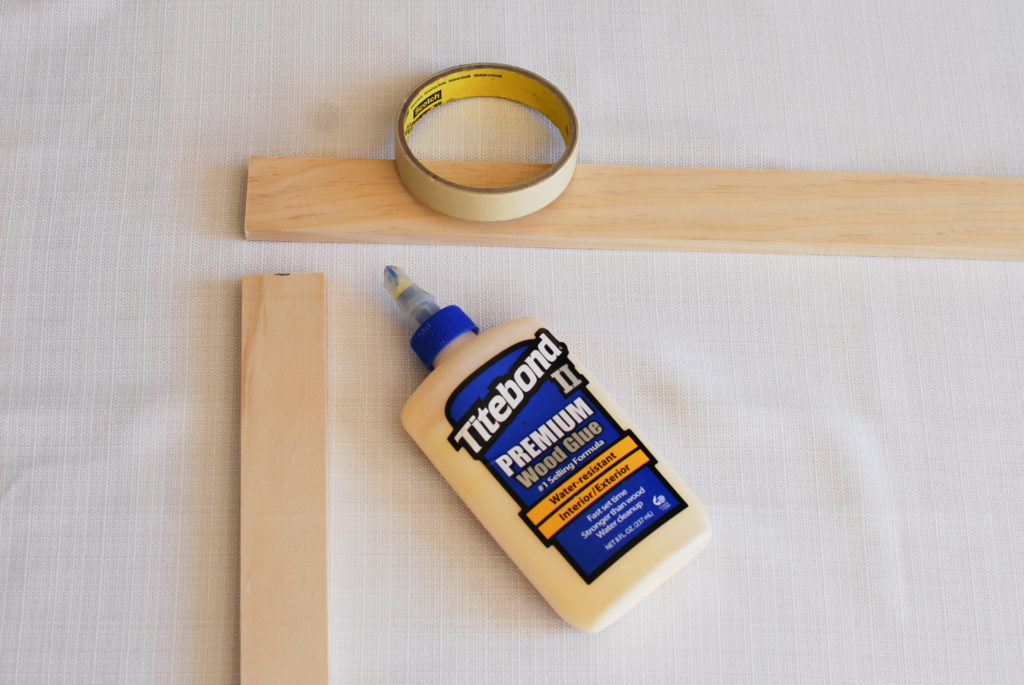
- (2) 1/2″ x 2″ x 36″ Pine Craft Wood (usually stored on the same aisle as other dimensional lumber but in smaller cubbies below the 8′ pieces)
- (2) 1″ x 2″ x 6′ Pine
- 4’x8′ Hardboard (you will not need the whole piece, but still need to buy the entire piece. This is what I used; it is smooth on both sides: hardboard)
- 1/4″ Offset Clips
- Wood Glue
- 2″ finishing nails (optional)
- Paint: white
- Acrylic paint (for lettering)
- Wood stain
- Spray clear coat (optional)
- Stencil/template (downloads below)
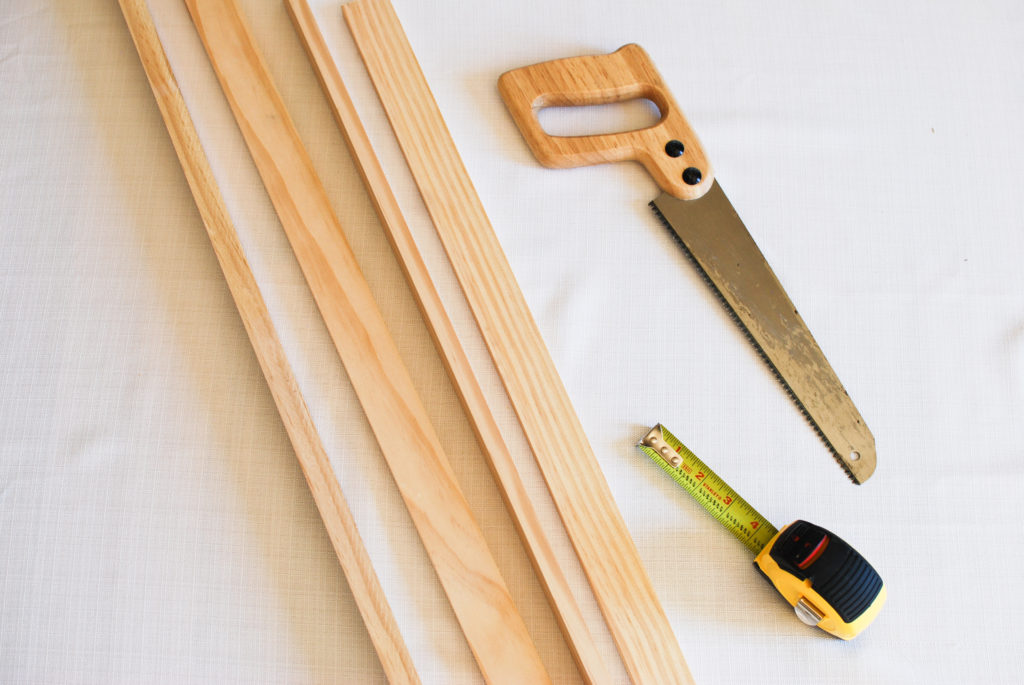
Tools/Supplies
- Saw
- Circular saw/table saw (if you don’t have hardboard cut at store)
- Nail gun (optional)
- Paint brush
- Rags
- Tape measure
- Pencil
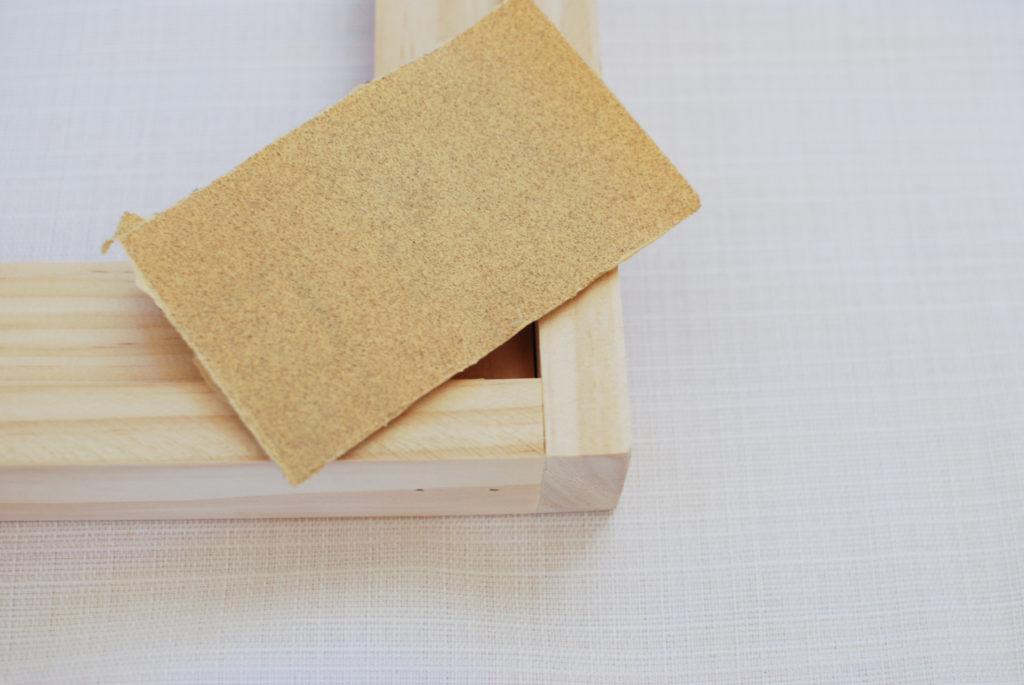
- Sandpaper 150/220
- Makeup sponge (optional)
- Sharpie (optional)
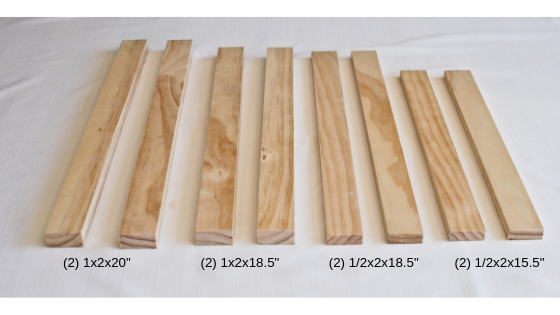
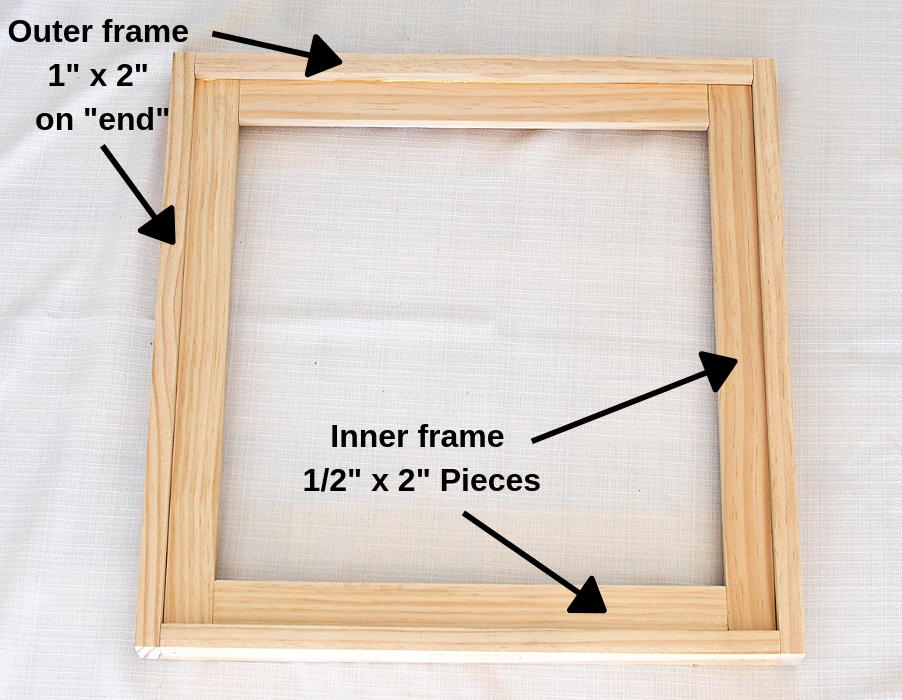
Step 1: Cut frame pieces
From the 1″ x 2″ x 6′ pieces cut the outer frame
- Cut (2) 20″
- Cut (2) 18.5″
From the 1/2″ x 2″ x 36″ craft wood cut the inner frame
- Cut (2) 18.5″
- Cut (2) 15.5″
Step 2: Cut hardboard panels (from the 4’x8′ piece)
- Cut (2) 16.5″ x 16.5″ squares
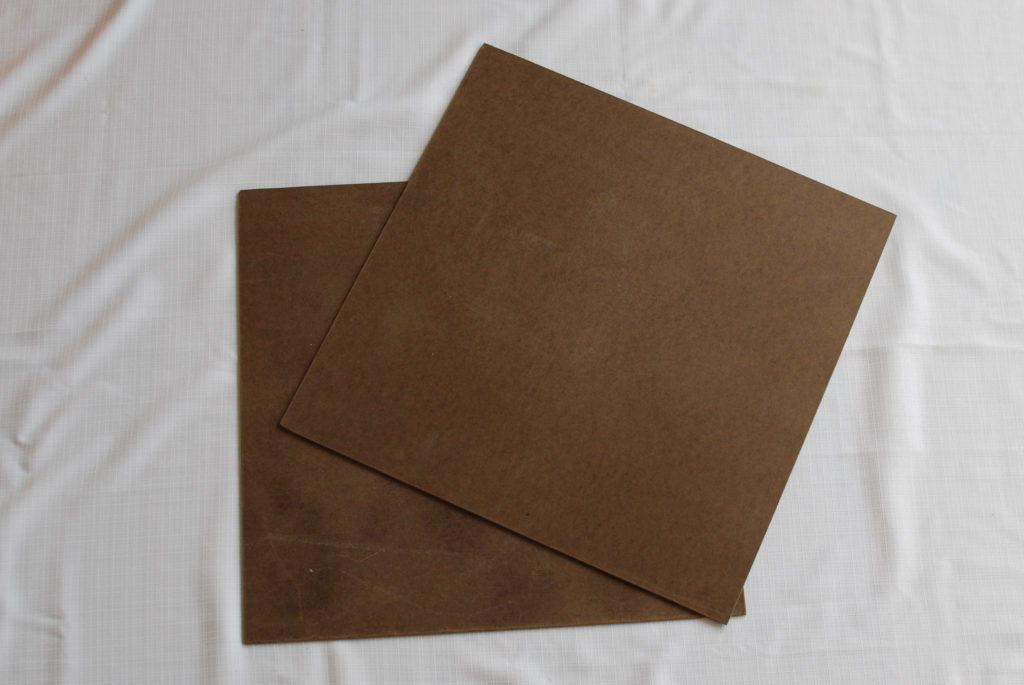
I used my table saw to cut my panels. If you do not have a table saw you can use a circular saw. Don’t have either? Ask an employee at the hardware store to cut it for you.
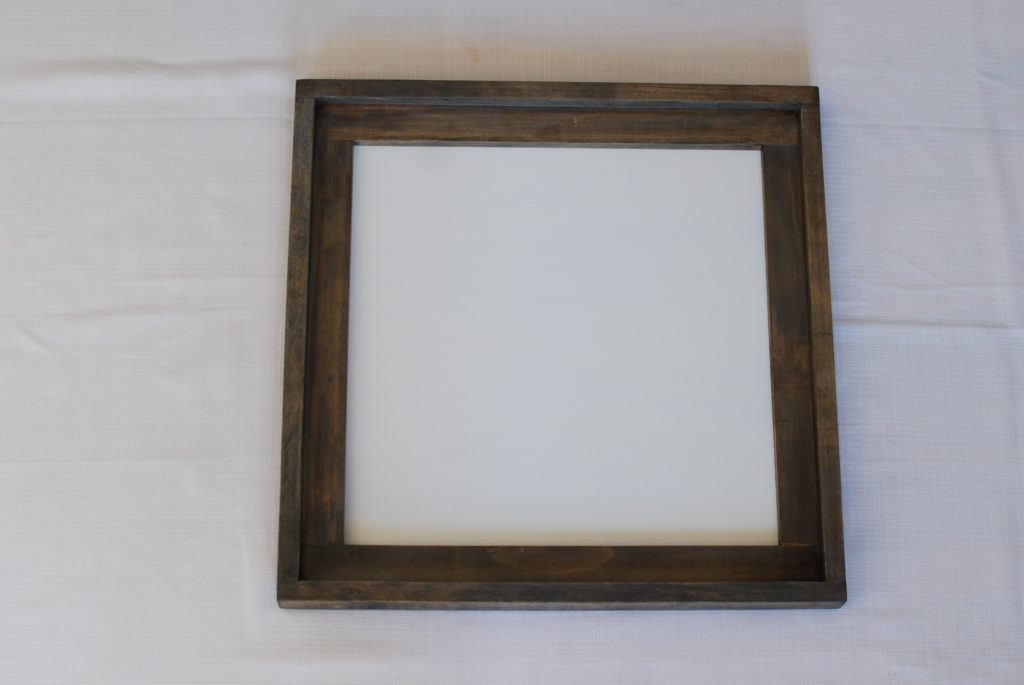
Step 3: Assemble frame
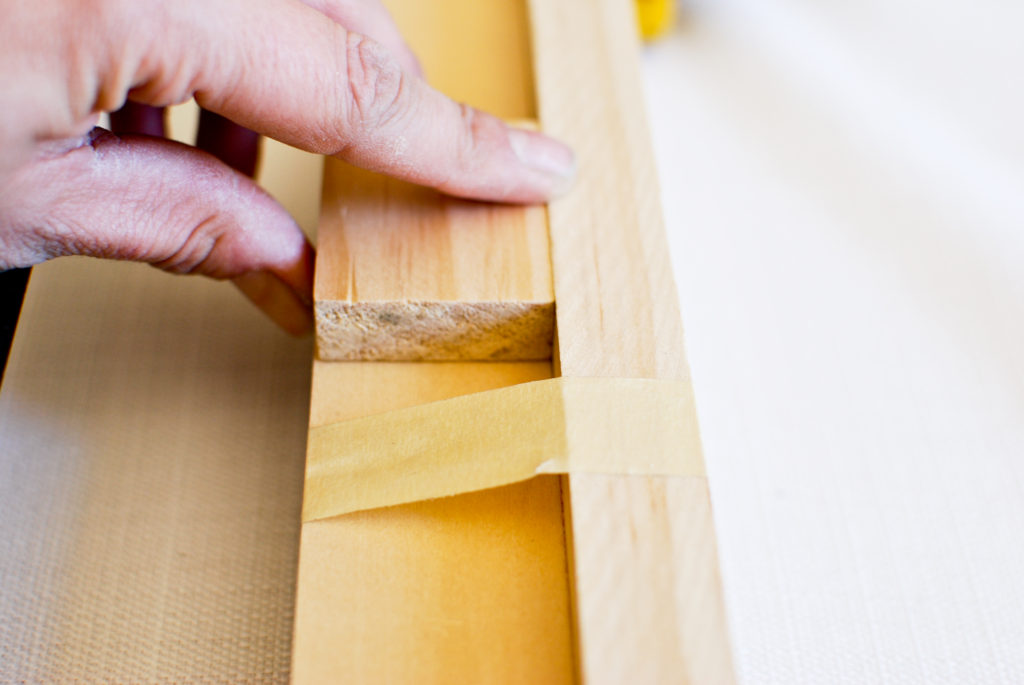
- Glue inner frame pieces together with wood glue. Use tape to hold in place while it dries. The pieces will lay “flat”
- Optional: You can secure with some finishing nails as well.
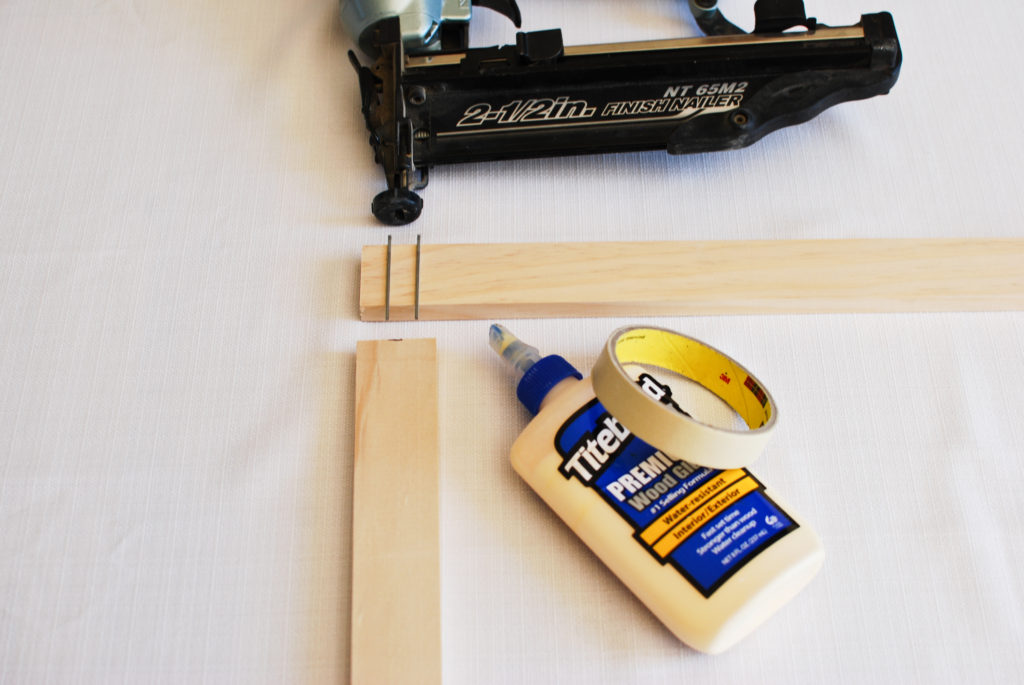
The above photo is showing where you would secure with nails if you decide to use them. (I did not nail my frame, but only used glue)
(The nails are laying on top of the piece just to give you a visual. If you nail your pieces together, they would go through the center of the top piece down into the bottom piece. Honestly, I would only recommend nailing if you have a nail gun. It would be difficult to use a hammer and accurately nail, while not splitting the wood. )
To prove how EASY and completely DOABLE this sign is look at the picture below…
That’s right, so easy a two year old in pink cowboy boots can do it! She really did help me place tape, while I glued on the outer frame pieces! Haha
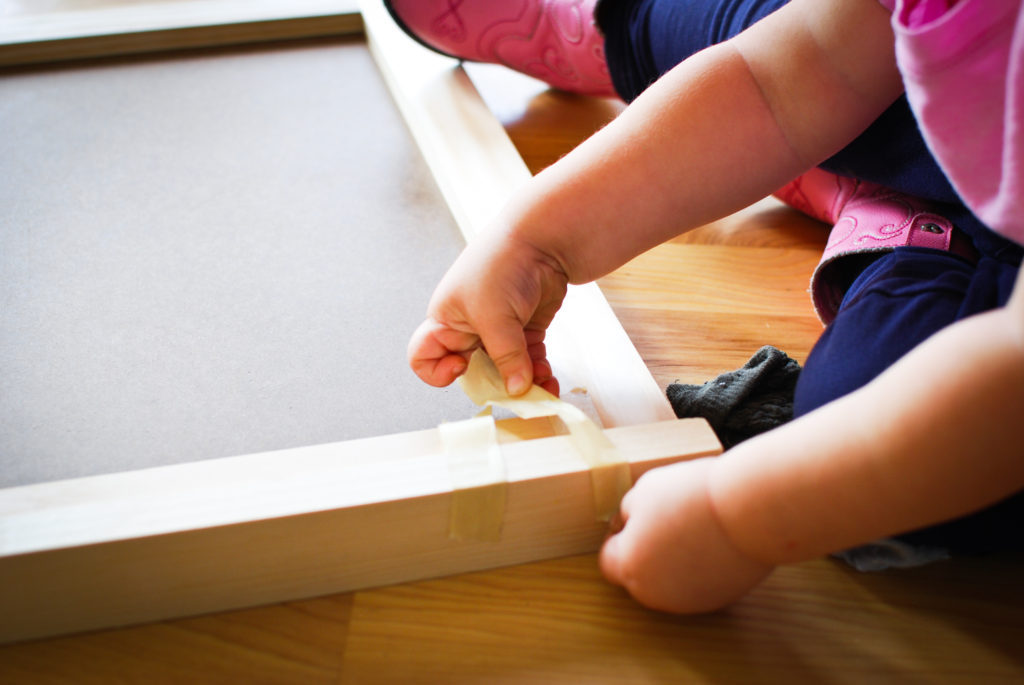
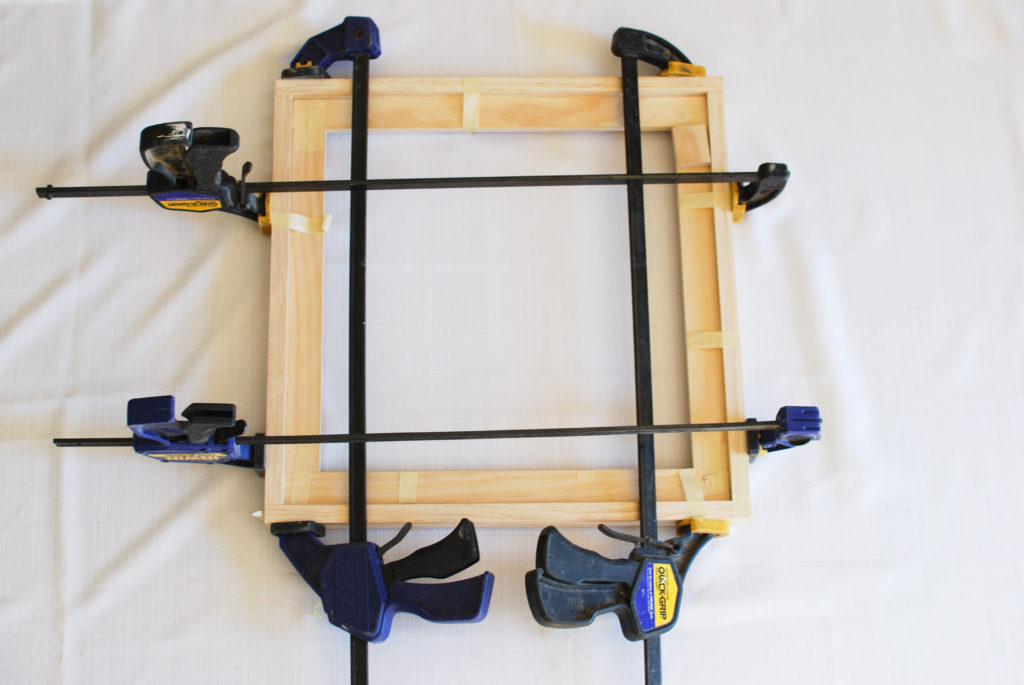
Glue outer frame pieces to inner frame. Outer frame pieces lay “upright”.
I used a small scrap of the 1/2″ craft stick as a spacer to know where to attach the outer pieces. The reason you do this is so there will be room on the backside of the frame for the hardboard panels to be displayed and stored.
If you have some clamps you can use them to hold the wood in place while it dries. Although, tape will work just fine too. I used 4 quick grip clamps.
It should look like this when you are done…
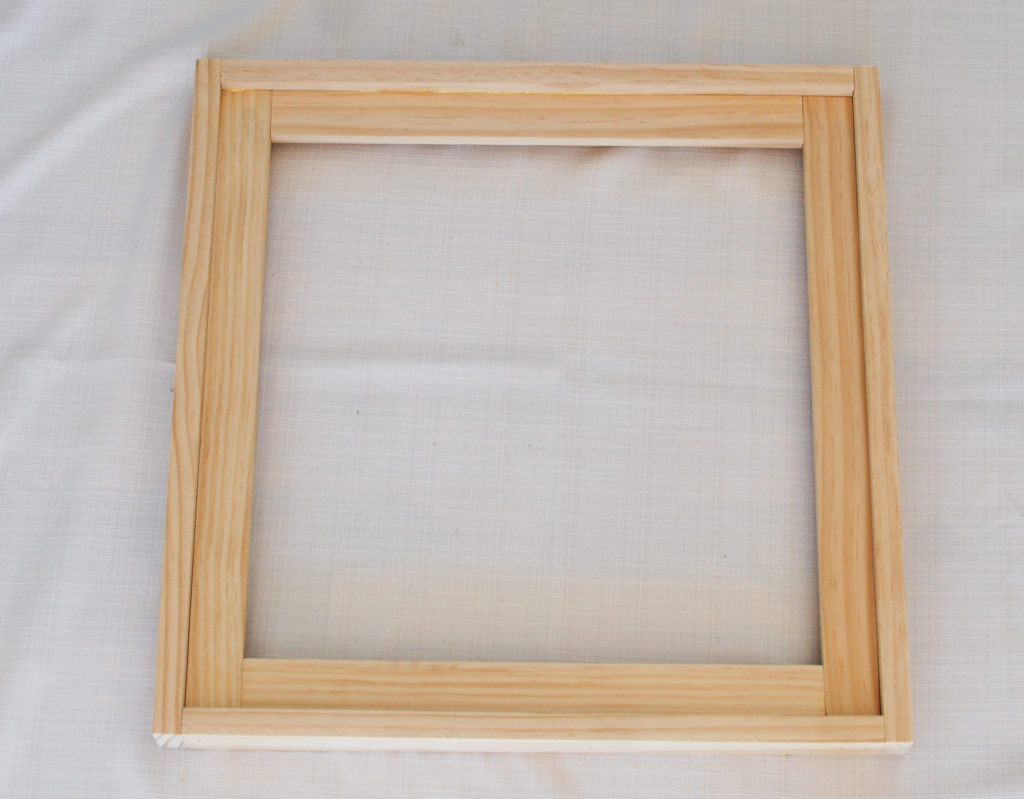
Give it a light sanding on the edges and corners, then it’s ready to stain.
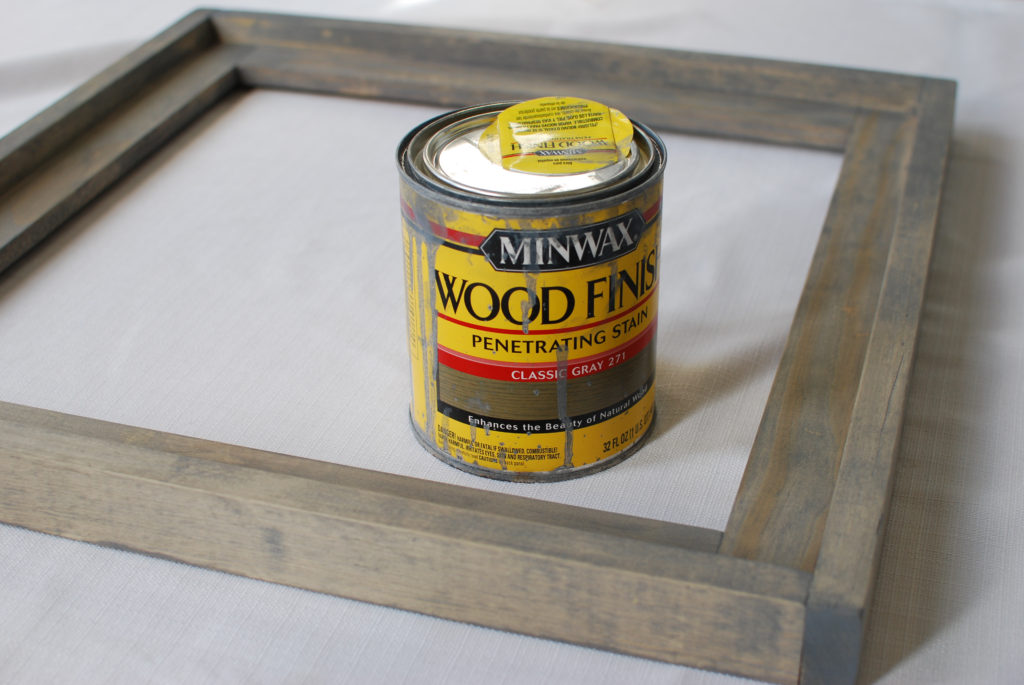
 Step 4: Stain frame
I used Minwax Classic Gray for the first coat and then when that was dried did a second coat of Minwax Dark Walnut.
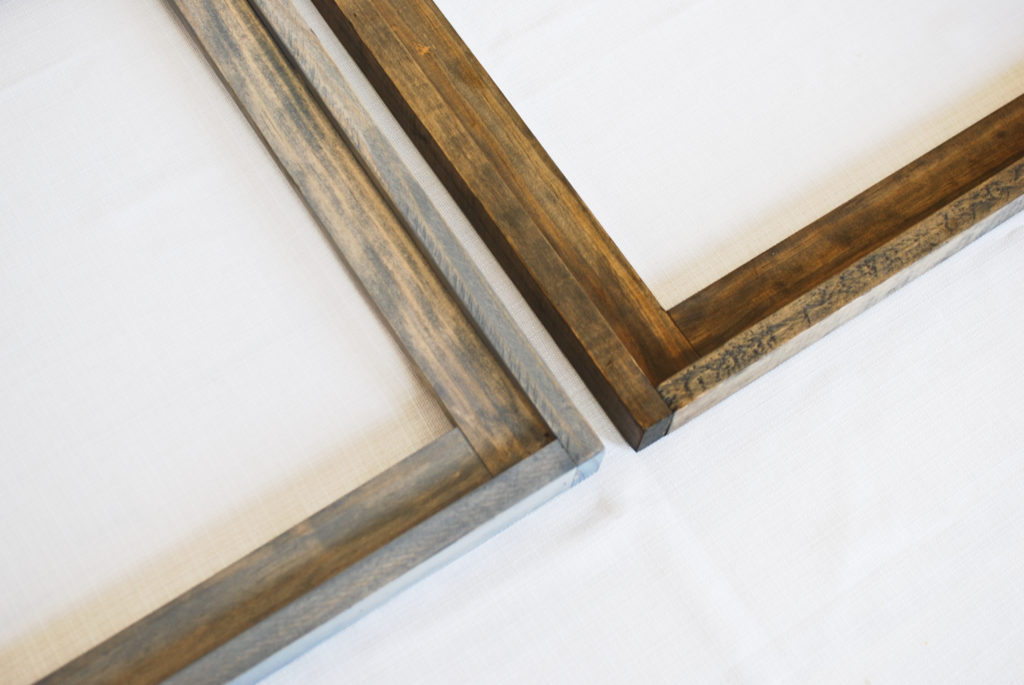
The frame on the left has one coat of Classic Gray and the right frame has classic gray with a second coat of Dark Walnut.
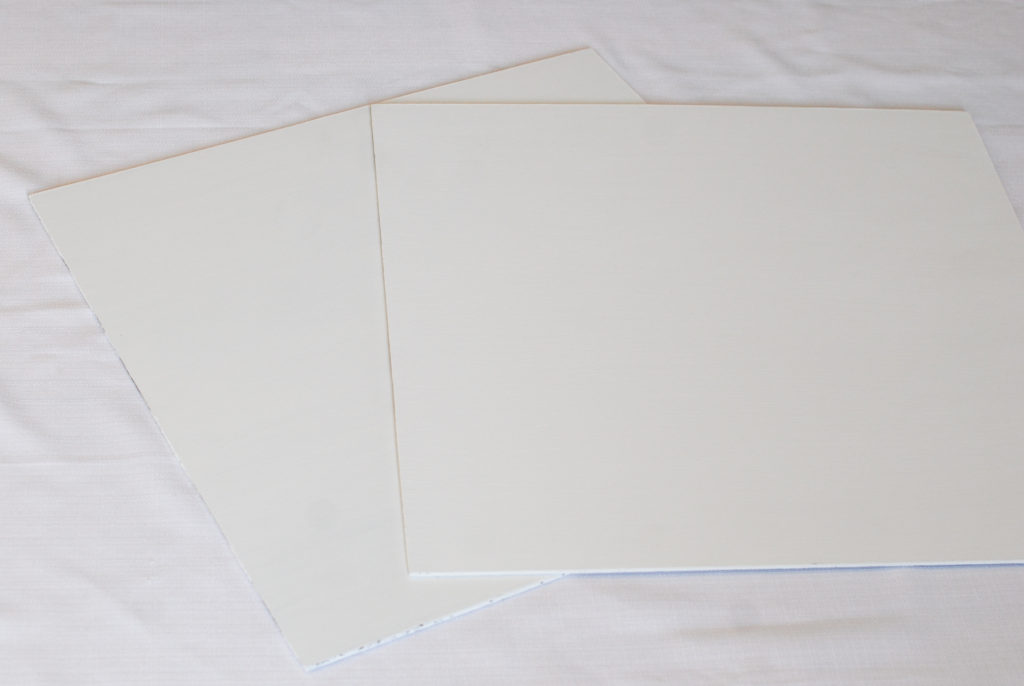
Step 5: Paint Panels
Paint the two square hardboard panels white, front and backside of each piece.
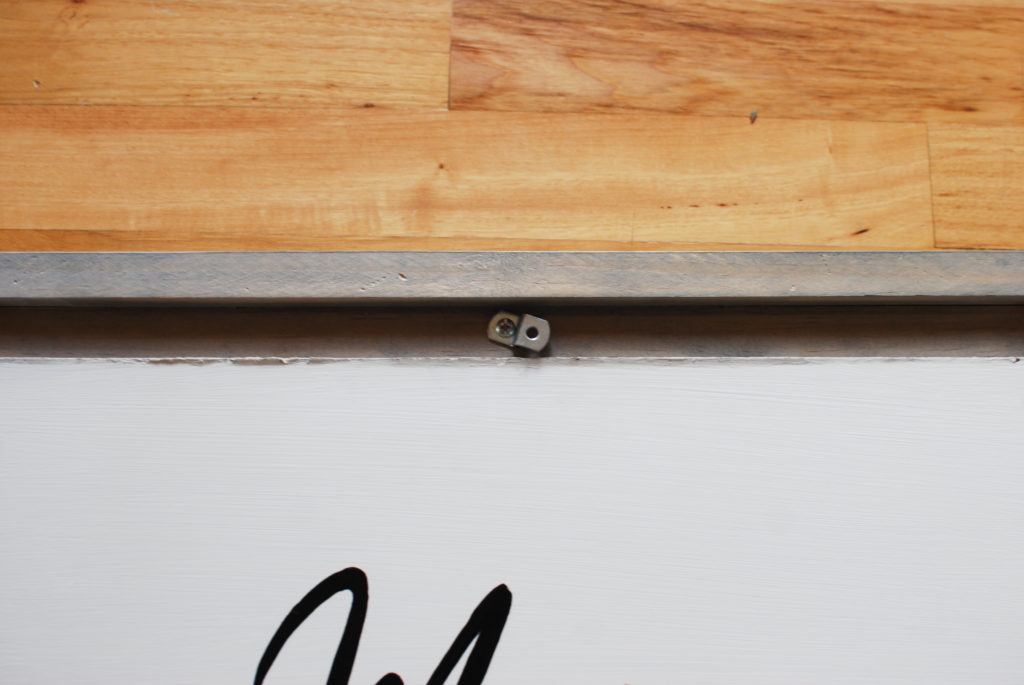
Step 6: Attach offset clips
On the back of the frame attach offset clips. I rested one of the hardboard panels on the back to figure out placing. Screw in two clips on the bottom and one on the top.
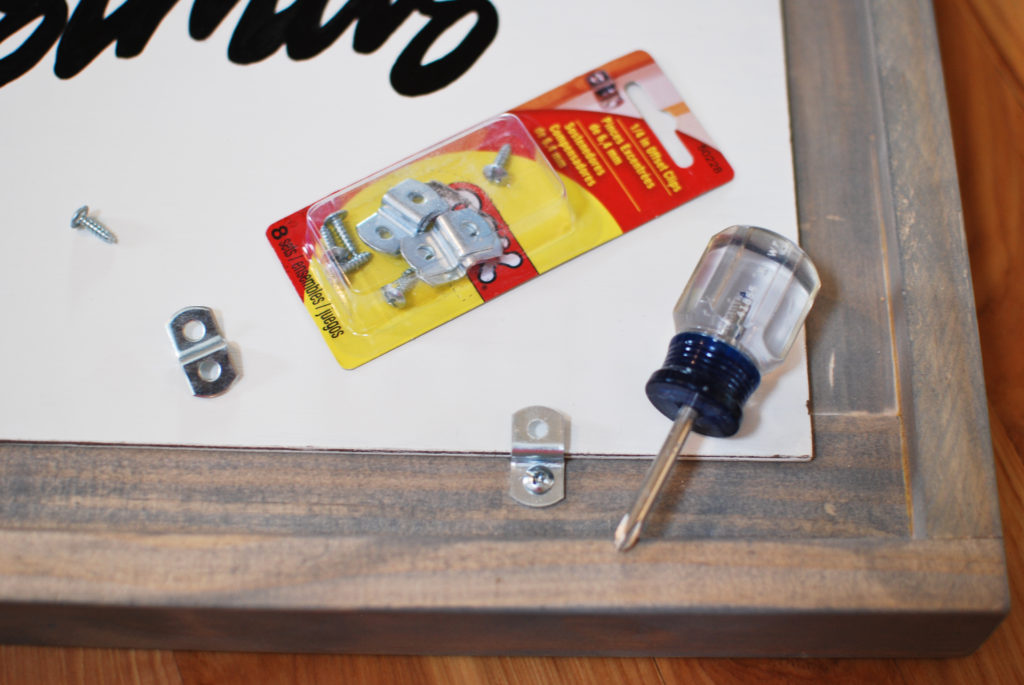
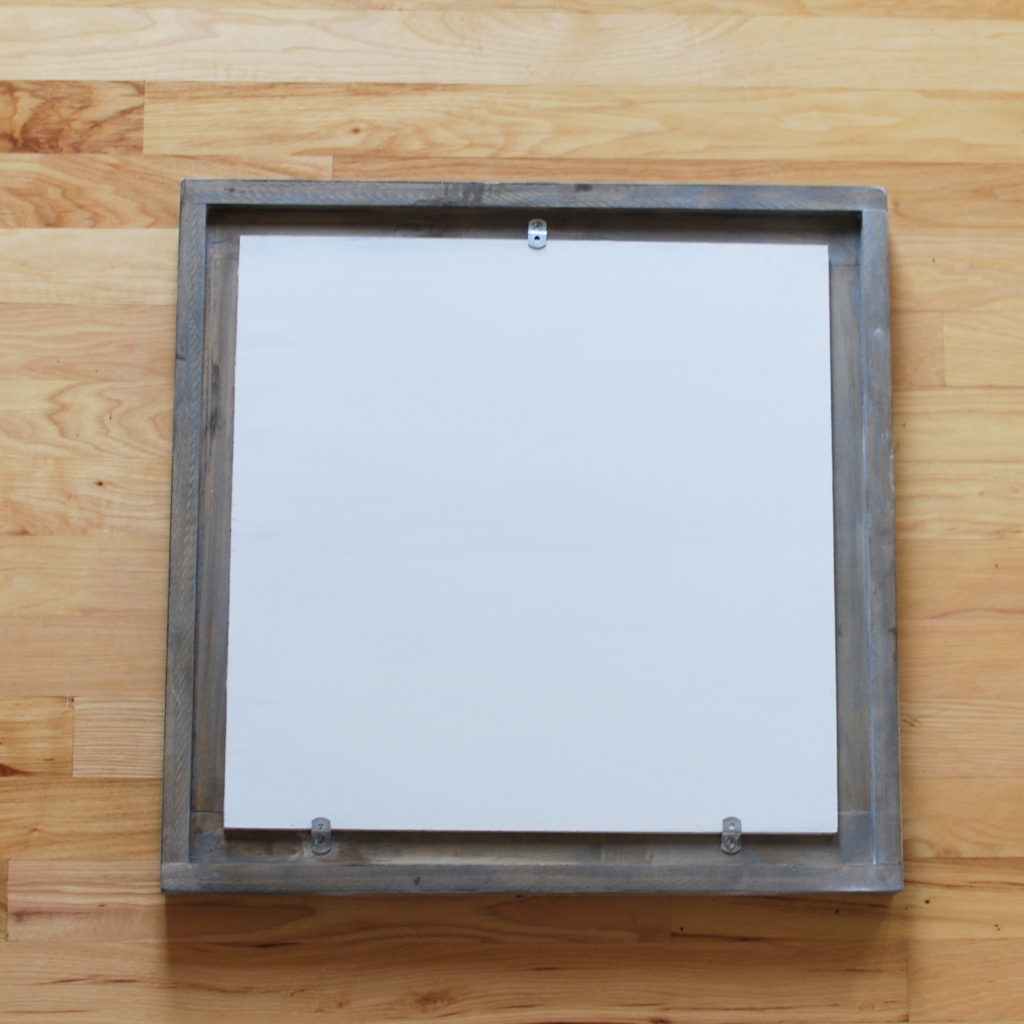
The hardboard panels will rest on the bottom clips. When you attach the top clip have it rest a little higher (to give it room to turn/swivel) when you are switching out panels.

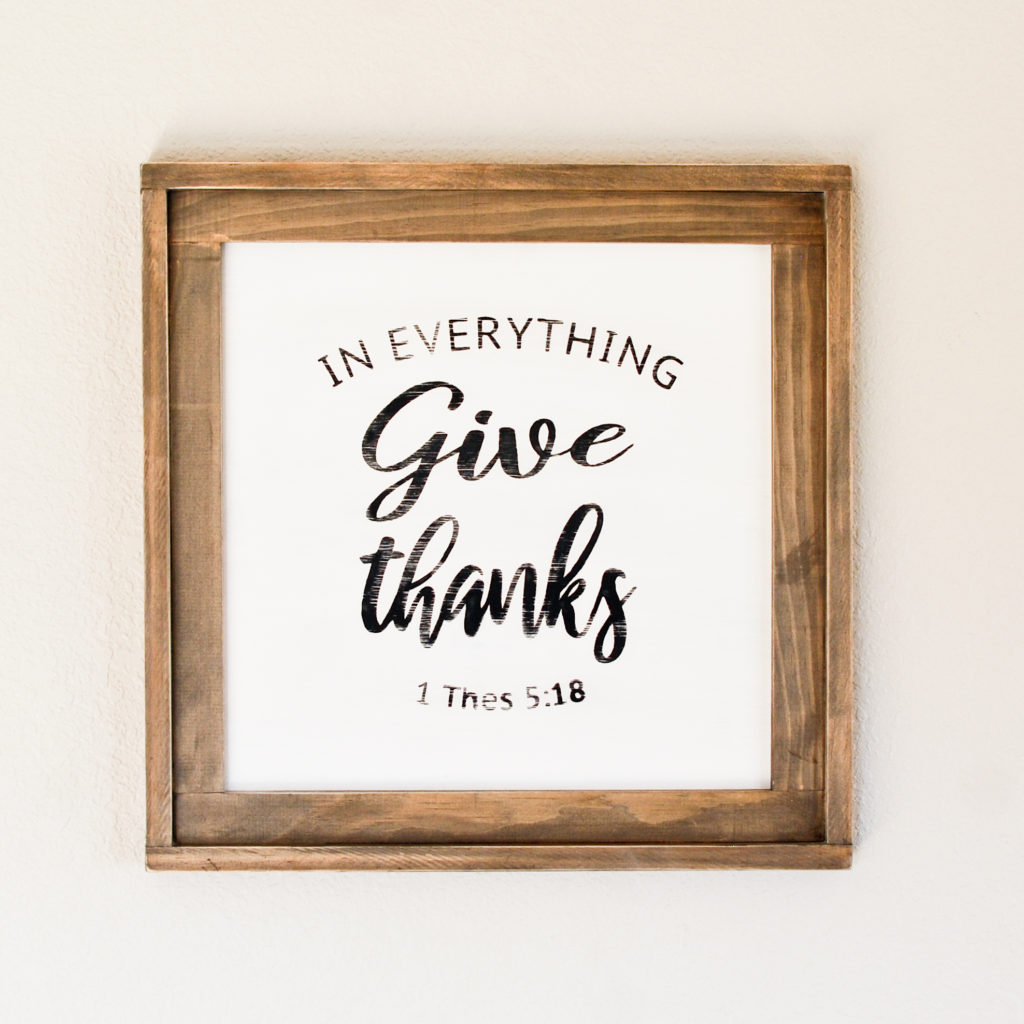
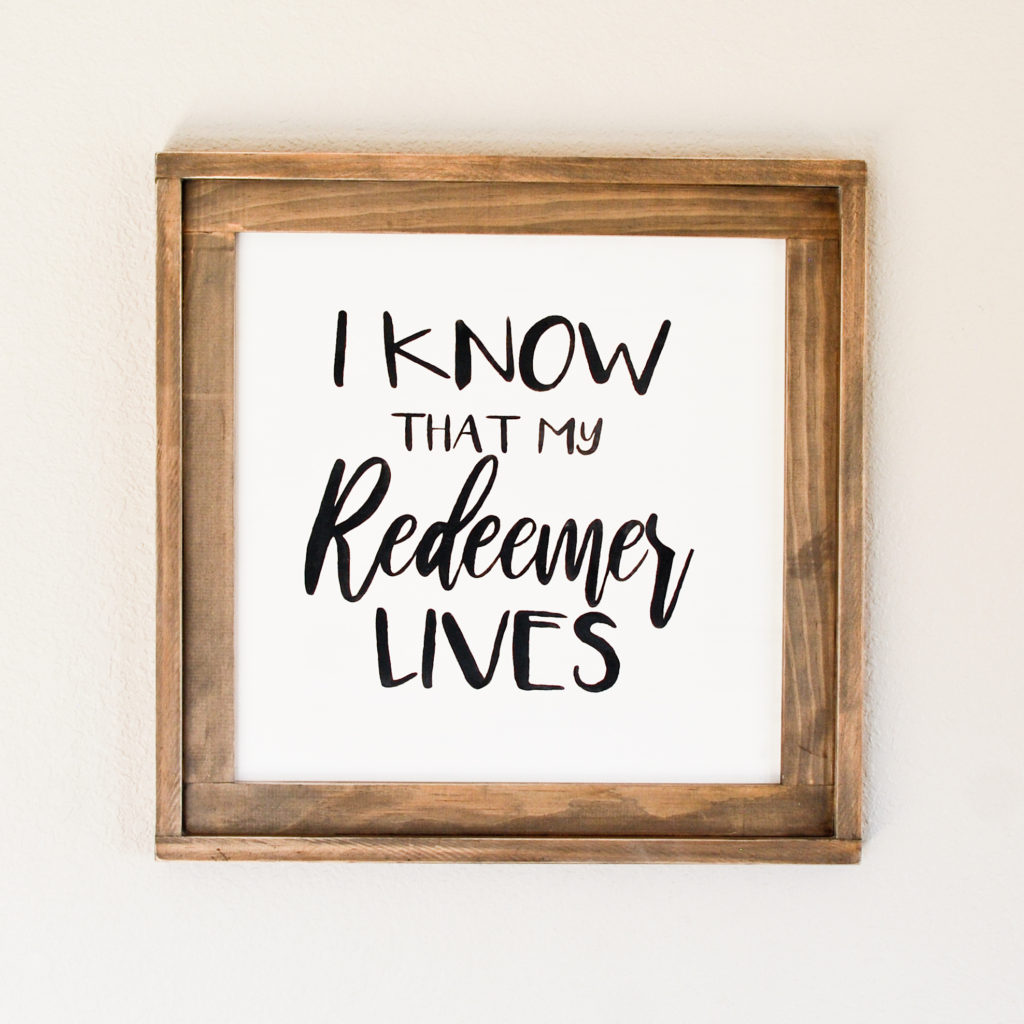
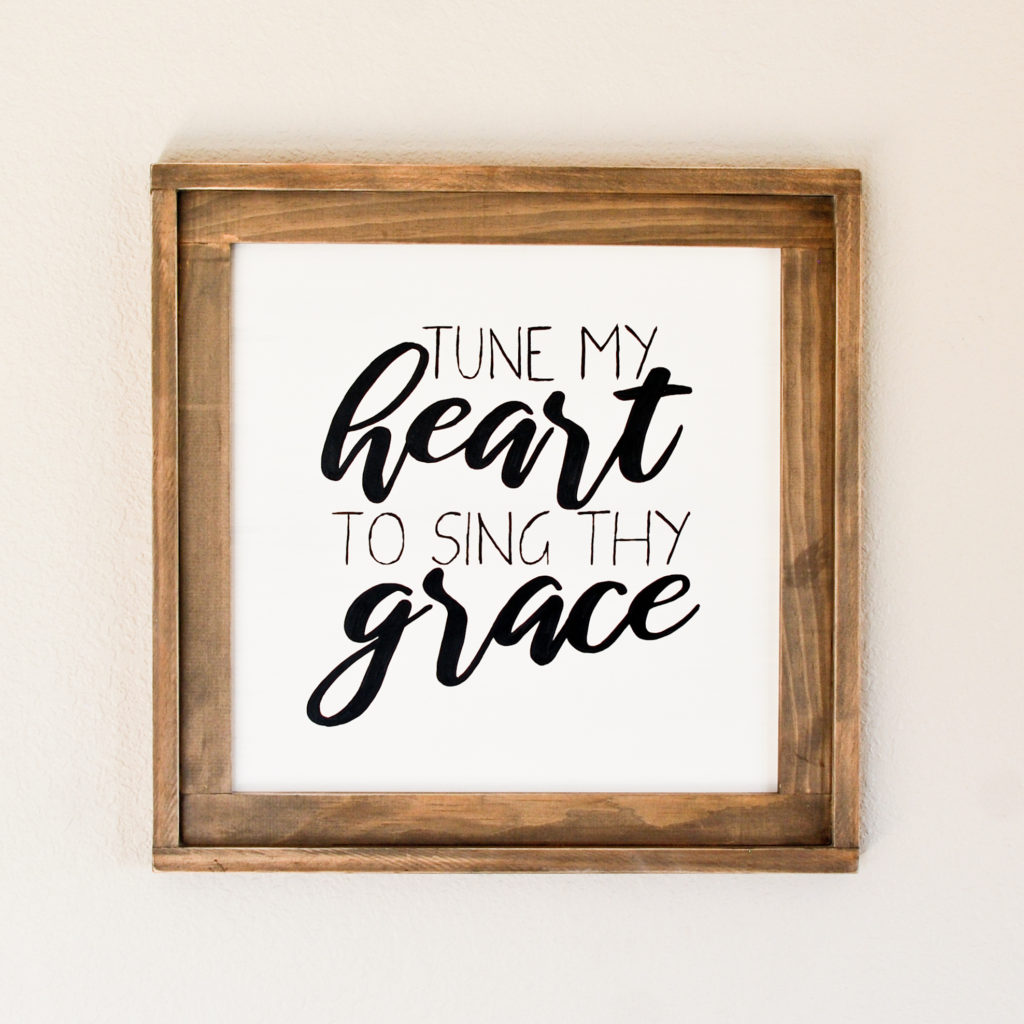
Step 7: Add words
I used my silhouette cameo to cut some stencils out to add my words to each panel. I like to cut my stencils out of contact paper, because it’s cheaper than vinyl and works just as good.
You will be doing front and back on the two hardboard panels, giving you 4 different sayings.
Contact Paper Stencil:
- Cut stencil out of contact paper using the cut files (links down below)
- Center the stencil on the hardboard
- Stick the stencil and smooth out any wrinkles
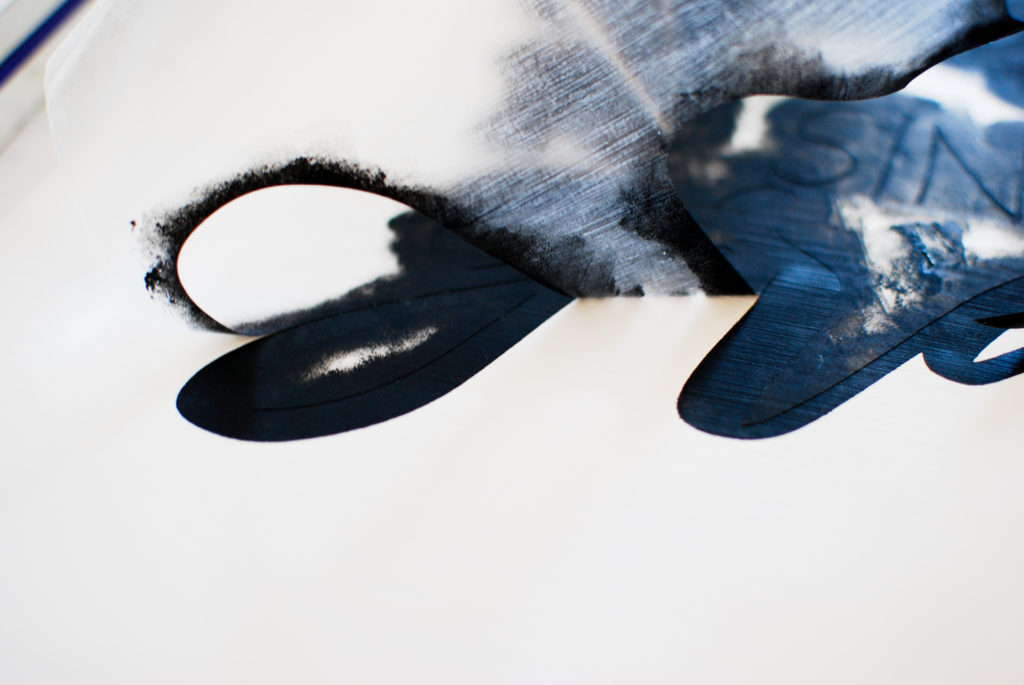
- Paint over the words with mod podge (optional). I do this to ensure I get crisp lines when I pull off the contact paper. Sometimes paint will bleed under. The mod podge just seals any edges.
- Paint the letters, using a makeup sponge. Dab the sponge in a little paint then gently dab the paint over the stencil. Less is more!
- Rip off contact paper
Cut Files for Simple DIY Wood Sign
Tune my Heart to Sing Thy Grace
Note: there will not be a preview of the file. Just hit the download button.

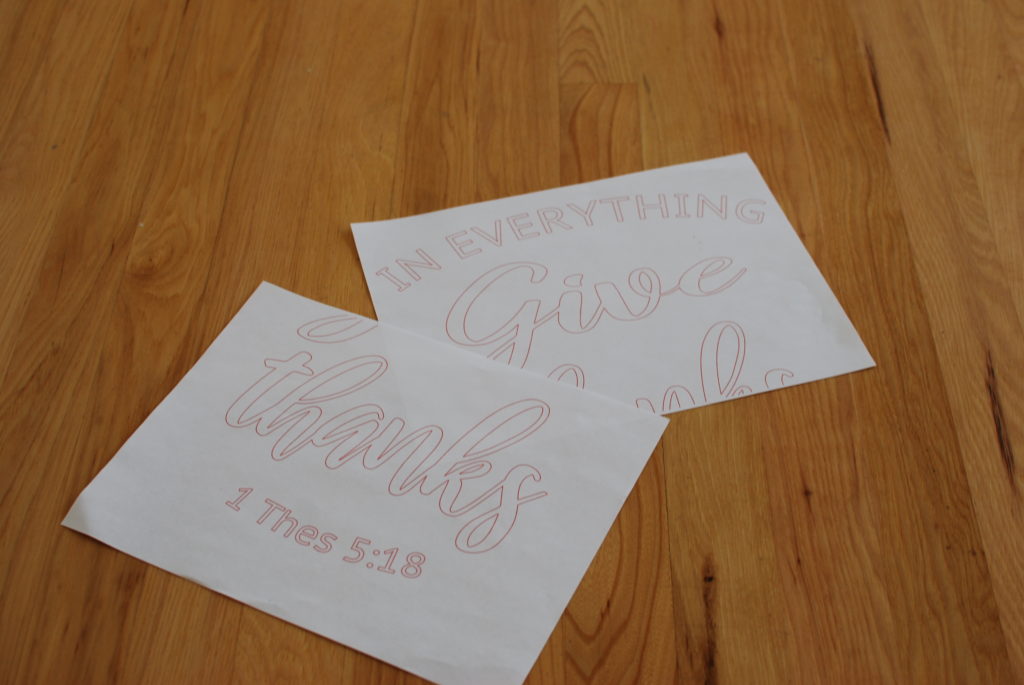
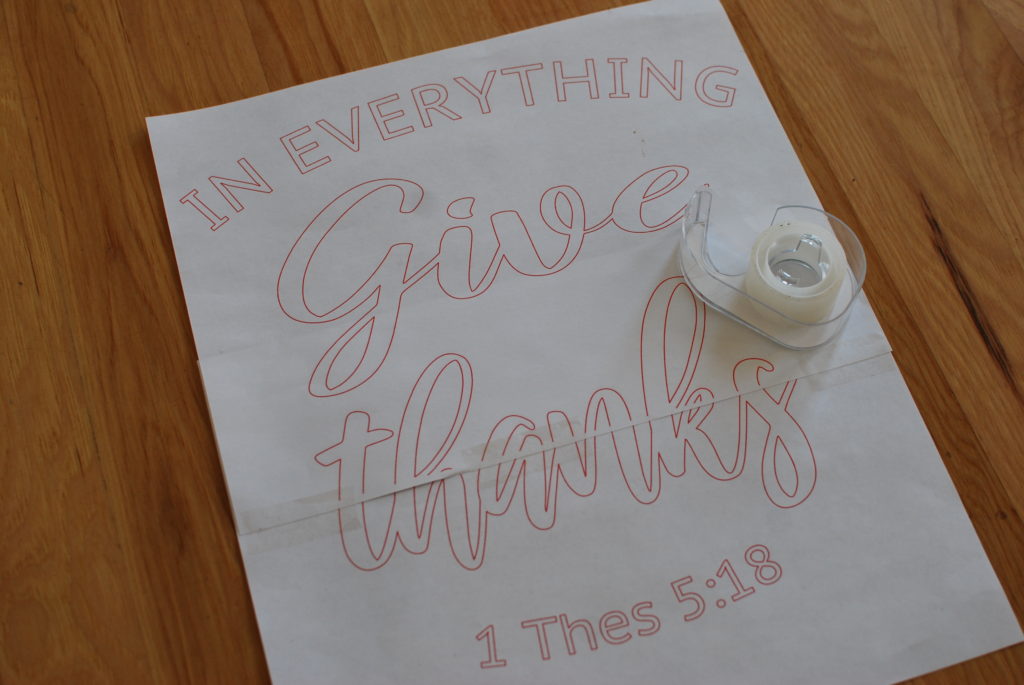
Okay, for those who do not have a stencil cutting machine…you can use this method for your wood sign:
- Print off pdf files. Each pdf is two 8.5″ x 11″ letter pages.
- Tape together pieces of paper so that the words are lined up.
- Center and tape to hardboard.
- Follow the instructions in the video.
Tip: If you use this technique you may need to trace the letter outlines on the backside of your paper print out before you trace over the top. The reason for this is that hardboard is…hard and you may not see the indention as well when you trace as you would on other wood surfaces.
Here is an example of what the pdf printouts will look like and then after I tape them together!
Some of you may have amazing handwriting and can just free hand whatever you want. I have terrible handwriting and can not write on a straight line, so this is not an option for me.
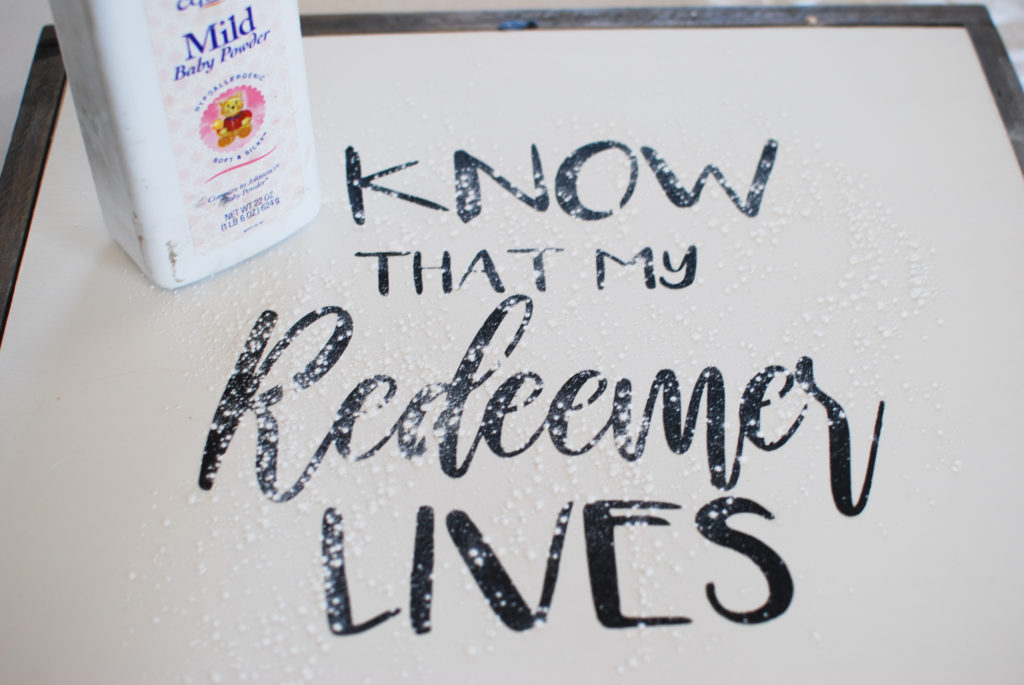
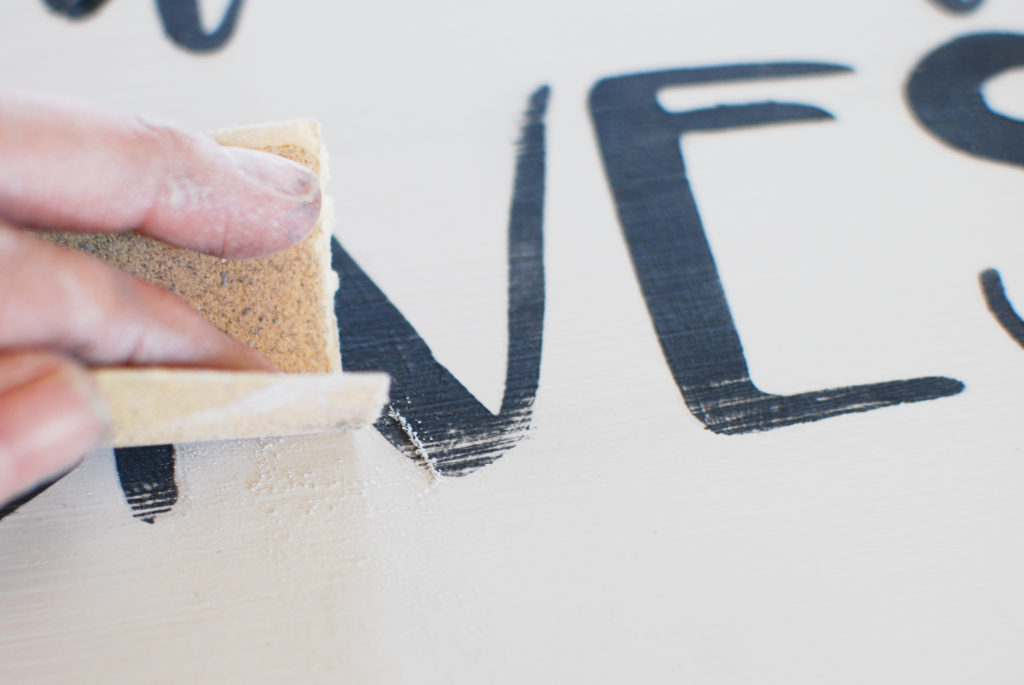
Want to distress the lettering?
If you want to give your words a distressed look you can give them a light sanding. One problem I have encountered when I have sanded my words, is black paint dust getting everywhere. Sometimes it has been hard to get off the white background. Couple options to try:
- Sprinkle baby power on sign. Rub it in. Then sand the words. Then brush it all off. The baby powder fills the crevices/brushstrokes so that the black dust does not rubbed in.
- Use air compressor with a blower attachment on it while you sand the words.
Finished!
Okay that’s it! Now you can place your two panels into the back of your frame, swivel the top clip down, to hold them in place, then give yourself a pat on the back! Done!

A couple suggestions, but not necessary
- Clear coat of some kind of the panels. I only suggest this because there are two pieces being stored together and they may rub against each other.
- I placed a piece of scrap felt between the front panel and the back panel to prevent any scratching. Any scrap fabric would work.
 I hope you have enjoyed this tutorial! I will be posting a tutorial on an alternative frame option in the future.
Have a great day!
Emily
Thank you for this! I’ve been wanting to make my own signs but every tutorial I’ve read says I need to nail it all together (for which I have no tools or skills). I can, however, glue things! Thanks for giving me the confidence to do it this way! Beautiful project!
You are so welcome! Wood glue is incredibly strong and for something that hangs on the wall is more than adequate! Good luck!
How did you attach the frame to the wall?
I attached a saw tooth picture hanger. You can find them at any hardware store. Although you could probably just hang it on the frame if you needed to.
If the hardboard is 1/4 inch thick, how do you fit both panels in the 1/4 inch offset clips? Wouldn’t there only be enough space for the panel being displayed? Or am I looking at this wrong?
Great question! The hardboard I use is less than 1/4″ thick which allows for 2 pieces to fit with the clip. I think the thickness is .112″ I have a link to the exact hardboard I use in the supply list of the post. Does that answer your question okay?
Yes, thank you! Most hardboard I’ve seen in my area is 1/4” so I didn’t realize it came in thinner sheets 🙂
Thank you so much for sharing! We have loved this fun project and it was the perfect decor for our home office. We’ve worked so hard to get it up and running. We even resurfaced the wood floor, but your decor has honestly helped me feel like I added a personal touch that is still beautiful and valuable. Thanks again.