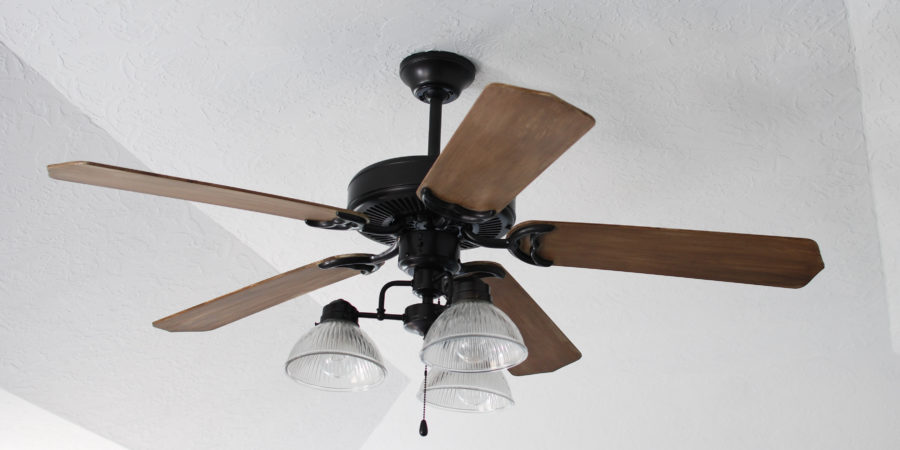
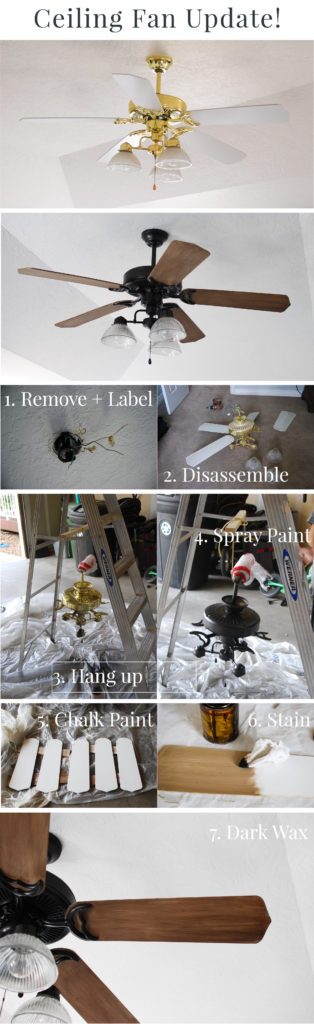
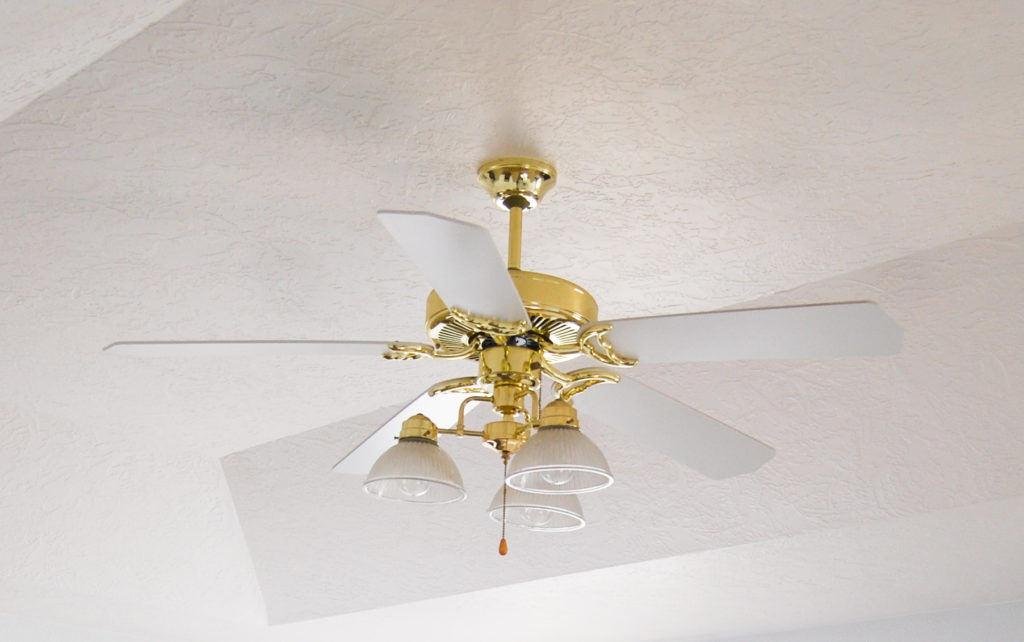
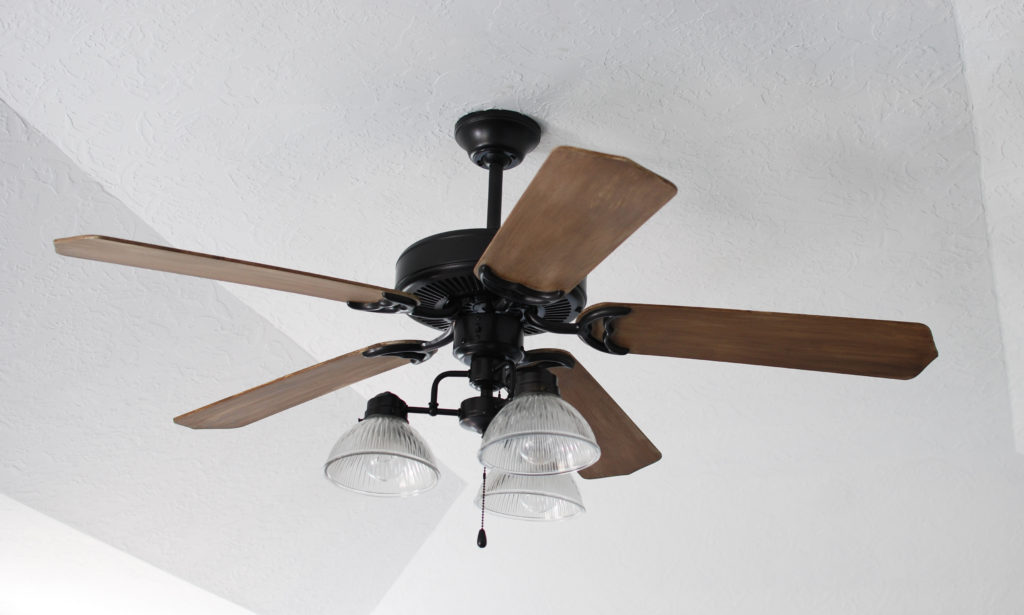
I have finally updated our master bedroom ceiling fan! Woo-hoo! It feels so nice to say goodbye to the builder grade brass! This has been a project on my list for a long time and I am so happy to finally check it off. With all the other bedroom updates I could not leave the outdated light fixture.
If you missed part 1 you can check it out here: Master Bedroom Update Part 1
It was not in my budget to get a new light fixture and fan, so I chose to update the existing one! This is an easy project! Don’t wait years, like I did before doing this!
I am going to share how I transformed my ceiling fan, so you can do yours!
Materials/Supplies:
- Spray Paint- Rustoleum Oil Rubbed Bronze Paint and Primer
- Chalk Paint- Annie Sloan Chalk Paint Pure White
- Wood Stain- Minwax Dark Walnut
- Dark Wax
Steps:
1. Remove fixture: It’s important to follow all safety measures when removing an electrical fixture. There are lots of good tutorials and resources online that will walk through the appropriate steps. I am not a certified electrician, but I have switched out several fixtures on my own, so do not be intimidated! Here are some simple instructions to use as a guideline: here
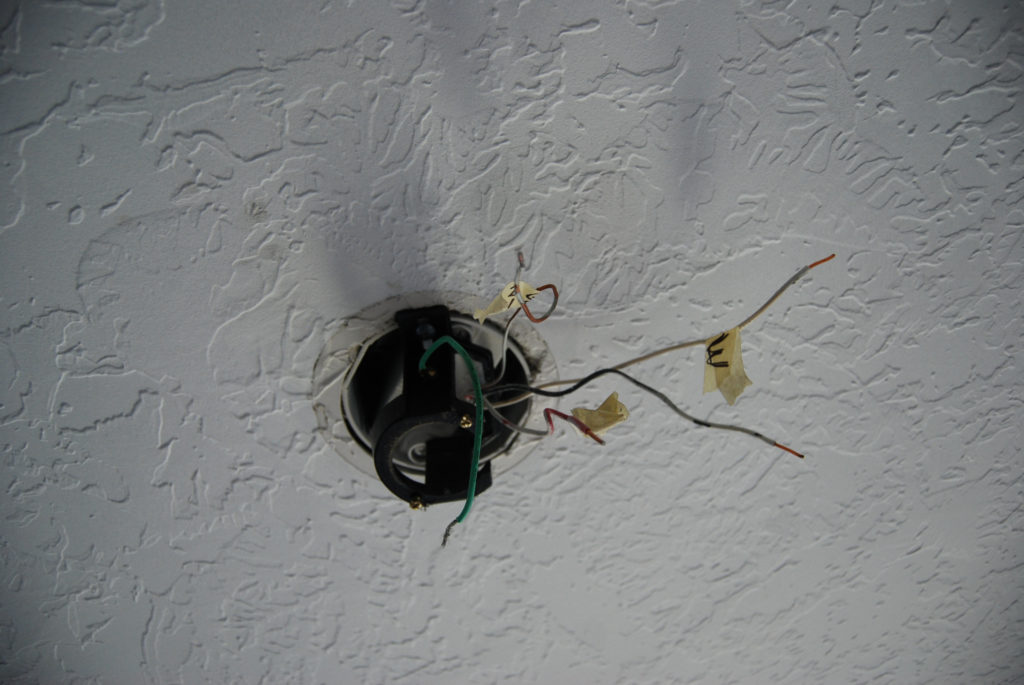
I like to label my wires with masking tape just to be sure I reconnect the wires correctly.
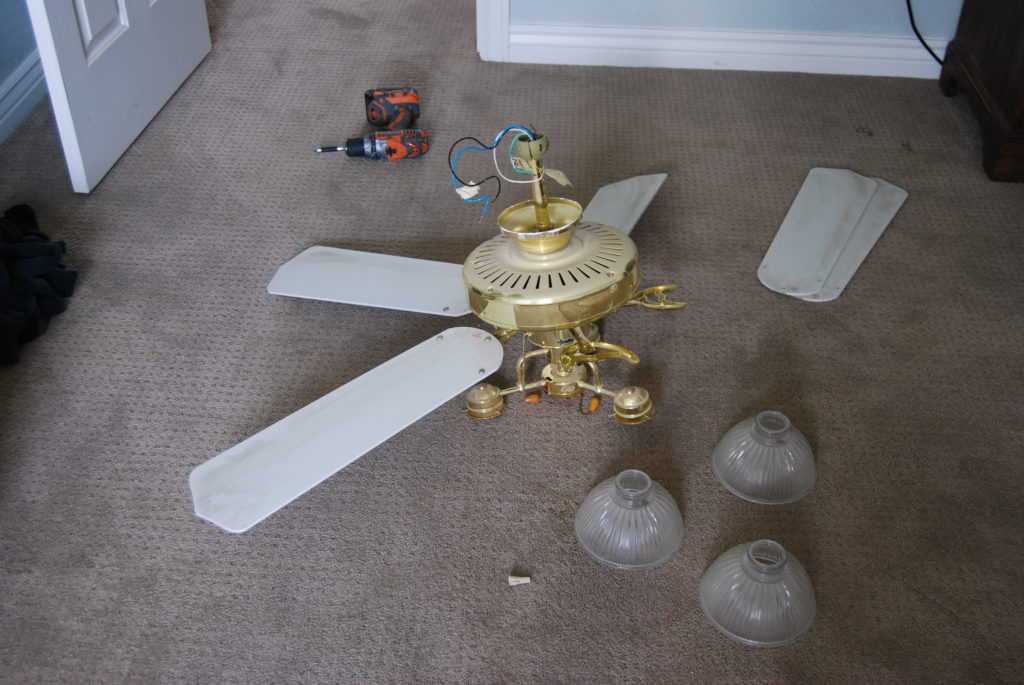
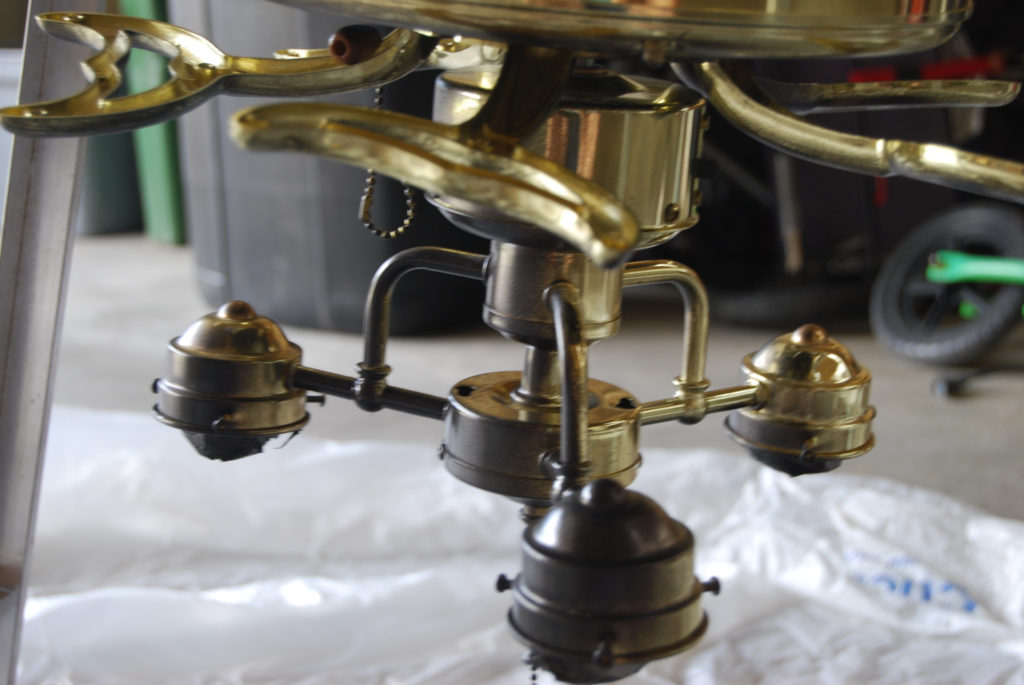
2. Remove fan blades and globes: Once you have the blades and globes removed, wipe them down to remove dust. Mine were disgusting!
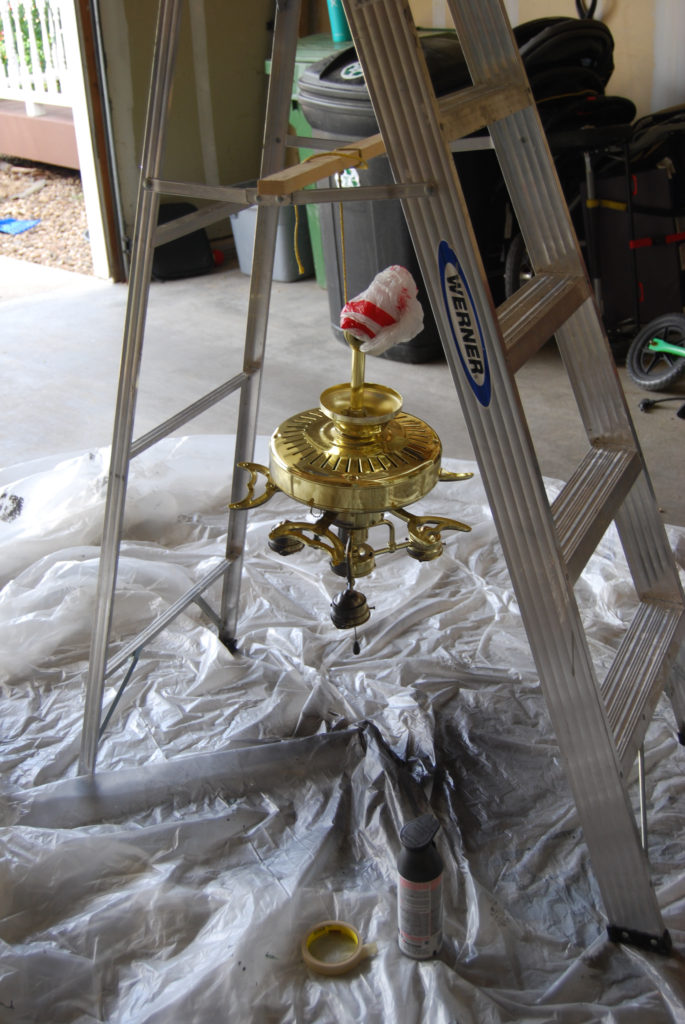
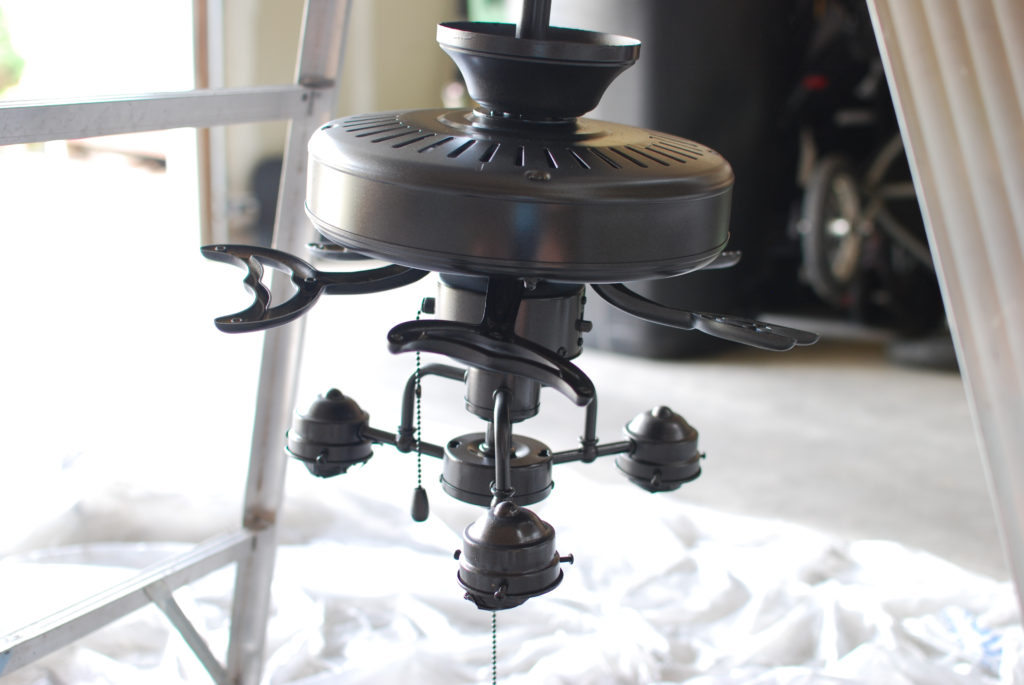
3. Spray paint fan: I wrapped the fan wires in a grocery bag and then tied a rope around the fan to hang from a ladder. With the fan hanging I could make sure I got everything covered.
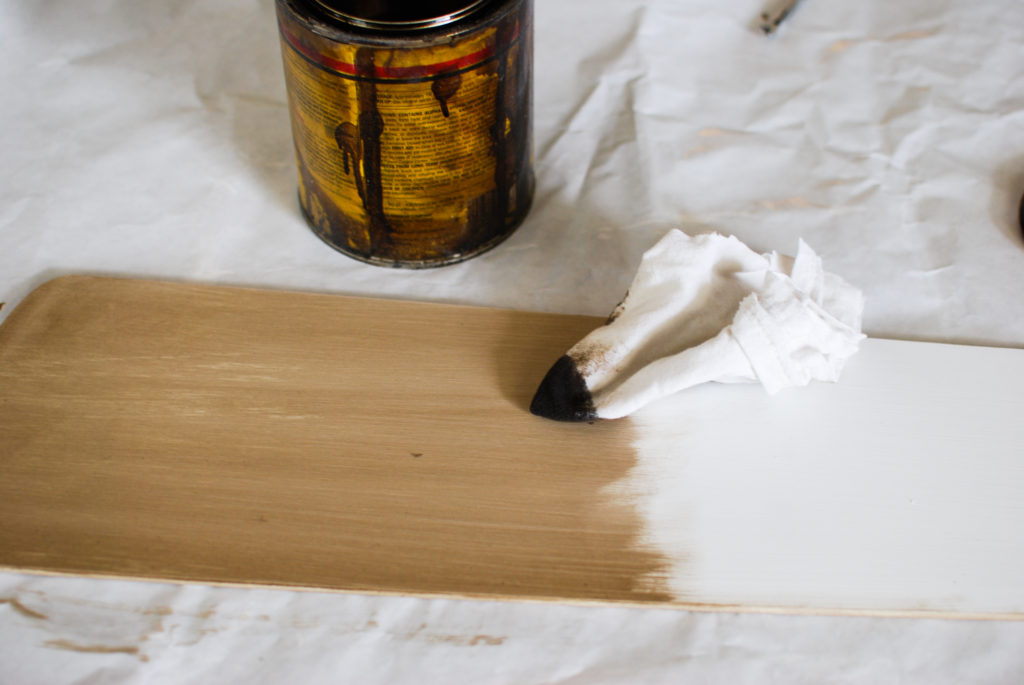
4. Paint fan blades: Paint both sides of each ceiling blade with Annie Sloan Chalk Paint in Pure White.
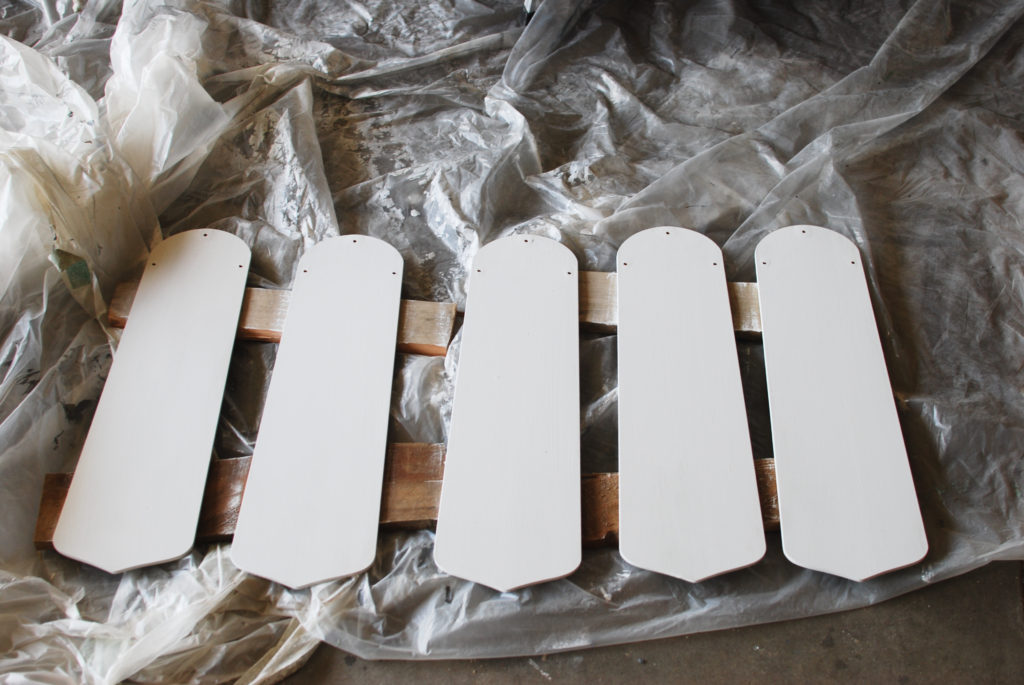
5. Stain fan blades: Applying stain over chalk paint creates a neat effect, almost wood like.
It’s the middle of summer here, so I had to get the fan back up the same day I took it down!
Tip: A little trick I use when I am rushed on a paint or stain project is to apply baby powder to the surface. It speeds up the dry time a little and helps with the surface being “tacky”.
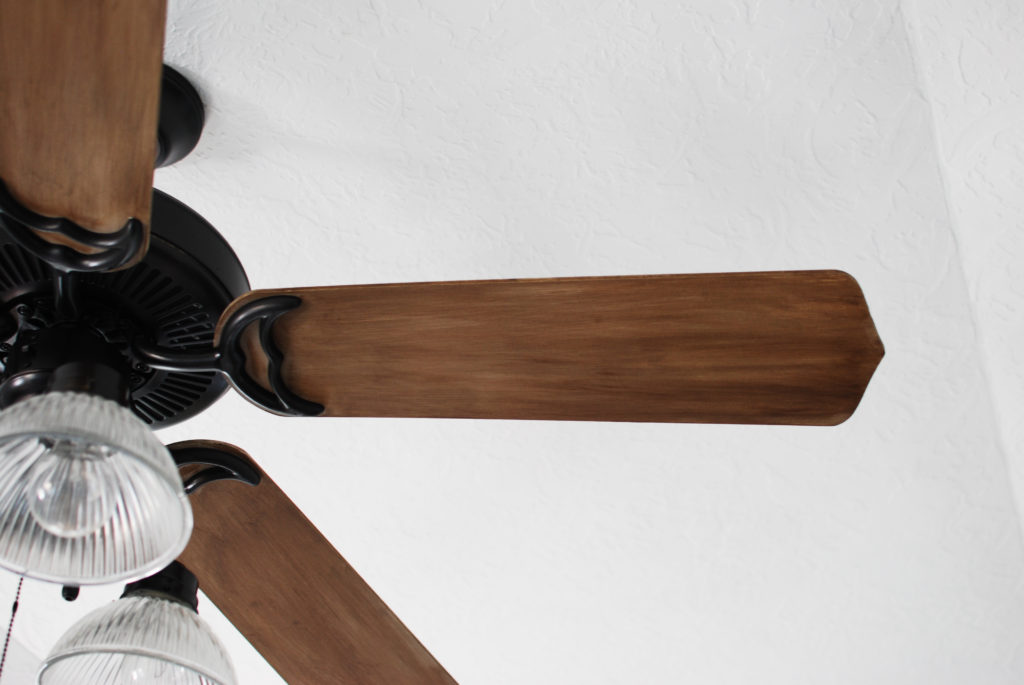
6. Apply dark wax: The next day, I applied some dark wax to each blade to provide a little bit of shine and protection. If I did this project any other time, I would have probably used a polycrylic to clear coat each blade.
Now its time to just sit back and enjoy how a little effort can make a BIG difference!
Have a great day!
Emily
Comments are closed.