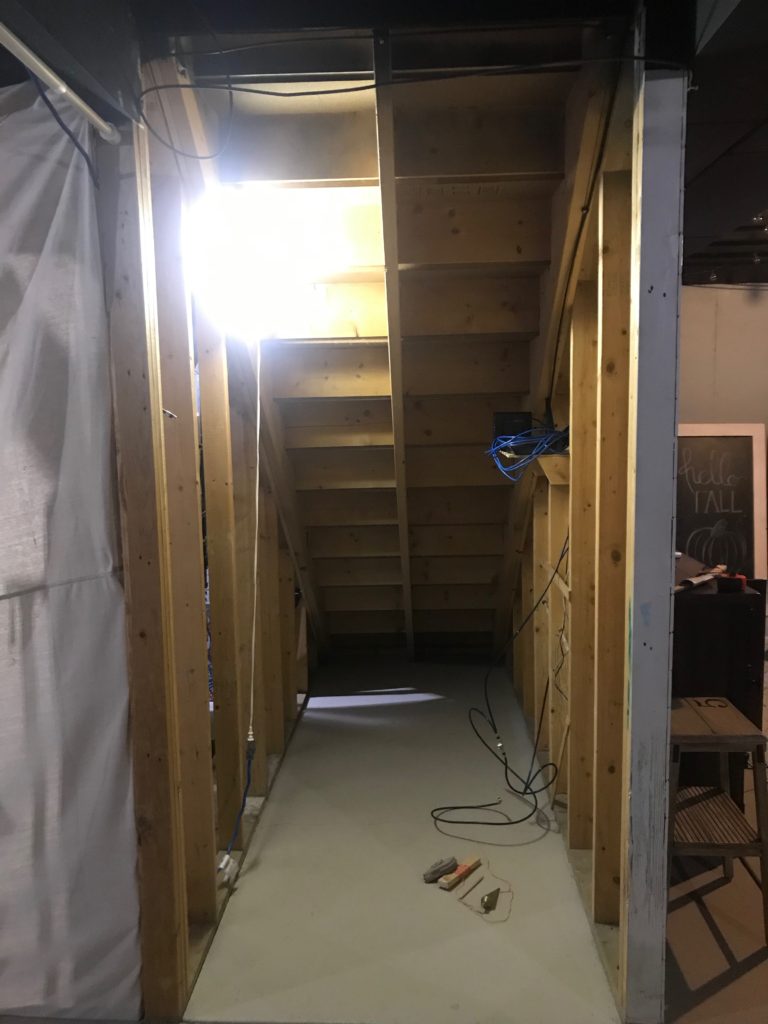
I have wanted to build an under the stairs playhouse for the kiddos for quite some time and finally pulled the trigger on starting it. Because the space in unfinished, our kids could access the furnace and water heater area, which I wasn’t crazy about. Deciding that I needed to block off access to that space, ultimately led to creating the under the stairs playhouse.
This project has been fun and provided lots of opportunity to try out new things and grow my skills. I did not follow a plan or even have a plan at the start. A lot of just winging it, which means this post is going to be less of a tutorial and more of just sharing glimpse of the process. Let’s take a look at the beginning!
Goals for Under the Stairs Playhouse
- Block access to furnace and water heater
- Create a fun useable space the kids can play in
- Try to use scrap material and supplies I already have!
- Build in such a way that it could be later converted into storage closet
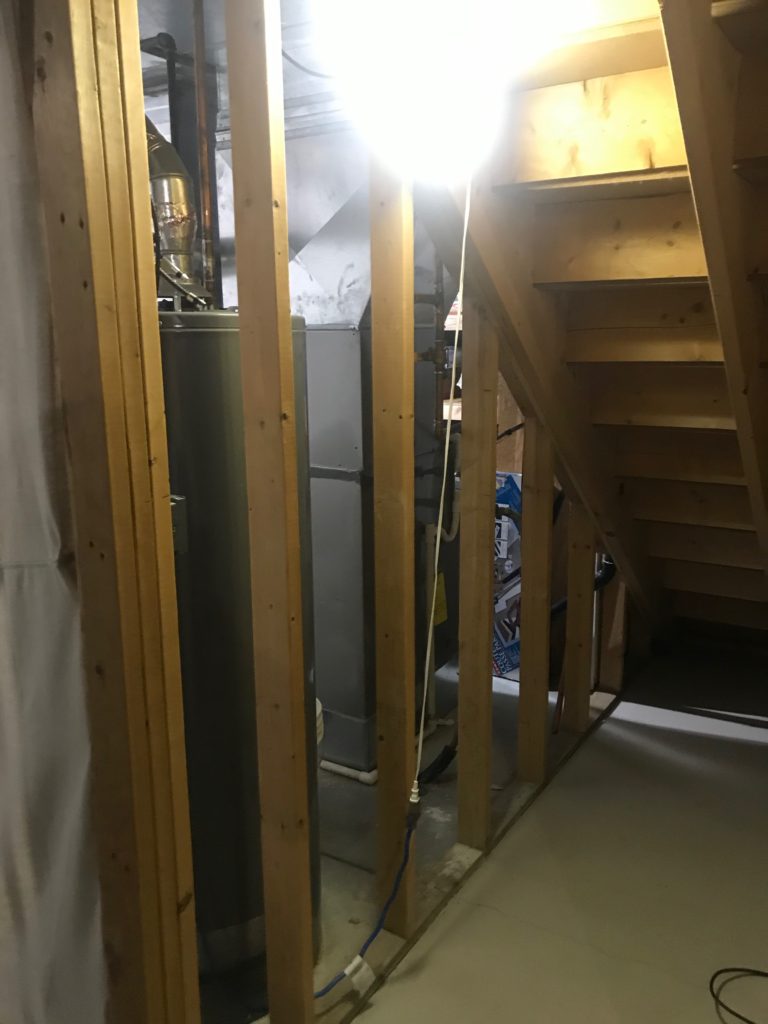
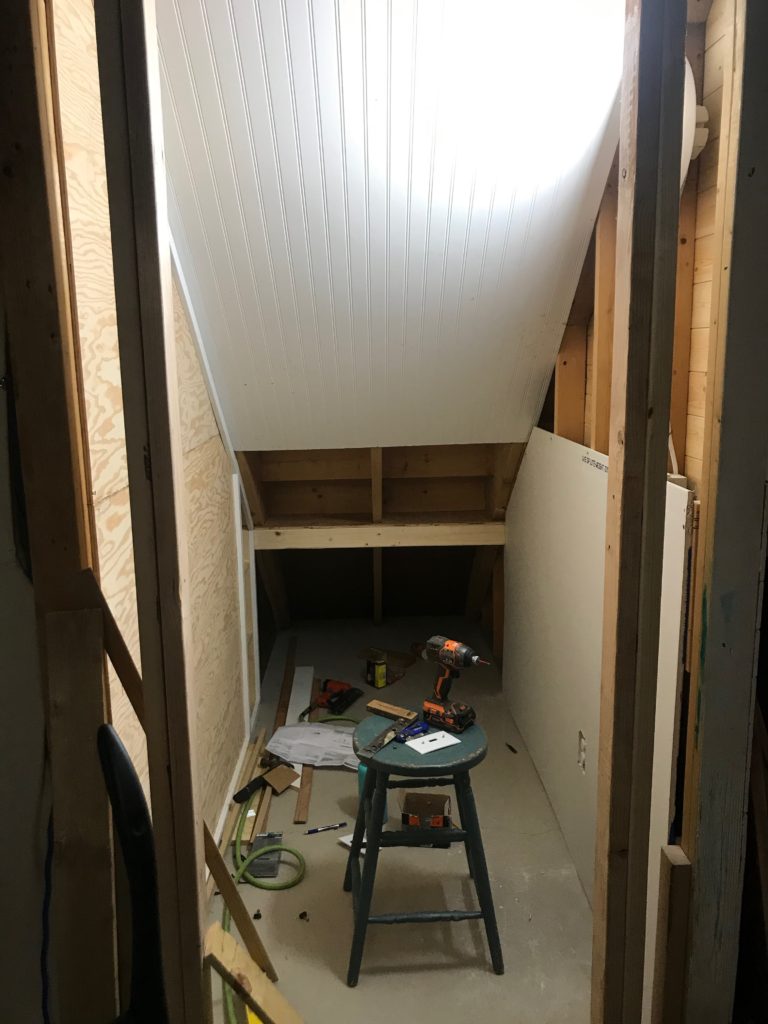
The above picture shows our furnace and water heater area, which is what I wanted to block access to. I attached plywood to the existing studs on this wall, knowing I would add some trim work to hide the seams between pieces.
Other steps
- Had electrician friend add this light and switch (so glad we did this!)
- Installed leftover beadboard paneling for the “ceiling”
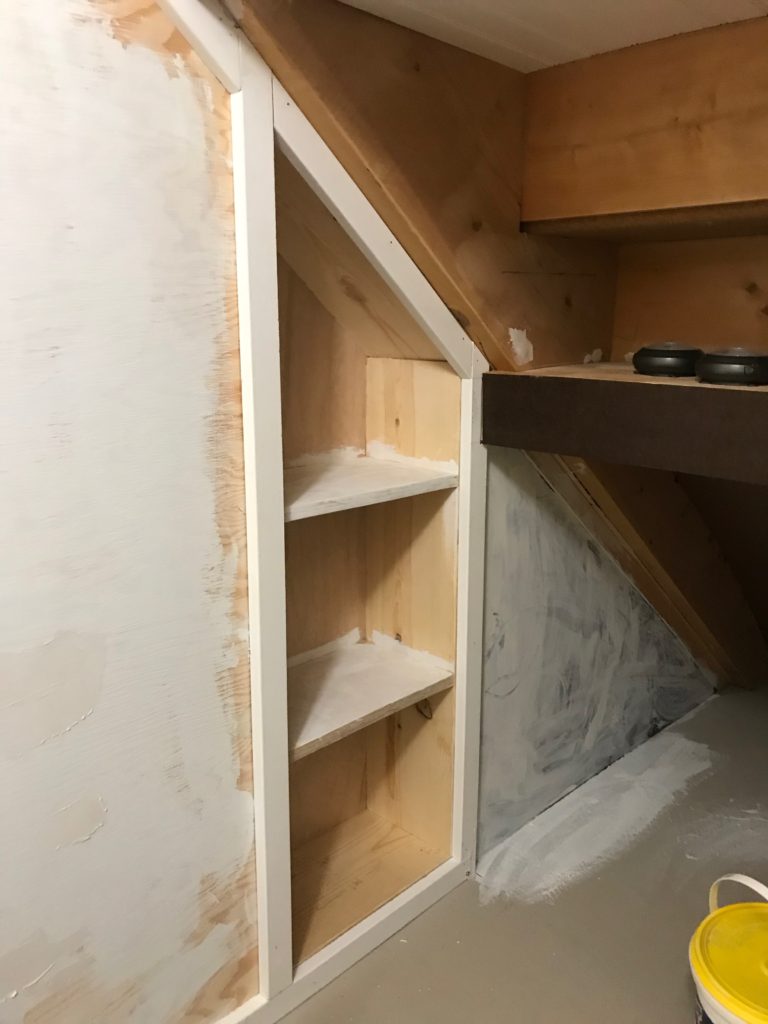
- Added little built in shelf between one set of studs.
- Left 2 steps uncovered, then added “shelf”
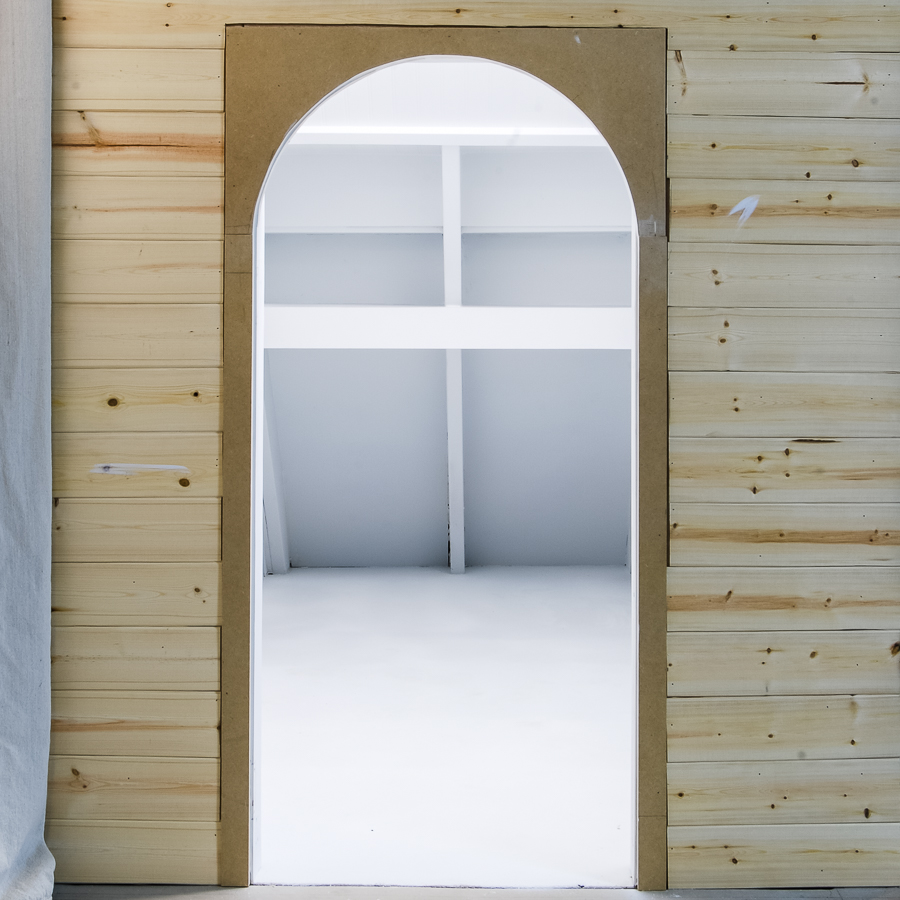
Initially, I was not going to use any drywall because I felt very intimidated by it. But I ran out of scrap plywood and material so decided to give it a shot. A basement closet playhouse is the perfect place to try out drywall! Turns out it wasn’t too bad and I learned a ton!
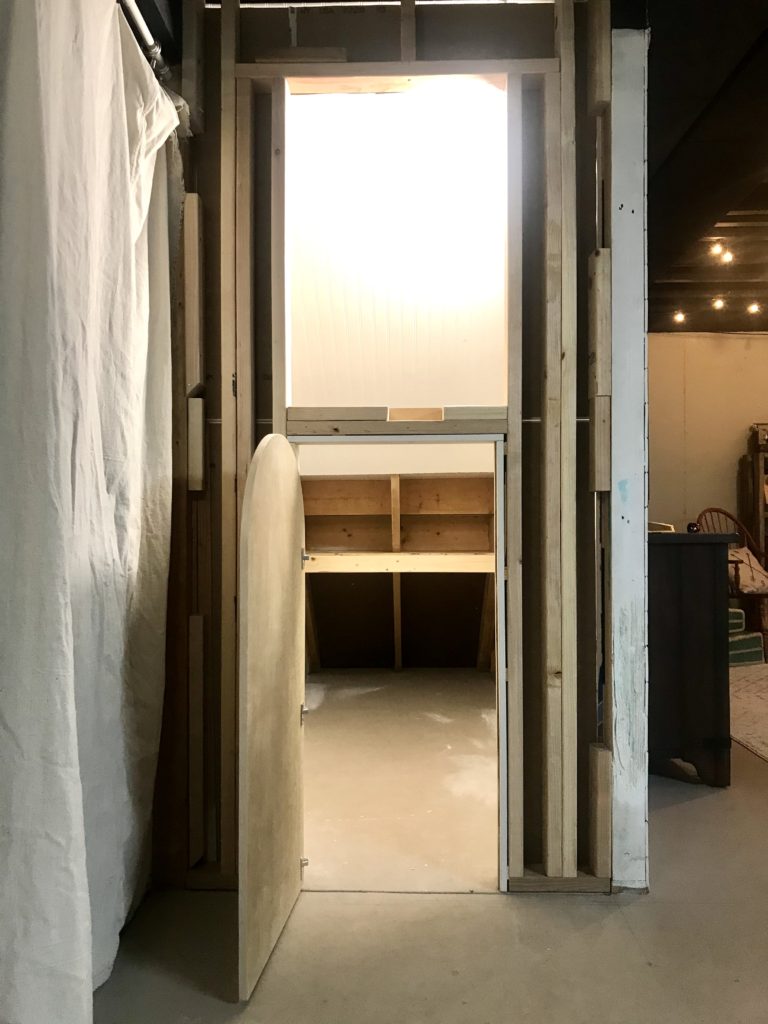
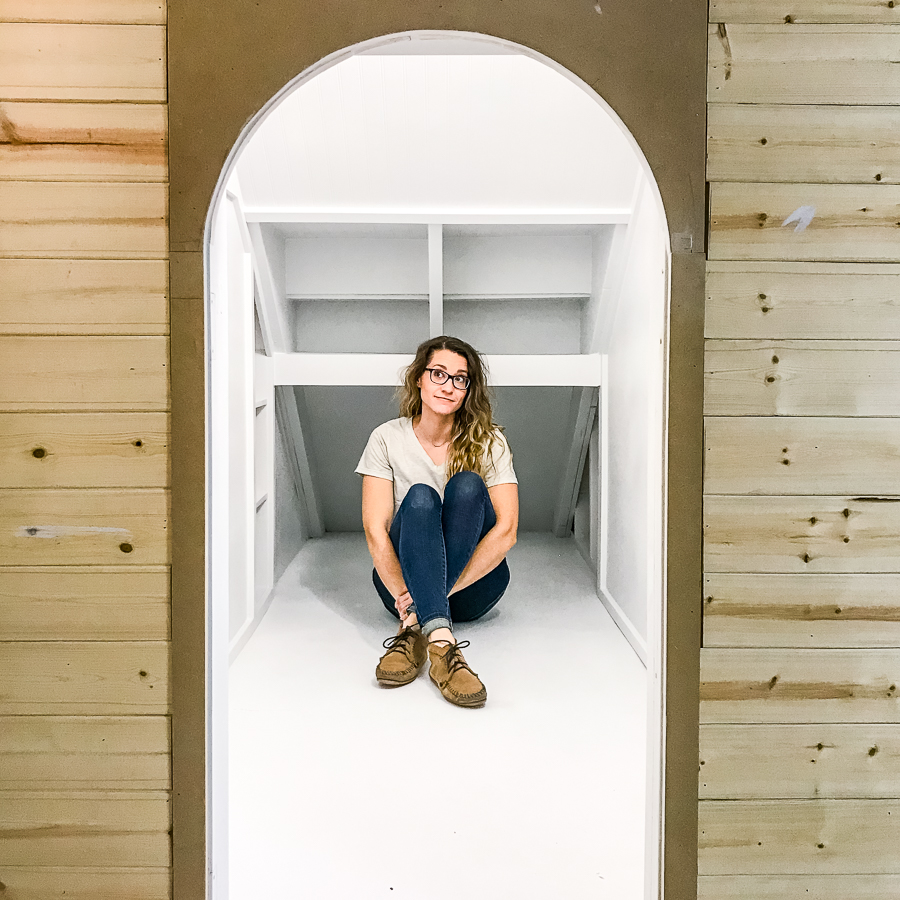
I framed out the doorway to fit a standard 28″ door even though I knew I was building a child size door. This way, when our kids outgrow the space or new owners want to change things it is all set up for a closet door.
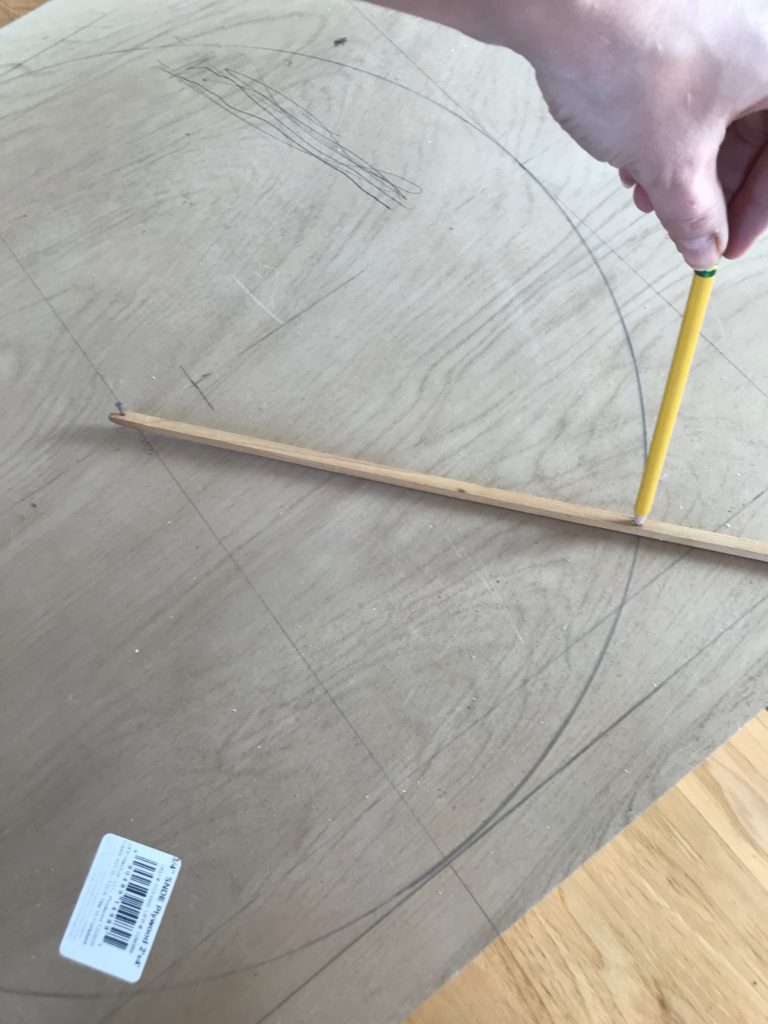
The playhouse door was cut from 3/4″ plywood. I was determined to have an arched door and although it gave me some headache every now and then, I am so pleased with it.
I used lots of leftover trim pieces for the inside. The trim really helped give a more finished look to the space, as did painting it!
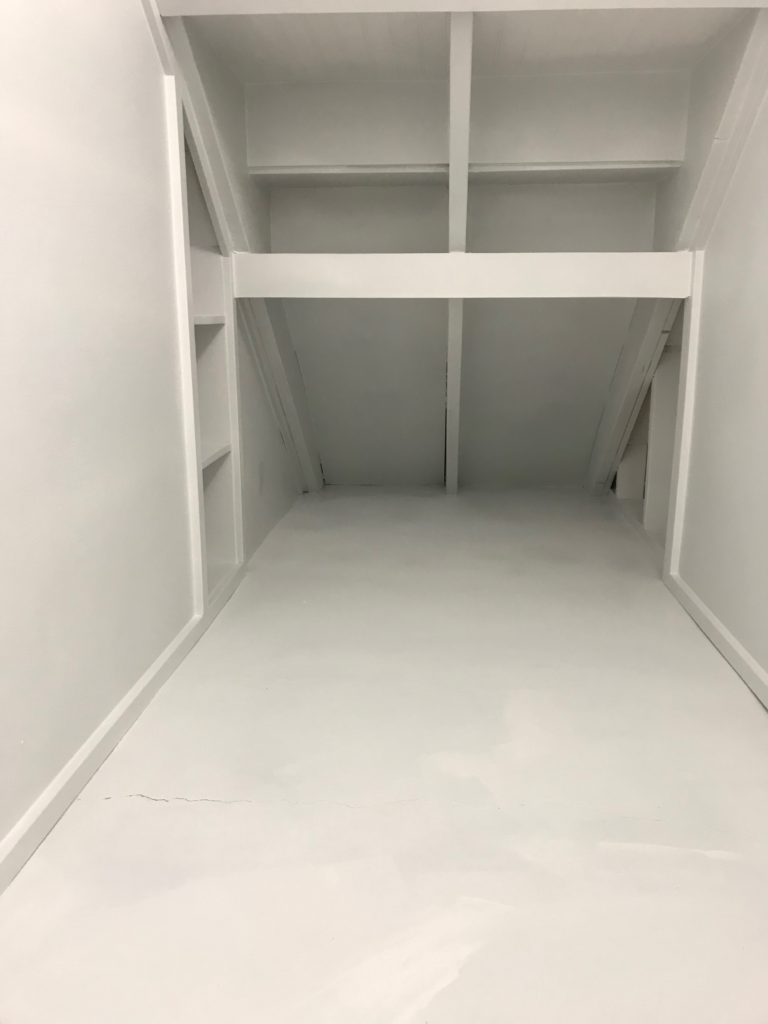
I used my paint sprayer to prime and paint the inside of the playhouse once the main portions were all built, using mostly leftover paint from other projects to save some money.
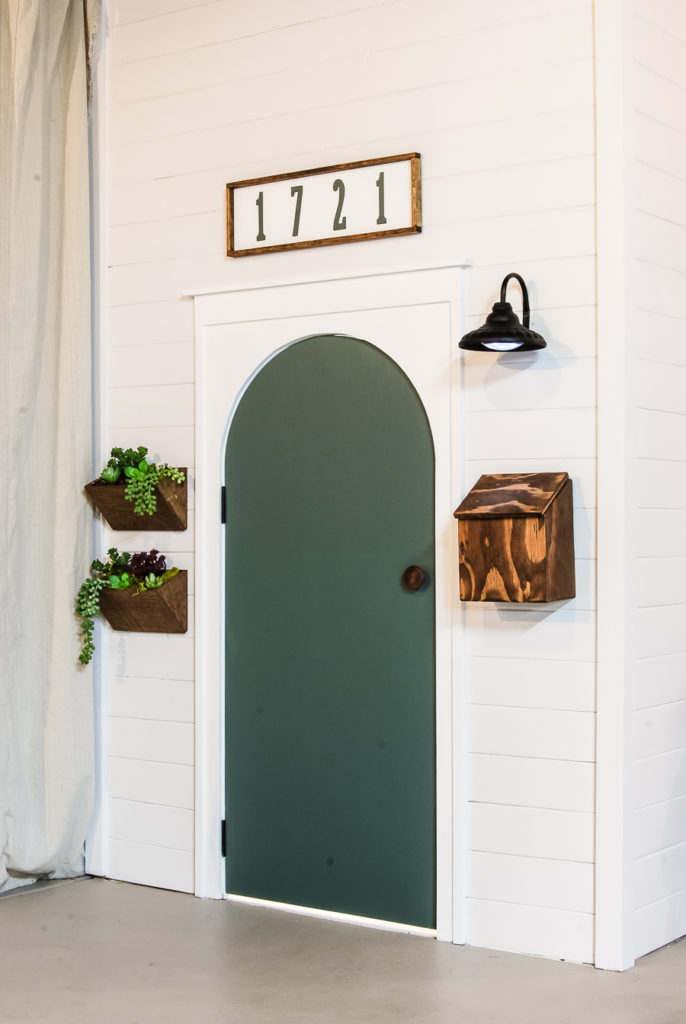
Now for the exterior…
Our basement currently has a shiplap wall and so I carried the same shiplap around the corner to the front of the playhouse. Cut out some trim from 1/2″ MDF and it was ready for paint!
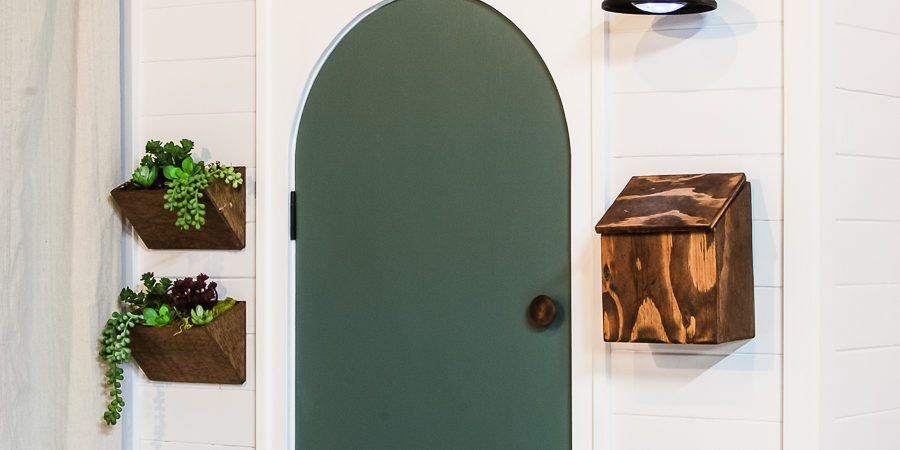
And take a look at the finished exterior! I will have a separate post for the interior once I finish it!
I absolutely love how this playhouse is coming together! The kids have been involved in the process as well which has made it even more special.
Our basement is unfinished, but we have still aimed to make the space useable for our family. Someday we may finish the whole basement…maybe. Adding the under the stair playhouse gives us one more useable space in our basement and that is a win in my book!
If you have an unfinished basement I would encourage you to not let that stop you from using the space you have. I have two other blog posts showing how we have set up a living room and guest bedroom in our unfinished basement.
Unfinished Basement on a Budget
I can’t wait to share the rest of the playhouse with you all! Just a few more pieces to finish up!
Emily
Comments are closed.