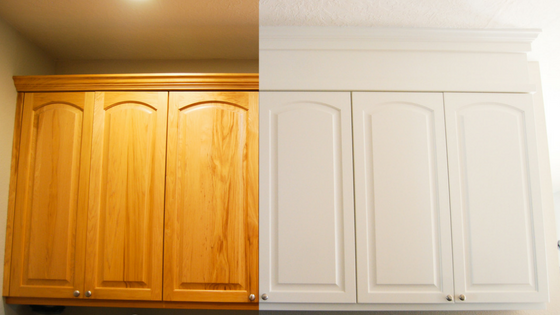
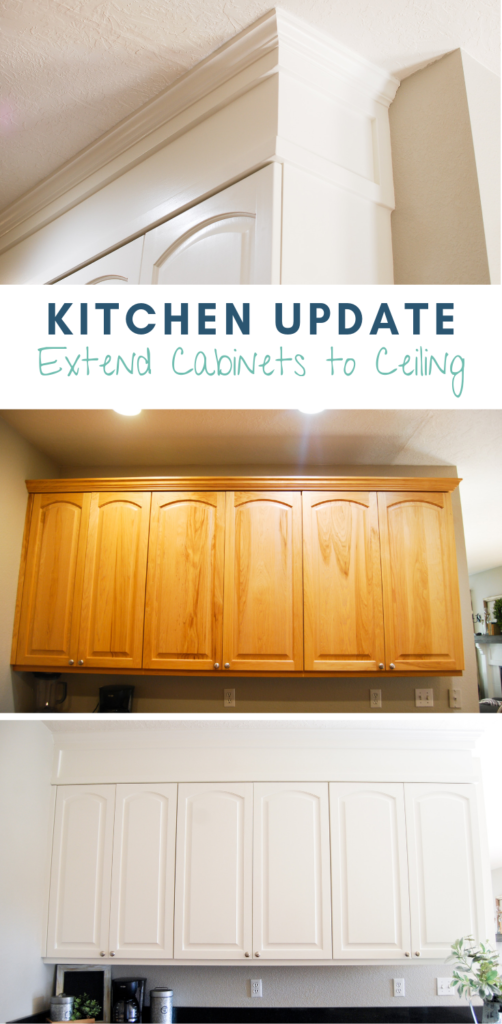
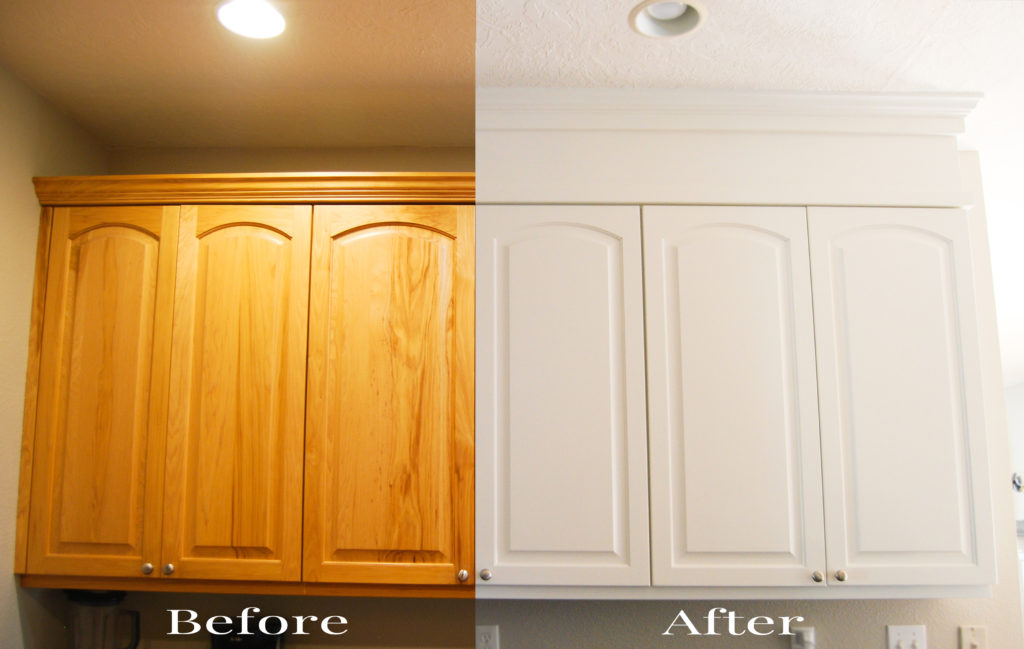
I did it! I finally painted our kitchen cabinets white!!! This has been on my project list since we closed on our house 3 years ago! This project took me about 2 weeks from start to finish. And it was totally worth the effort. I LOVE how it has completely transformed the kitchen. In a separate post I will be sharing the painting portion of the cabinets, but today I want to share my first step in this process: extend cabinets to ceiling.
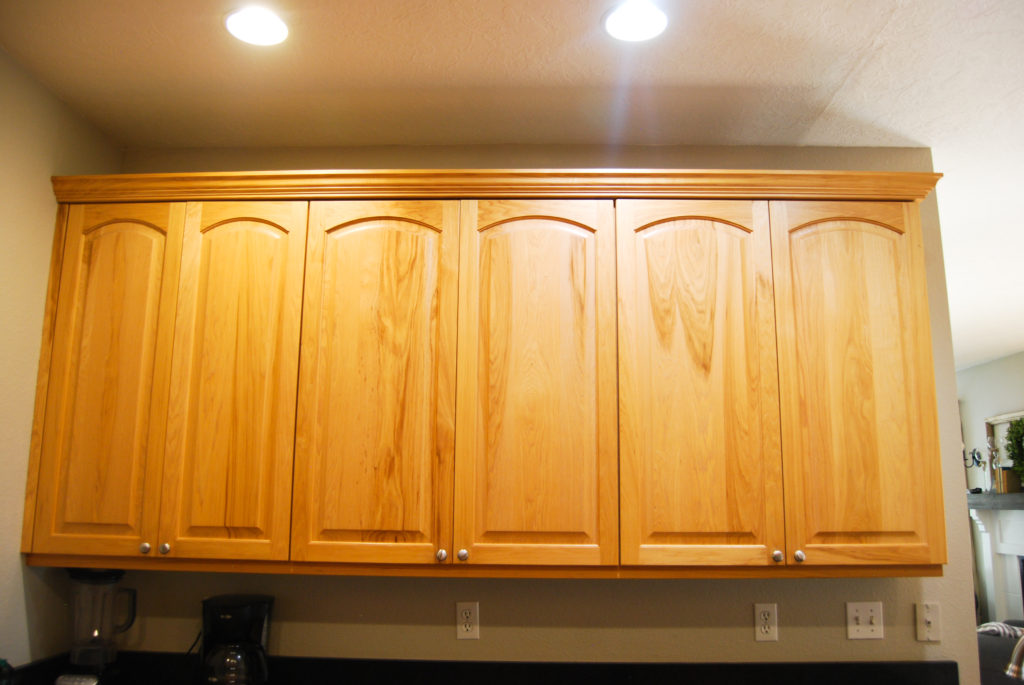
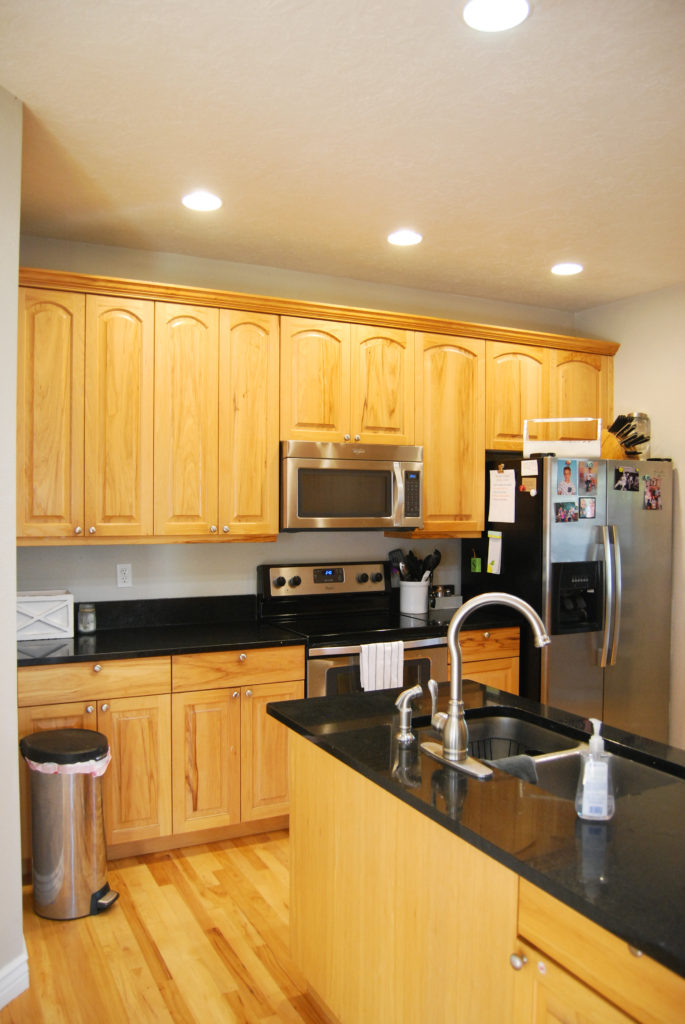
There was about 10″ above my upper cabinets that was open space. It was not quite enough space for open shelving or adding additional cabinets, so I opted for filling it in. First, let me share why I think its a good idea to extend cabinets to ceiling.
- Gives the illusion of taller ceilings.
- Makes cabinets look custom
- Eliminates the grimy dust collecting surface. (I was seriously disgusted at how gross/dusty the top of my cabinets were!)
It is pretty easy to take your cabinets up to the ceiling. Here is a great tutorial to look at for reference: Extending Kitchen Cabinets to Ceiling
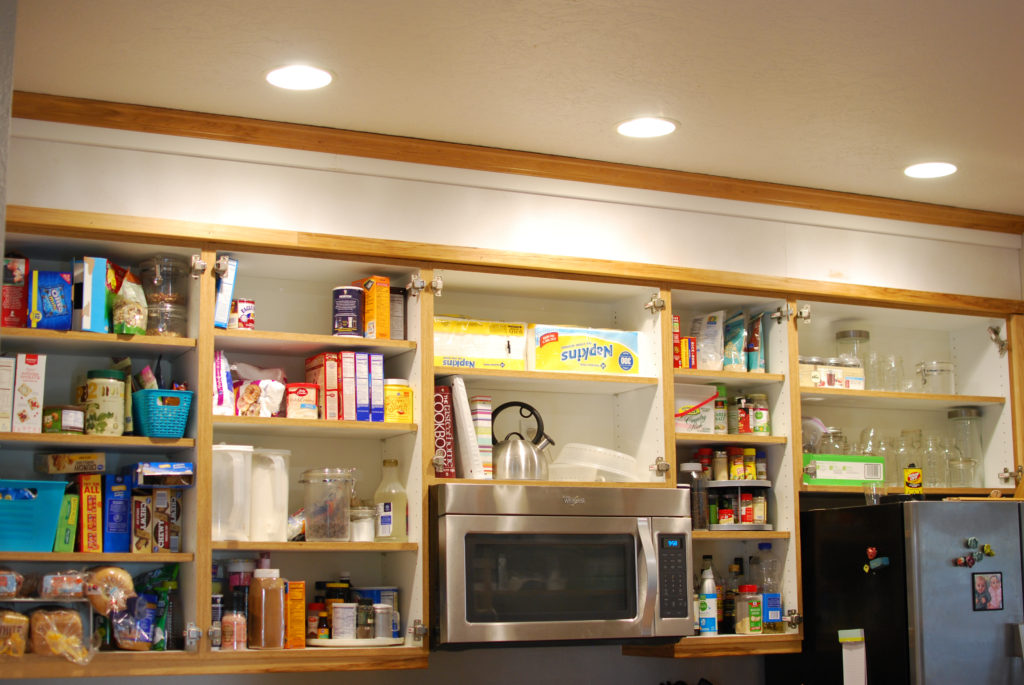
Let’s look at some before photos…
Basic steps I took to extend cabinets to ceiling:
- Install wood cleats into ceiling. This will give you something to nail your front panel piece into
- Cut 4×8 sheet of mdf to width and use for front panel piece. Measure from the top of cabinets where the wood would sit to the ceiling. I took off about an 1/8″ to 1/4″ to give me some wiggle room.
- Cut mdf trim pieces to “frame” front panel. This is the small piece sitting just below the crown molding once everything was moved up.
- Re-install existing crown molding
- Fill nail holes and caulk along seams
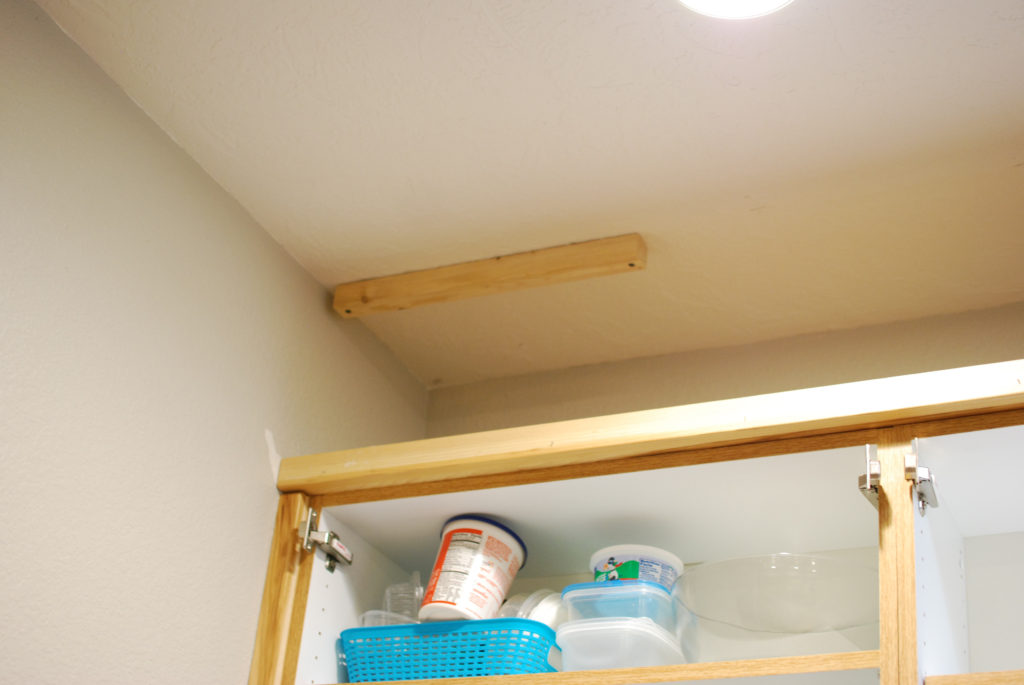
In the above picture you can see that I have removed the existing crown molding, and added a 2×2 wood cleat into the ceiling. Where you install the cleat will depend on how deep your cabinets are and the width of the material you will be using for the front panel piece.
Here is what the cabinet extension looked like once I got everything up there and installed with my nail gun. Last step was to fill in all my nail holes and caulk along the seams. Even without anything painted the kitchen already felt bigger. The added height makes the ceiling feel so much taller.
This is not a very detailed tutorial so please let me know if you have any questions!
If I had more room I would have opted for actual cabinets, but I think this still turned out pretty good.
I am so excited to share the final reveal of the whole kitchen with you all! It turned out even better than I thought!
Have a great day!
Emily
Did you miter the corners of the MDF or just but them up to each other?
I did not miter the one outside corner of the mdf and that worked out fine, since I painted. I also did not miter or use a “scarf” joint where the two pieces of mdf came together to span the total length. Here I wish I would have done it differently. The joint is a little obvious to me even after sanding, filling and painting.
Did you spray the cupboards yourself & why did you use MDF instead of drywall?
I did spray the cabinet fronts and drawers myself. I used a brush to paint the cabinet frames. (I did not want to tape everything off inside to spray inside). I chose MDF because its affordable and easy to work with. I wanted a smooth finish that would look like the cabinet fronts. Drywall could have been an option but I have not ever worked with drywall and it seems more cumbersome.
In the second to last picture, I can see the mdf and see the brown crown molding at the top. But there’sa strip of white between the mdf plank and the molding. What is that?
Hello! Yes I just looked back at that post and see what you are talking about. I added a 1×2 mdf piece below the crown molding. I feel like it finished it out more and matched the existing piece right above the cabinets. Thank you noticing that, I will edit the post to include that information.
Did you spray paint the cupboards yourself & why did you choose MDF over drywall?
Did you use the same crown molding from the cupboards& how did you attach it? Did it hit a joist when you nailed the molding to the ceiling?
I did use the same crown molding that was previously on the cabinets. I was not able to nail into a joist in the ceiling because the ceiling joist run the wrong direction for that to work in my kitchen. That would be ideal. I was able to nail into backer wood blocks I attached when I built the extension frame, if that makes sense.
Hey,
What paint did you use to paint the cupboards
Thanks
Benjamin Moore Advance paint in color White Dove.
I don’t know how to attach the backer Blocks for the crown. My daughter what’s to do her cabinets like your.
If you can find ceiling joist that would be ideal to attach the blocks. But they might not be in the right location or run the wrong direction in your ceiling. If that is the case, you could use screws and just place them where you need them. Attaching to drywall only is not as strong, but thankfully the crown molding is not incredibly heavy or bear weight. Another option is using screws along with a little liquid nails (glue) to attach the blocks to the ceiling. The last option could be attaching a “L” shaped wood piece to the top of the cabinets. The horizontal part-screw into the cabinets and the vertical piece of the “L” could act as the support for the crown molding. I hope that makes sense!
Even though it looks like you did a fantastic job, considering you have little people around, 😊 I just couldn’t for the life of me enclose that space. I have a large kitchen with literally no space for Knick knacks of any kind. I definitely want my space above my cabinets useable!
I do love that you show yourself as a normal everyday mom with kids that do have quite creative imaginations!
I did debate back and forth before closing up the space. And you are right! It can be a great space to display knick-knacks and decor or even serve as extra storage.
Nice job! I am planning the same project and I am wondering why you chose MDF instead of birch or maple to show wood grain?
Hi! Thanks! I picked MDF for a couple reasons. 1. Affordable-much cheaper than birch or maple. 2. Didn’t think it was necessary to show any wood grain, especially since everything was being painted white. 3. Did not have a lot of concern as far as wear and tear goes so durability wasn’t a super high priority. I do think birch or maple would have worked as well and could be great options for other people’s projects depending on their needs/goals.