I can say with much satisfaction that I checked off one of the top projects from my list: paint cabinets white! This has been a project on my Project List for 3 years and now it’s done! It took me three years to build up the drive to take the plunge. I had painted bathroom vanities and other small cabinets before, but tackling an entire kitchen seamed like a beast. I am here to testify that it can be done. It does take time and patience, but the actual steps are pretty easy.
There are hundreds of tutorials on how to paint cabinets white out there and I have probably read about 90 of them! After reading blog after blog, I settled on following this step-by-step from Blesser House How to Paint Kitchen Cabinets like a Pro
I did a couple things different than she did and I will share those, but for the most part I followed the same steps, with just a few different products.
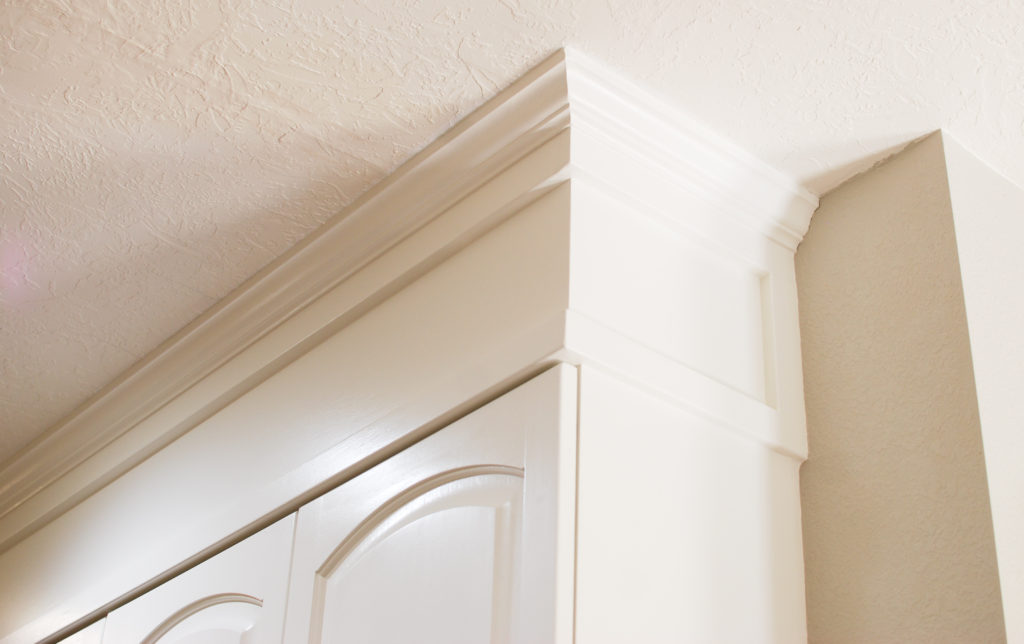
Before painting I did extend my cabinets to the ceiling. You can read more about that HERE!
Now for the painting part. Like I said earlier, I followed the tutorial from Blesser House. It was simple and easy to follow. I encourage you to go check out her tutorial for more details.
My Supply List:
- Krud Kutter Cleaner and Degreaser
- Crown Liquid Deglosser
- INSL-X Stix Bonding Primer from Benjamin Moore
- Benjamin Moore Advance in White Dove satin
- 220 sandpaper
- Latex gloves
- Purdy paintbrush
- Homeright Finish Max paint sprayer
- White paintable caulk
- Painters tape
- Drop cloths
- Plastic cups
If you compare this to Blesser House’s tutorial you can see it is mostly the same. I did use a different deglosser and primer than her.
Now for the “how to”…paint cabinets white
Label and Remove Doors/Drawers
My amazing hubby did the labeling and removing of the doors, while I worked on the cabinet extension. Because of our hinge design we were able to remove the cabinet doors and drawer fronts and leave the hinge attached to the cabinet frame. He unscrewed one of the screws so we could swivel the hinge out of the way for painting but not fully removed.
I did not get good pictures of this step. In the pictures below, the first picture shows how our hinges are and the second photo is after unscrewing one of the hinge screws and swiveling the hinge out of the way.
For keeping track of which doors go with which cabinet, my husband numbered them with masking tape. He put one number on the back of the door and one number inside the actual cabinet, on the shelf. Easy.
Degrease and Degloss
Once all the doors and drawers were in the garage it was time to degrease and degloss. This was my least favorite part. I planned on it taking a day. It took me about 3 days since I wasn’t able to work on it continually throughout the day.
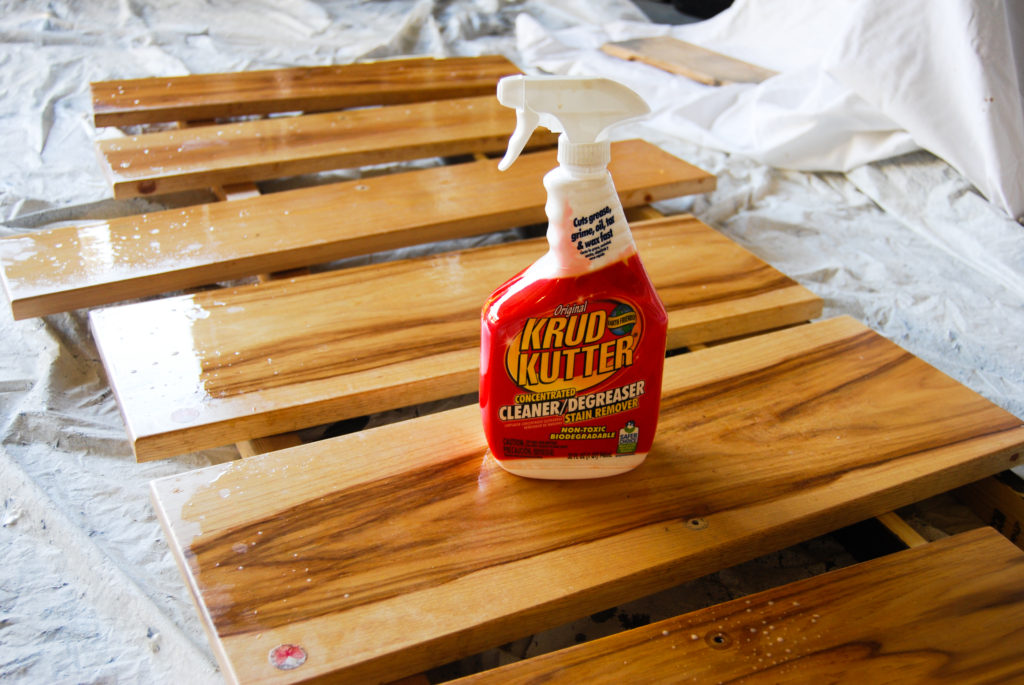
Even without interruptions I anticipate this to take a good amount of time. My cabinets were particularly dirty, due to the fact that I did not clean them regularly and the wood really hid the grime well. I am sure having white cabinets will force me to clean more frequently.
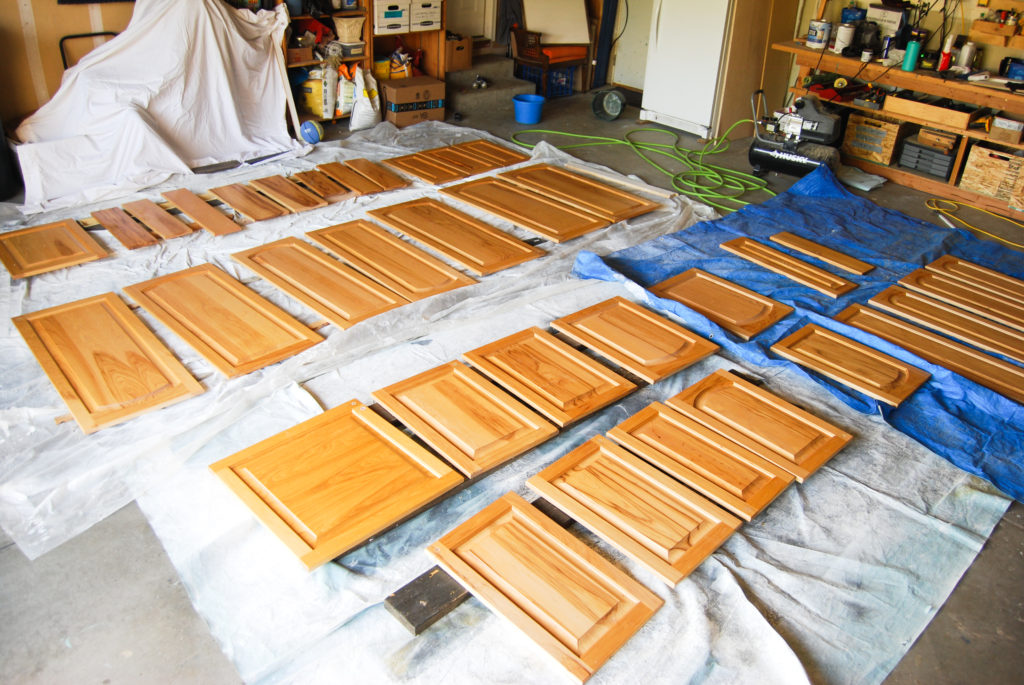
Prime and Paint
Finally, it was time to paint! I sprayed the cabinet doors and drawer fronts in the garage and brushed the cabinet faces inside. This seemed easier than taping off the inside of our kitchen to be able to spray.
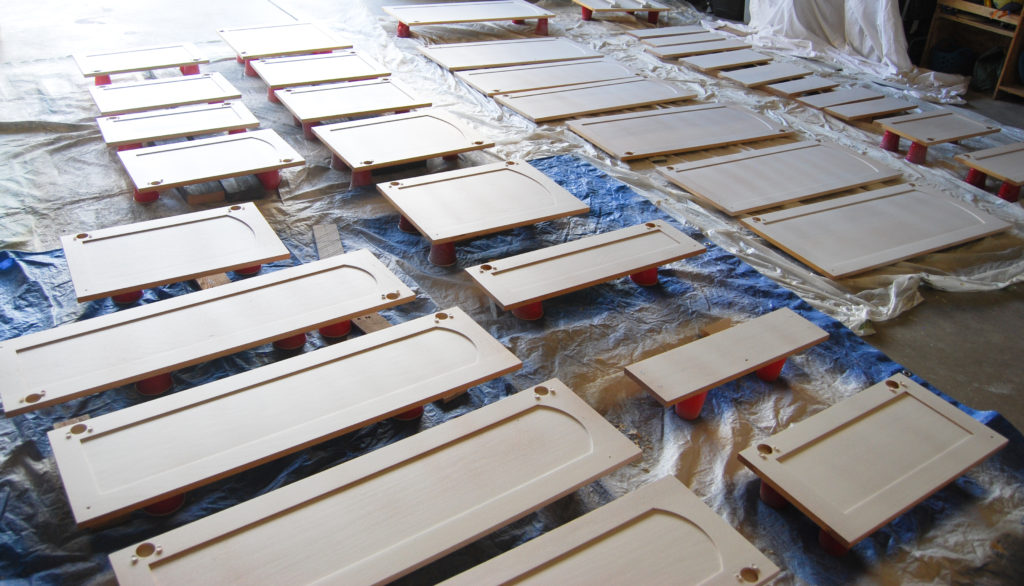
Two coats of primer on the backs of everything and two coats on the fronts of everything, with light sanding between coats. Repeat with the paint. Advance paint takes 16 hours to dry between coats, which basically means just one coat a day. I allowed 2 days after my final coat for everything to just sit before reinstalling.
The above project is mid-process. I moved some furniture to block my little people front touching the drying paint.
The sprayer made a huge difference! It made applying a coat quick and painless. I worked out my sprayer kinks on the backside of cabinets so that when I flipped them I was more comfortable with the sprayer. I used plastic cups to prop up my cabinet doors/drawers to make it a bit easier to spray them.
My overall thoughts on the process to paint cabinets white
I am so pleased with how the finish turned out. There are still a couple spots I need to touch up a bit with some light sanding and a paintbrush. I would have liked to wait a couple more days before re-hanging the doors, but we were hosting the twins 2 year old birthday party the next day so I needed them back on.
The Advance paint was easy to apply and dried beautifully. It is self-leveling, which really helped hide any brush strokes or imperfections. I will post an update in several months to update how it is holding up.
Now for the best part…
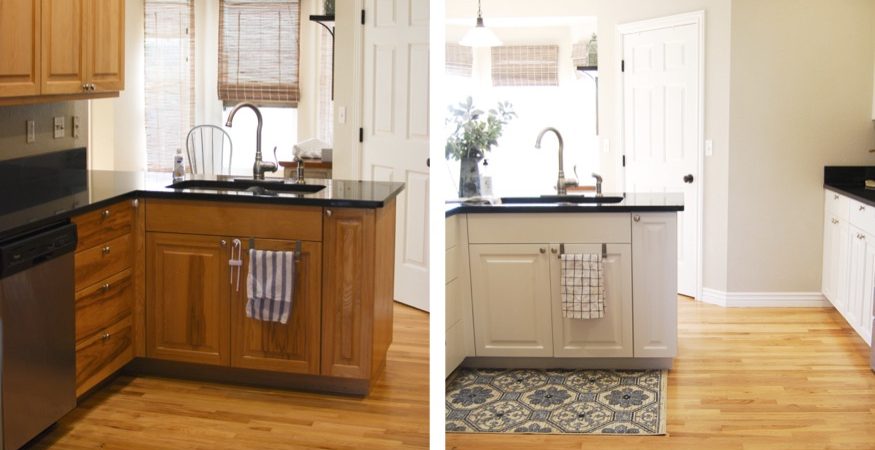
Before and After Photos

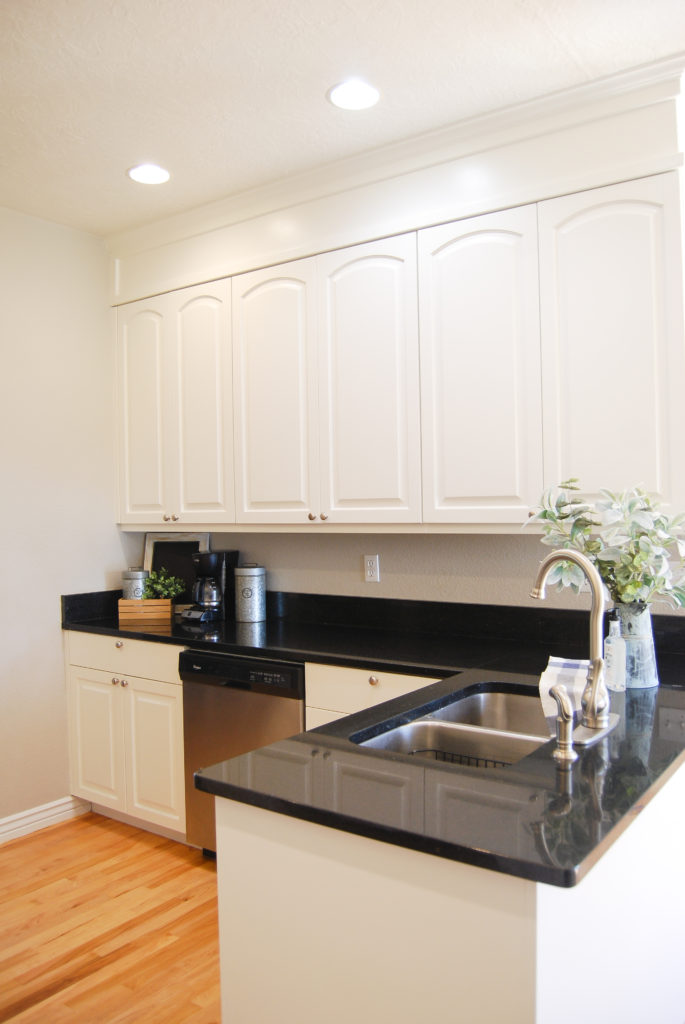
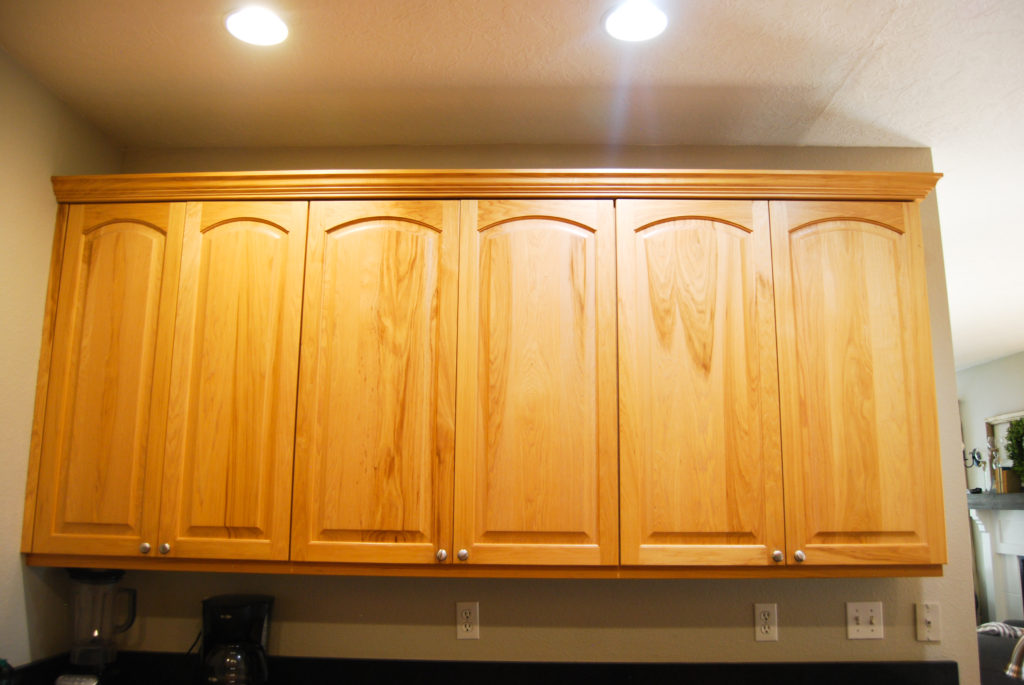
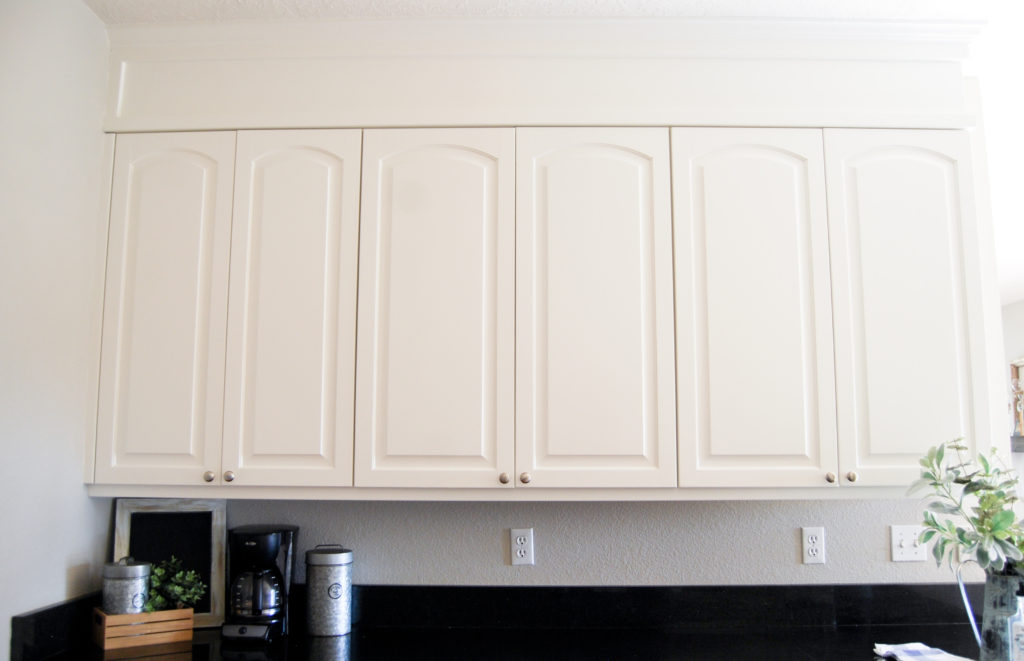
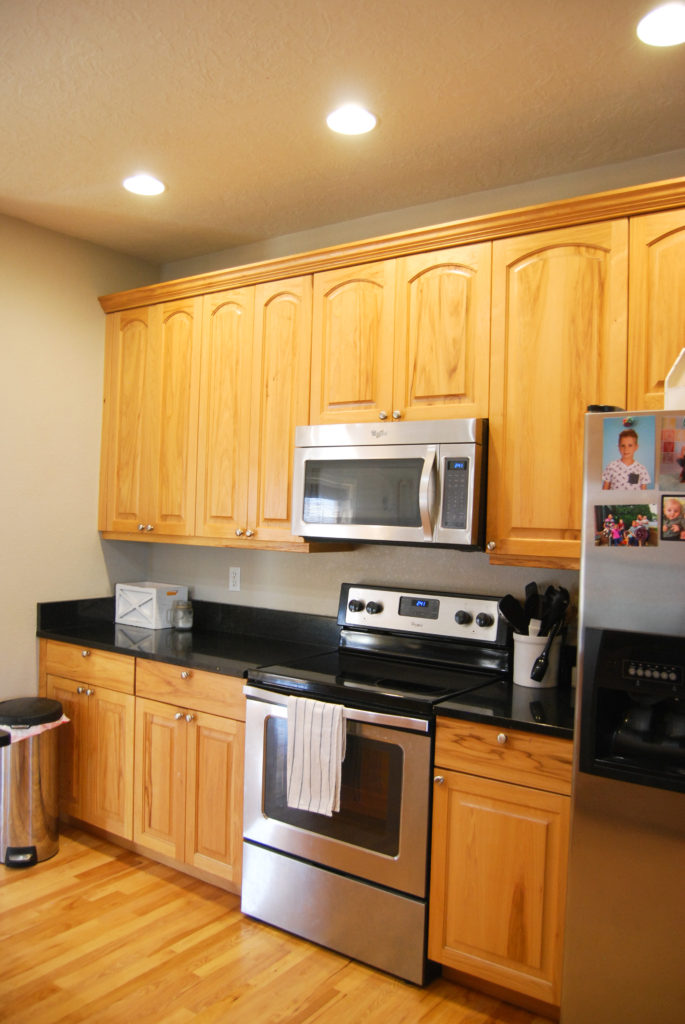
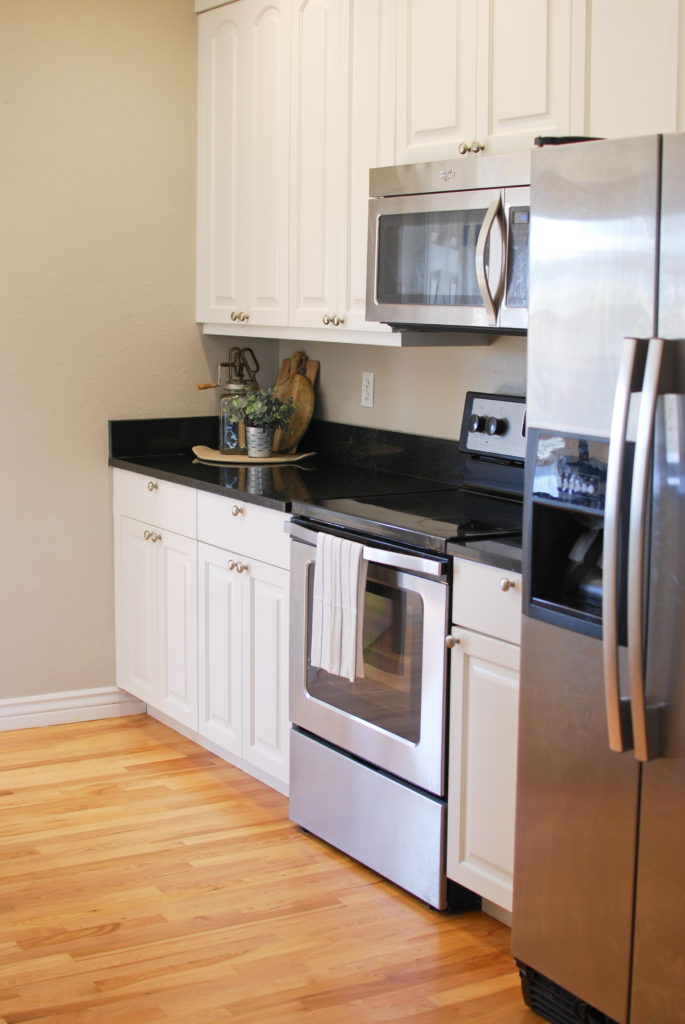
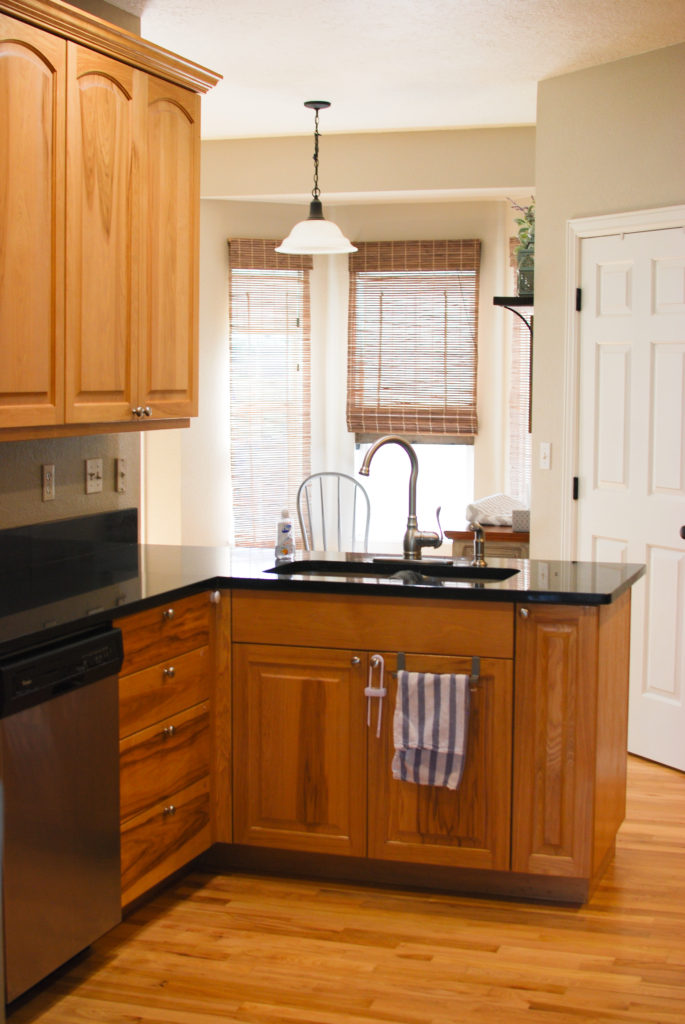
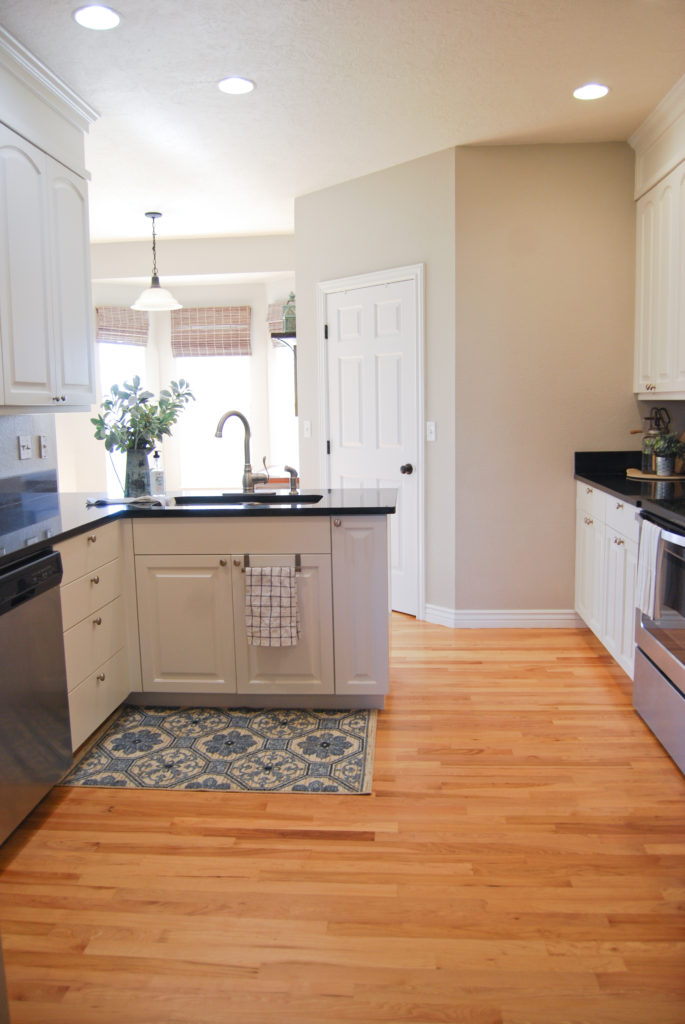
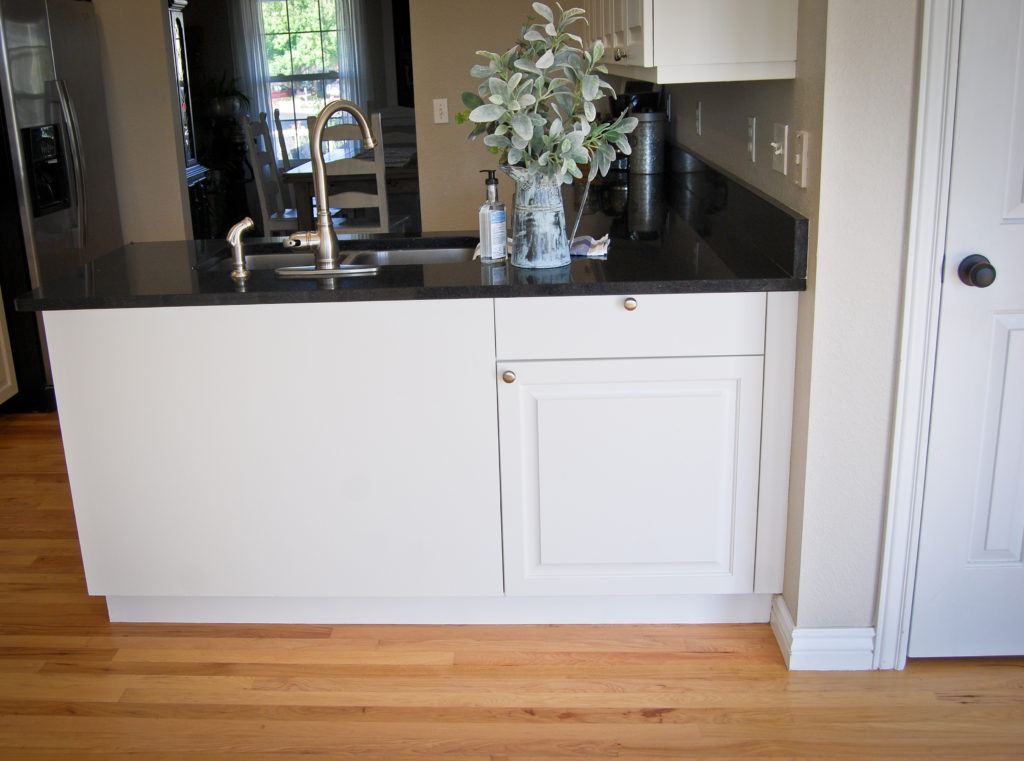
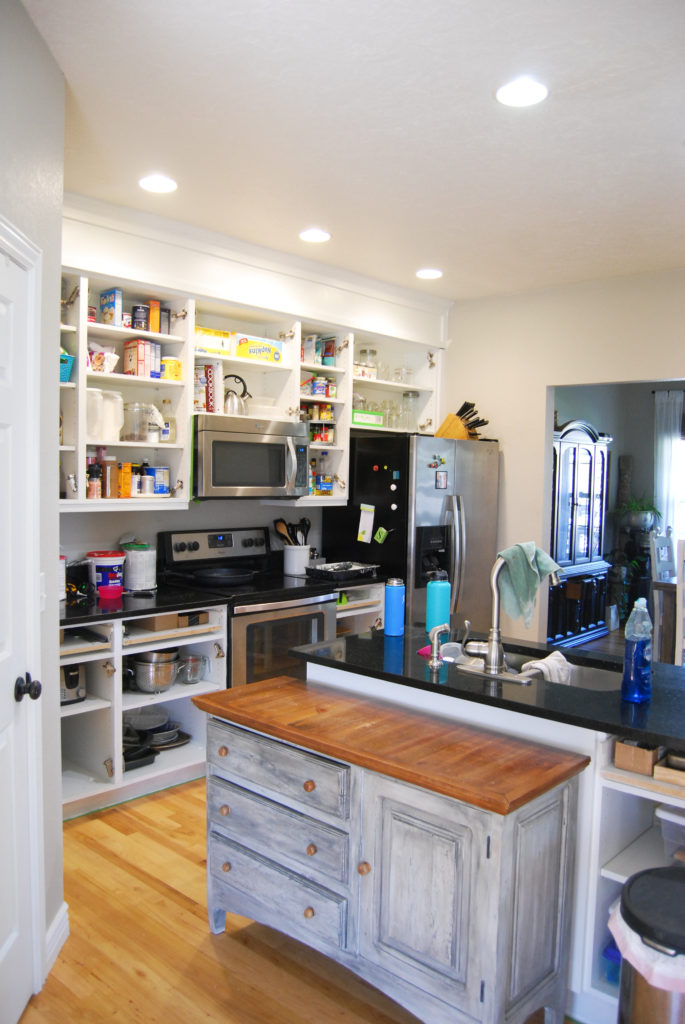
One of the things I love the most is now having some contrast between my cabinets and the wood floor. Before painting the cabinets the floor and the cabinets blended together.
I wish I could better capture the transformation, but this is a challenging room to photograph. With no window in the kitchen, having bright white cabinets has SIGNIFICANTLY brightened the space.
If you have any questions on how I did any part of the process let me know! If you are looking to brighten up your kitchen I would recommend to paint cabinets white.
Have a great day!
Emily
Great job !! I have “orangey” wood cabinets as well and am dying to paint them white. What paint color is on your walls? The cabinet and wall colors look perfect together.
Painting my kitchen cabinets probably remains one of my favorite updates we have done to the house. A lot of work but the result was worth it! My walls are a custom paint color from years ago. A similar match would probably be agreeable gray from Sherwin Williams.
Hi there! I noticed you used the Stix primer – did you find any issues with using that in the paint sprayer? I’ve been trying to research it but haven’t found where people used that particular primer in the Homeright sprayer, but I’d look to be able to use it! Did you have to thin it at all? I wasn’t sure you could thin that primer. Thanks!!
*love to be able to use it! Oops!
Hi! I do not remember if I thinned the primer but I don’t think I did. I believe the can of primer said to not thin it. I don’t remember having any trouble spraying the primer, but start on the backside of the doors to work out any problems first. Sorry that is not super helpful.
Hey Em! Love your stuff ❤️ I’m about to do this with my sis-in-laws cabinets. Very similar style to yours. I saw you mentioned in the one year later about caulking… what type of Caulk did you use? Also how many days would you say this realistically takes (if you weren’t interrupted by kiddos)? It seems the wait is mostly dry time. Thanks again!
Hi! How exciting to start on some cabinets for your sis-in-law. I would use just basic paintable caulk for molding/trim or doors/windows. I think they are about $3 a tube. Nothing fancy. And as far as how long it takes…the most time consuming portion is the set up and prep. So removing all the cabinets, labeling, cleaning/degreasing etc. I would say that maybe a full day? The actual painting is not long if you are spraying, although you will have to wait between coats. If you are using the BM Advance paint I think its 16 hr dry time? So minimum 2 coats on each side of cabinets means at least 4 days of painting (not including the priming portion). I waiting a week after the last coat before rehanging them. I would say a week to complete and another week to let them sit. It is a project with lots of waiting 🙂
Hi! I had a question about using advance with homeright sprayer. I am in the middle of painting my oak vanity. I was able to spray kilz primer with a bit of thinning beautifully. However I struggled for hours with advance today before finally giving up. The paint wouldn’t stop splattering even with thinning. Did you use the green tip with your sprayer? Also did you thin the paint? Thanks!
Hello! Sorry for the late response and sorry to hear you are having some difficulty with spraying the advance paint. I did thin the paint before spraying. I don’t have an exact ratio but would thin a little, spray on a scrap piece then thin more if necessary til I got the right consistency. I really with. I would have written down if I used the blue or green tip. I want to say the green because the advance is such a thick paint. Good luck!
Hi, I am looking to add the molding on top of the cabinets. Can you explain how you did that part?