
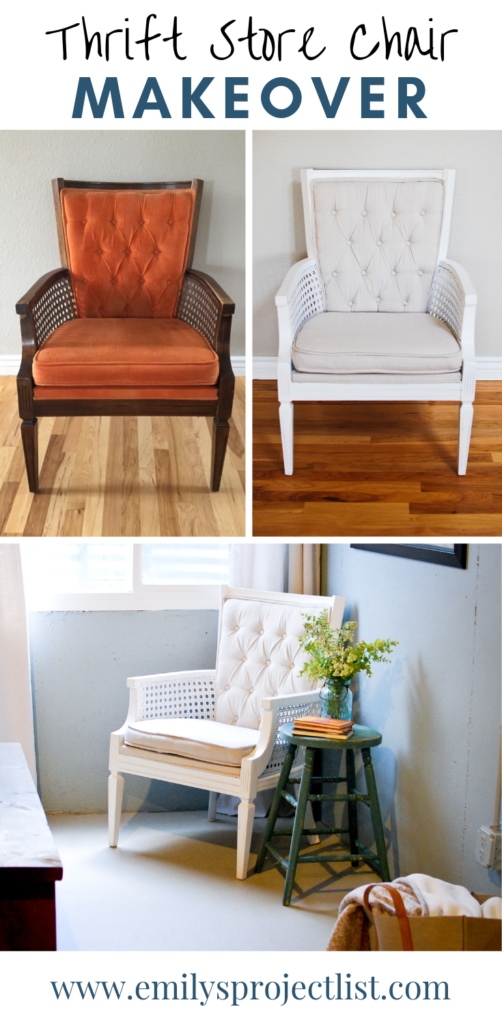
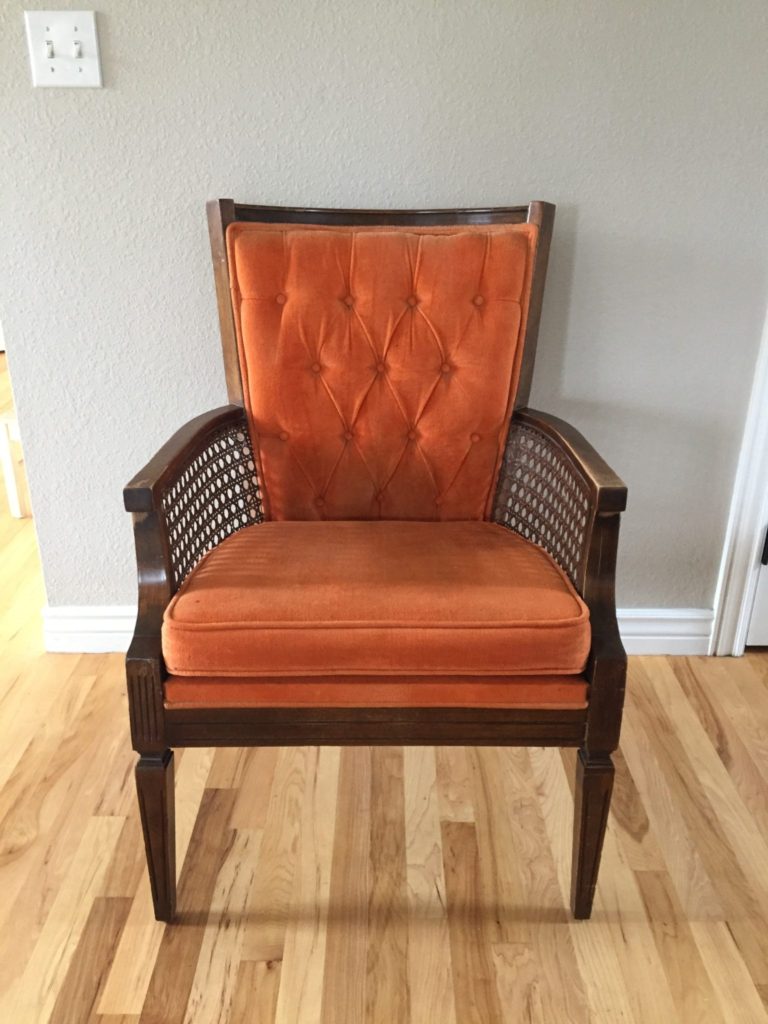
From across the store I spotted her…the orange velvet beauty. For $3.99 I was able to snag this awesome accent chair from the thrift store. I have attempted reupholstery projects before and they did not go in my favor. But, I am eternally optimistic and thought, how hard could a tufted back chair makeover be?
Turns out…not that hard actually. I found an amazing tutorial to follow that gave great step-by-step instructions, making it really easy to tackle this chair makeover.
Tufted Back Chair Makeover Tutorial:
I am not going to write up my own directions, since I followed Kristi’s tutorial at her amazing blog Addicted 2 Decorating
The directions on Addicted 2 Decorating are so thorough and helpful, so please check them out if you have a similar project in mind.
Couple details
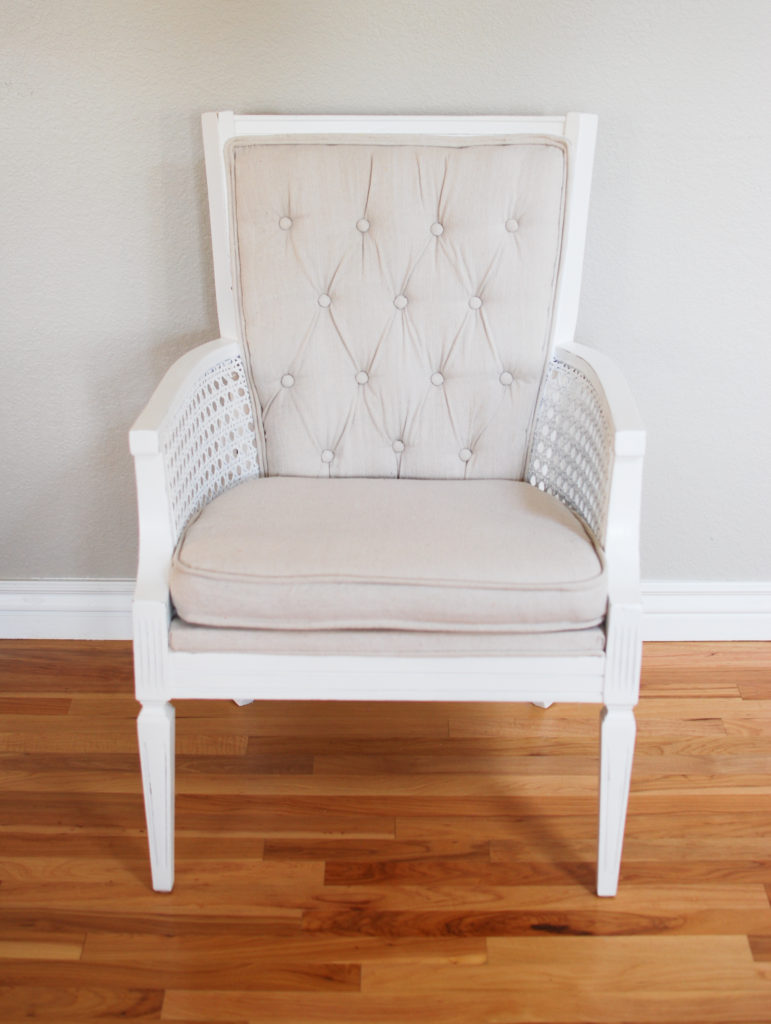
- Paint: I spray painted the chair frame with Rust-Oleum White in Satin. I used spray paint, because I thought it would be easier to use on the cain part of the chair.
- Fabric: canvas drop cloth. A drop cloth is a cheap fabric option and I love the neutral color and texture. Probably not the most durable upholstery fabric you can find. I have used drop cloths for curtains and pillow cases before, but this is my first time using it as an upholstery. The weave is a little loose, making the seams I sewed on the seat cushion, appear to be a little weaker. Time will tell if I made a good choice here.
- Scotchgard: a good coating of scotchgard to all the fabric before I attached it to the chair frame. Doesn’t hurt to add a little protection from stains.
Before picture

In process…
A couple photos along the way.

Finished!
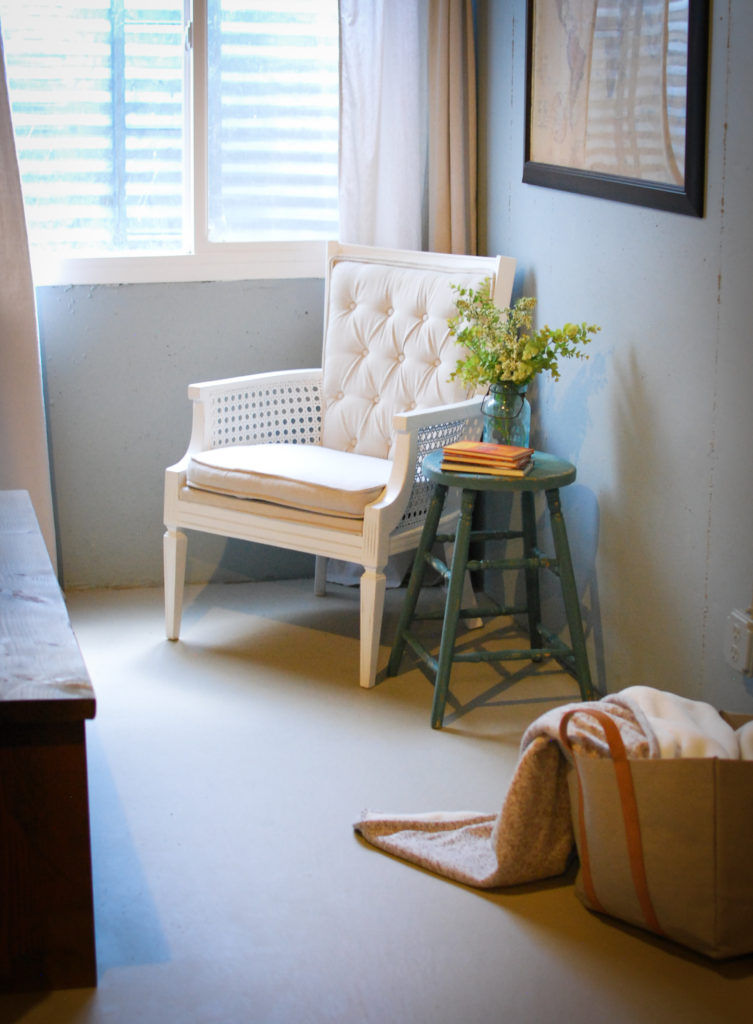
Currently, I have put my “new” chair down in our basement “guest room”. We have an unfinished basement, but I have set up a little guest bedroom down there until it is in the budget to finish it. A little decor and a cozy chair make the concrete walls and floor seem a little more “finished”.
Thanks for stopping by!
Emily
Comments are closed.