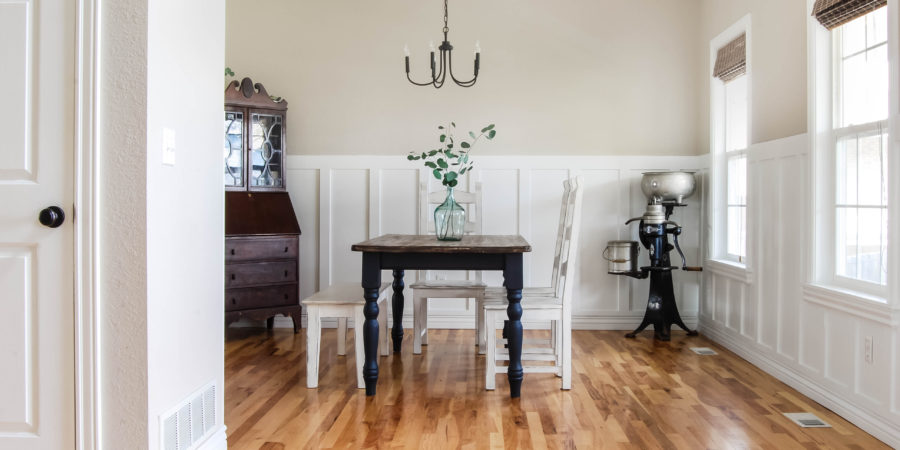
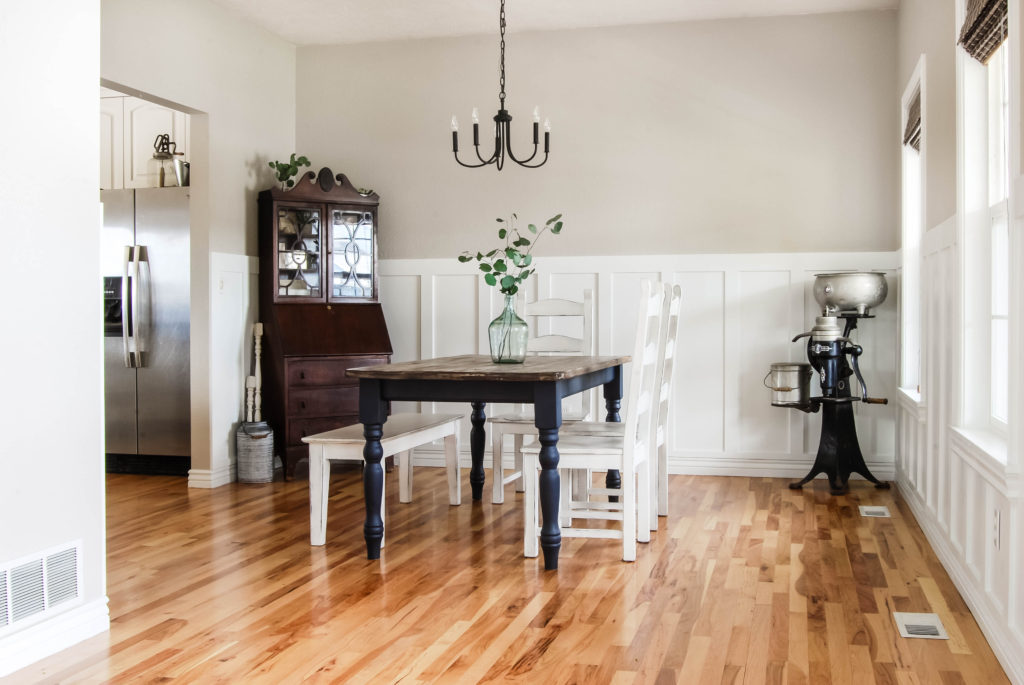
The board and batten for my dining room update is done…and I LOVE IT! The space feels brighter, bigger and has more character! It was totally worth eating amongst painting supplies and tools during the project!
To see the first step in my dining room update check out my first post about adding window trim here!
If you do a search for DIY board and batten, you are going to find many amazing tutorials available. Each one is a little different and unique to a space and someone’s preferences.
After I looked at many photos and tutorials I came up with a list of some of the things I wanted to specifically do for my board and batten.
- Install hardboard behind the vertical and horizontal pieces to have a smooth texture. (I have seen many beautiful board and batten projects that installed the wood on top of existing drywall and it looks great. I just didn’t want to have my textured walls show)
- Use MDF for all my vertical and horizontal pieces. Cheaper, smoother, and consistent in size and shape.
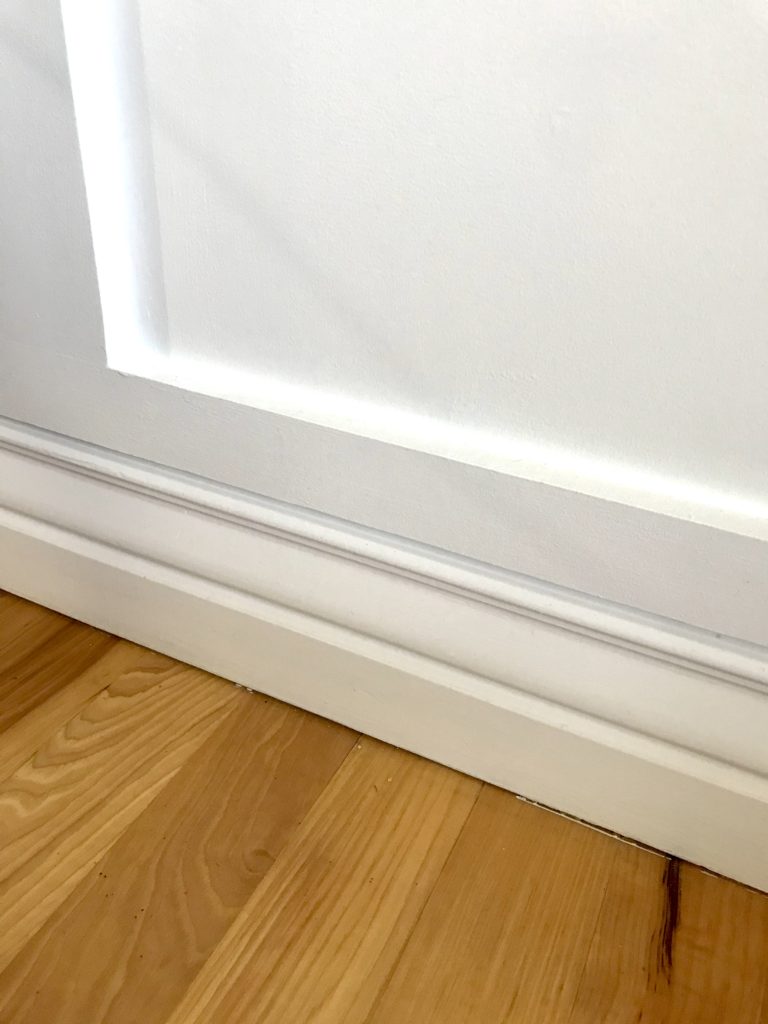
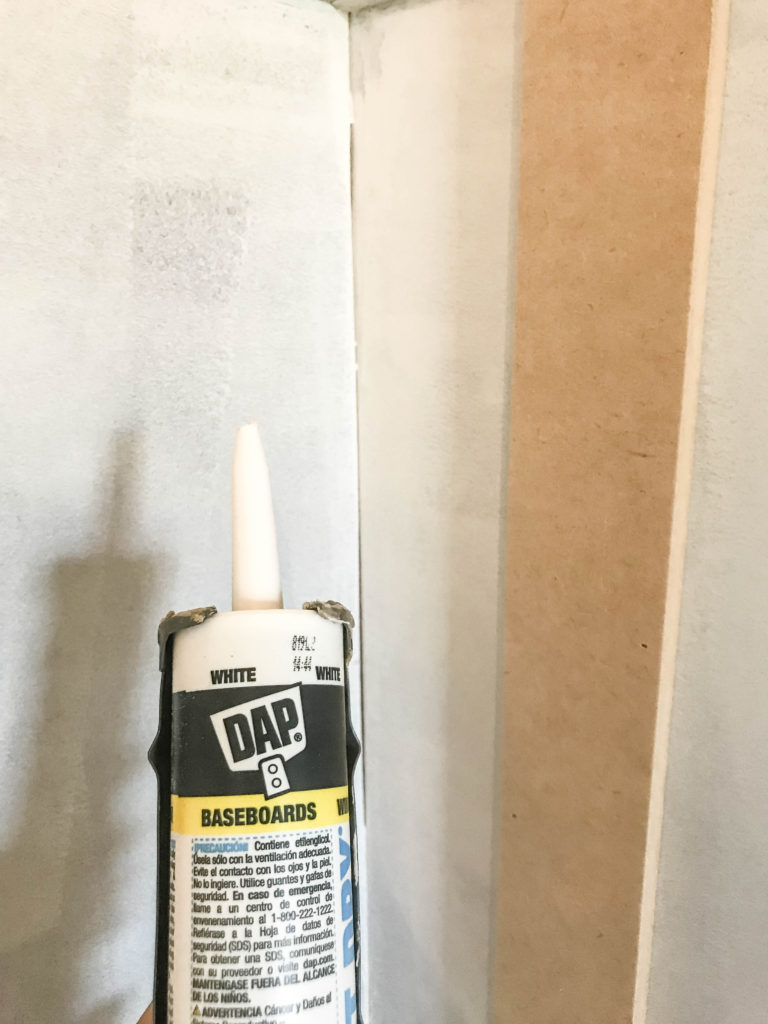
- Leave existing baseboard. I did not want to remove or replace our existing baseboard. I’ll show you what I did to address my vertical pieces coming down to my baseboard.
- Extend outlets and light switches using box extenders.
DIY Board and Batten
The first step is really planning out the overall look you want. Take some time to plan out your design to save yourself some time later on. Look at lots of pictures and figure out what you like. Do you want a wide top board? How close do you want your vertical pieces to be spaced? How high up the wall do you want the design to go? Make a plan so you can get the right amount of material and make the installation easier.
How I planned out my design:
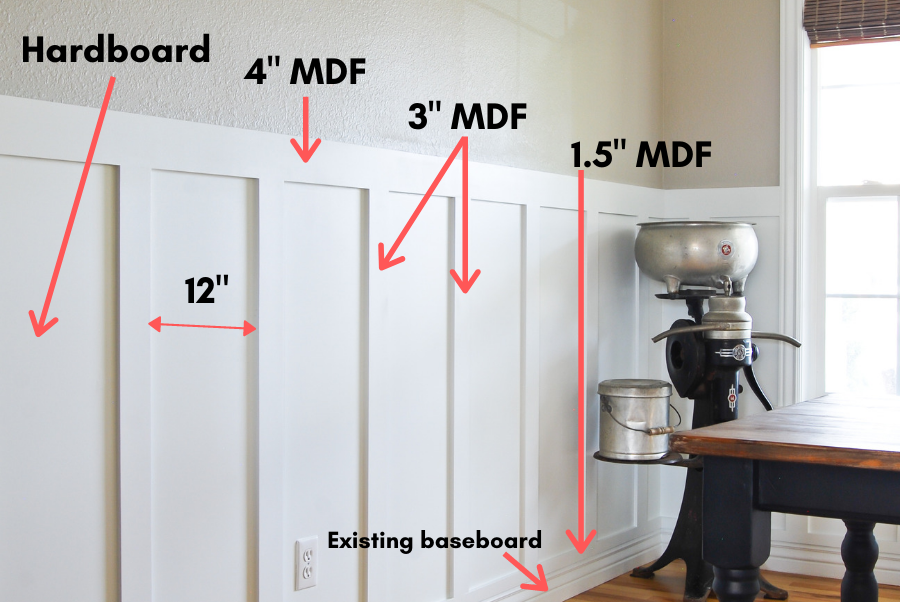
- I determined how high I wanted the design to go up the wall. I used painters tape to mark a 4′ line up the wall and liked how that looked. Then, I checked where my light switches were to see where a top board would hit them. I determined that 4′ from the top of my baseboards worked visually and practically.
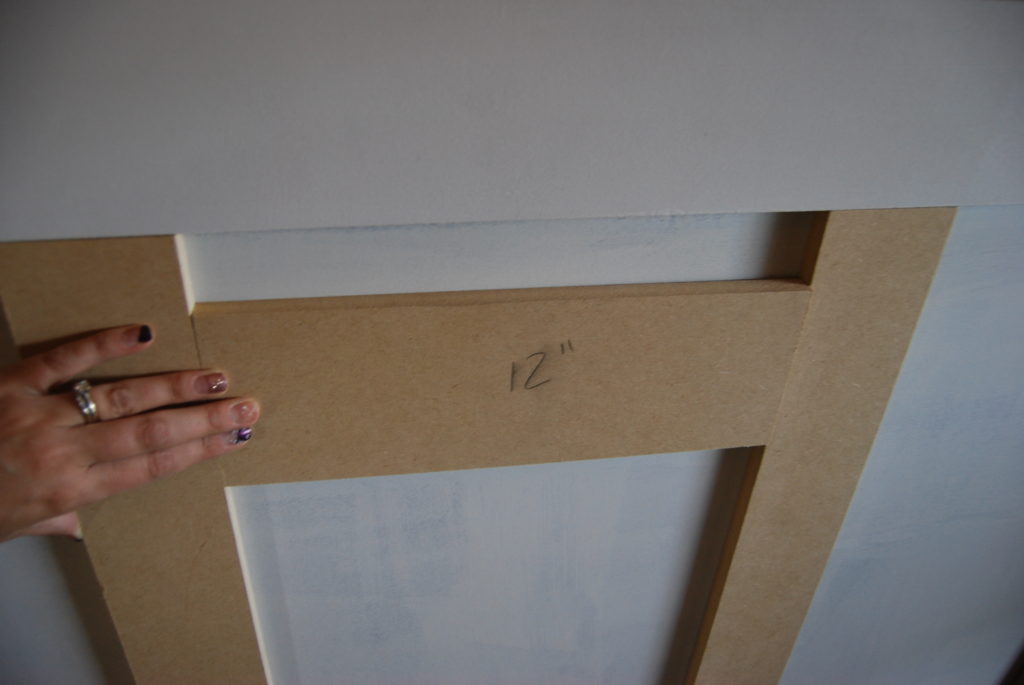
- To figure out the vertical piece spacing I cut a couple sample pieces and tried them out with different spacing. It seemed like 12″ seemed about perfect. I used a pencil to mark a X along the wall where every piece would sit to make sure that spacing worked well for each wall.
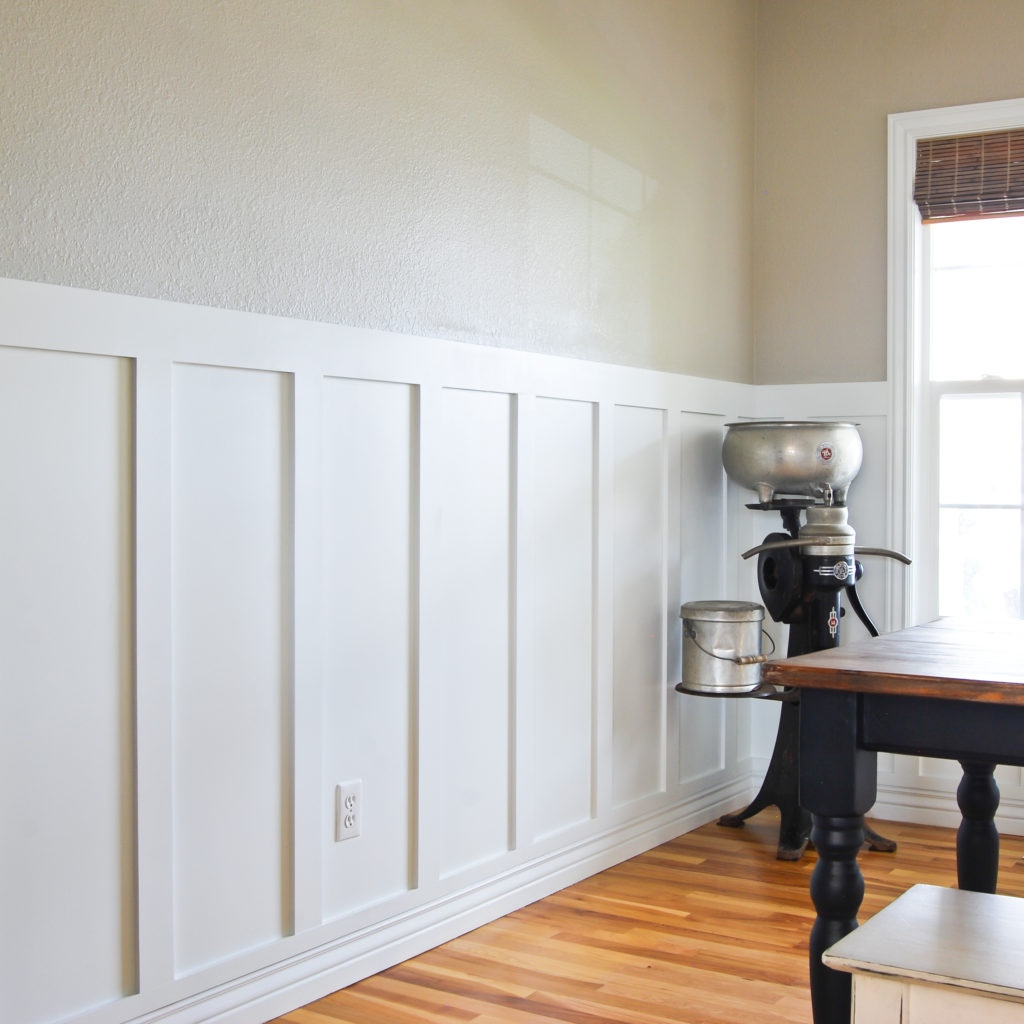
- Lastly, I determined how wide I wanted my pieces to be. Visually I liked a 4″ width for the top piece and 3″ pieces for all the vertical.
- To avoid removing the existing baseboard, I planned to use a 1.5″ wide mdf piece to run along the top of the baseboard to give an edge for every vertical piece to rest on.
Below you can see the layout of the design before we move to the actual steps. This is not a difficult project, but does take a little planning. Let’s get started!
TOOLS and SUPPLIES
- Table saw (for ripping mdf and cutting hardboard to size)
- Jig saw (for cutting hardboard openings for outlets, switches, etc)
- Nail gun and nails
- Level
- Tape measure
- Screw driver (if installing electrical box extenders)
- Wood glue (for scarf joint)
- Paint roller and pad
- Paint brush
- Caulk
- Wood filler/spackling
- Paint
- 1/2″ MDF ( I needed 2 full sheets)
- Hardboard paneling (I needed 4 sheets)
- Box extenders
1: Extend outlets and light switches
This first step is only necessary if you are planning on installing hardboard panels along walls. If you are going to nail the horizontal and vertical pieces straight to the wall this won’t be necessary.
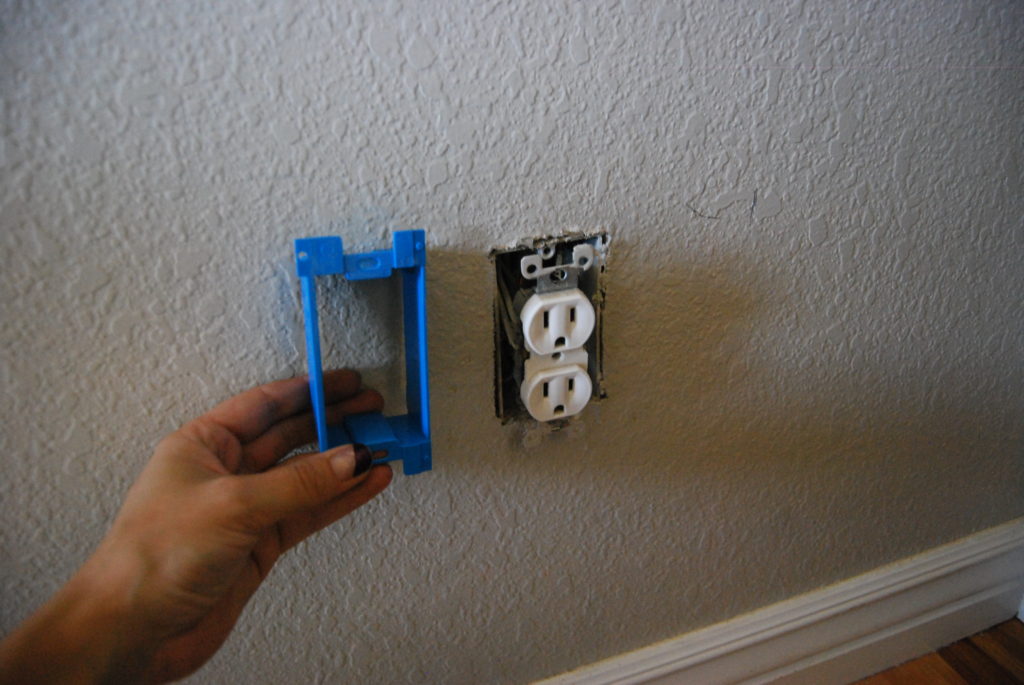
Make sure you take all precautions before starting any electrical work, like turning the breaker off to cut power of the room you are working in. (note: I am not a certified electrician and am only sharing what I did as reference.)

Screw the box in to the depth you need to bring it flush with the hardboard. Only needed to extend about 1/4″. These are the box extenders I used.
2. Install hardboard
Since I wanted to have a smooth surface between my vertical pieces (versus painting walls in between pieces), I used this smooth hardboard which comes in 4×8 sheets. I wanted the finished look to be around 4′ up the walls so was able to nail the hardboard as is, resting it on top of the existing baseboard. If possible try to nail into studs.
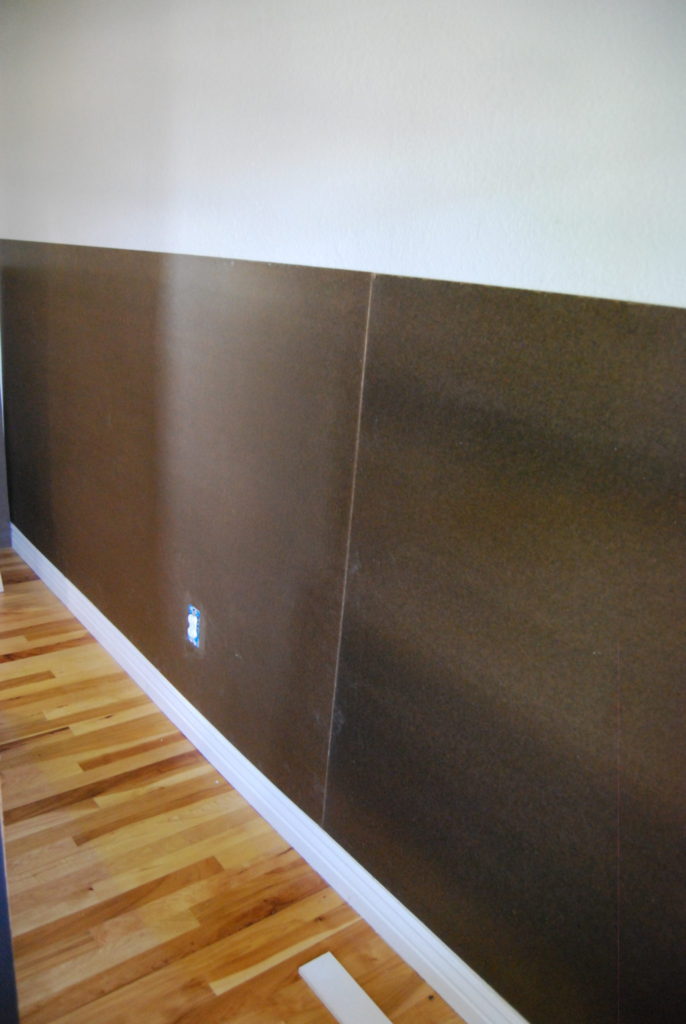
Use a jig saw to cut the hardboard around electrical outlets, switches, etc.
3. Rip MDF for horizontal and vertical pieces
There are several ways you could create the look of board and batten. I chose to use 4×8 sheets of 1/2″ MDF ripped on a table saw to the different widths I wanted. A couple advantages of using MDF…
- Consistent smooth finish. Using real hardwood would mean possible knots, bows, warps, variance in thickness, etc.
- Can choose whatever width you want! Because you are using a large 4×8 sheet you can rip a piece to whatever size you want and are not limited to the standard sizes.
- Cheaper! If I would have used real hardwood or precut mdf I estimate it would have cost 2x as much.
- 1/2″ mdf is a shallower profile than 3/4″ material which looked better for where the board and batten met existing window trim and baseboards.
I was able to use 2 pieces of 1/2″ 4’x8′ sheets for the whole space! But how much you need will depend on how large your room is and your design. Prepare for lots of dust when you are cutting this stuff!
- Top pieces: 4″ wide
- Vertical pieces: 3″ wide
- Bottom pieces: 1.5″ wide
4. Install top and bottom pieces
Use a nail gun to install top board (4″ wide) over the top of the hardboard. Use a level as you go to ensure everything is straight and square. If you have a wall longer than one piece use a scarf joint to put two pieces together. (If you don’t know what a scarf joint is watch this video)
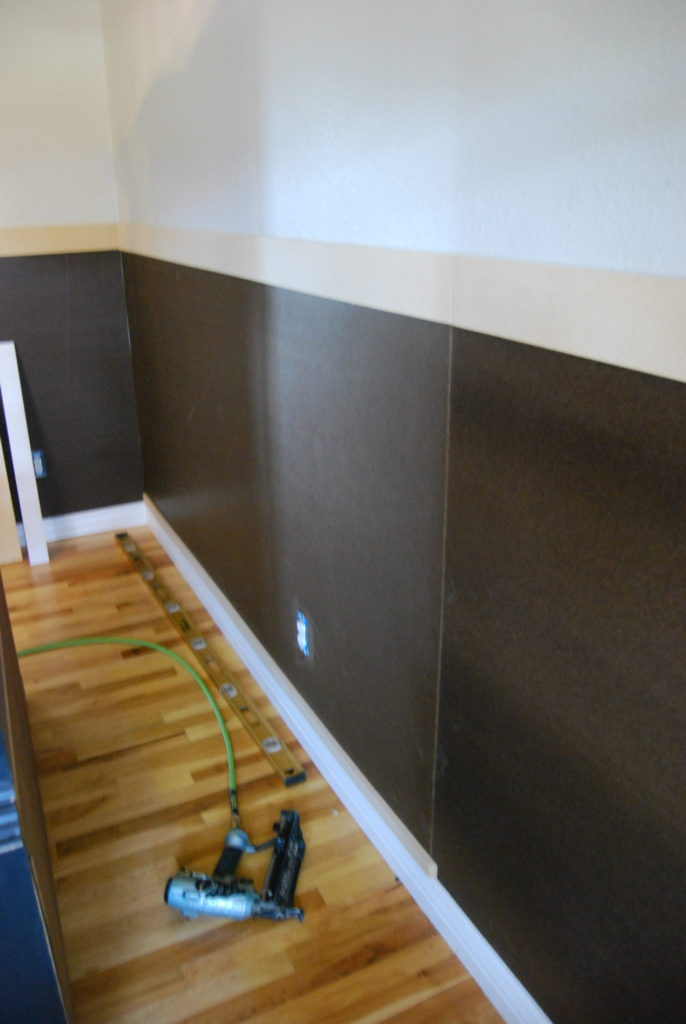
Do the same thing for the bottom 1.5″ piece. This is an optional step, but unless your existing baseboard is 1/2″ thick the vertical boards may look odd resting on top of thin baseboard. Here is a close up of the finished look.
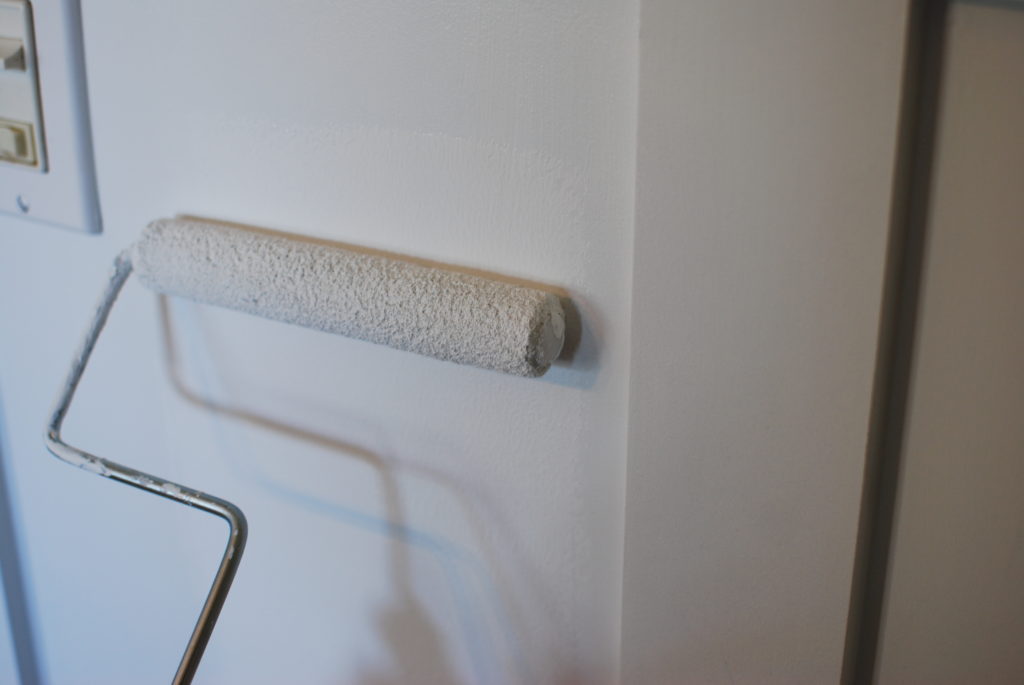
5. Paint 1st coat
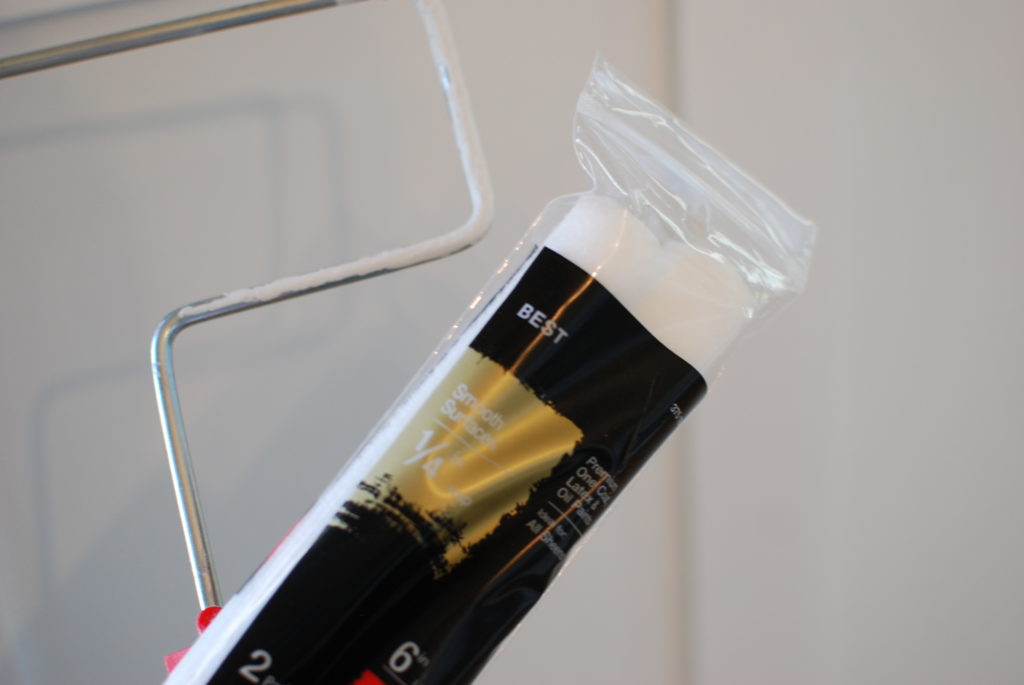
Before installing the vertical pieces I chose to do one coat of paint on the hardboard. I used a mini roller with a smooth finish pad. It was quick and did a great job!
Tip: wrap your roller in a plastic bag and store in the refrigerator til you need it for the next coat. This keeps it from drying out between coats without having to try to wash out the roller.
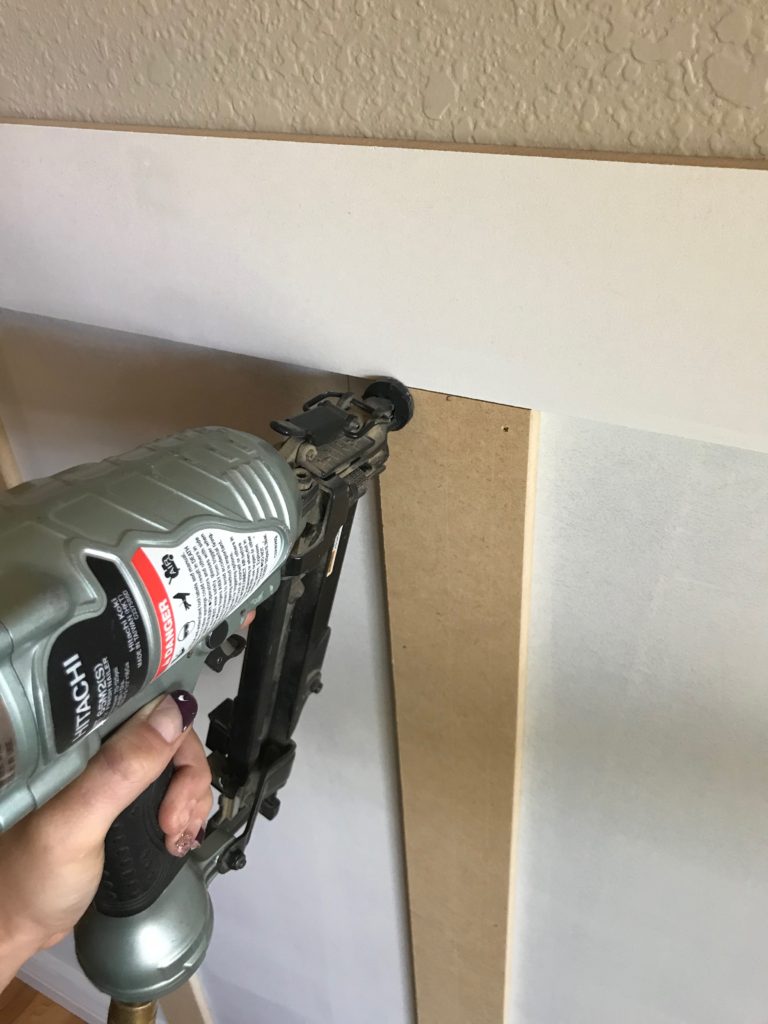
6. Install vertical pieces
This is the step where the design really comes together!
- Cut a spacer to help you space out each piece. My design had a 12″ gap between each piece so I cut a block 12″ long to use as my spacer.
- Use a level to make sure you install each piece straight.
- Install with a nail gun and 1 1/2″ to 2″ nails. (Keep in mind the more nails you use the more holes you need to fill before painting)
7. Add trim below window
This step may not apply to most people, but after I finished the board and batten I could not get over how odd it looked below my windows. I decided to add some window trim below to create a stool that looked connected to the rest of the window. See pictures below.
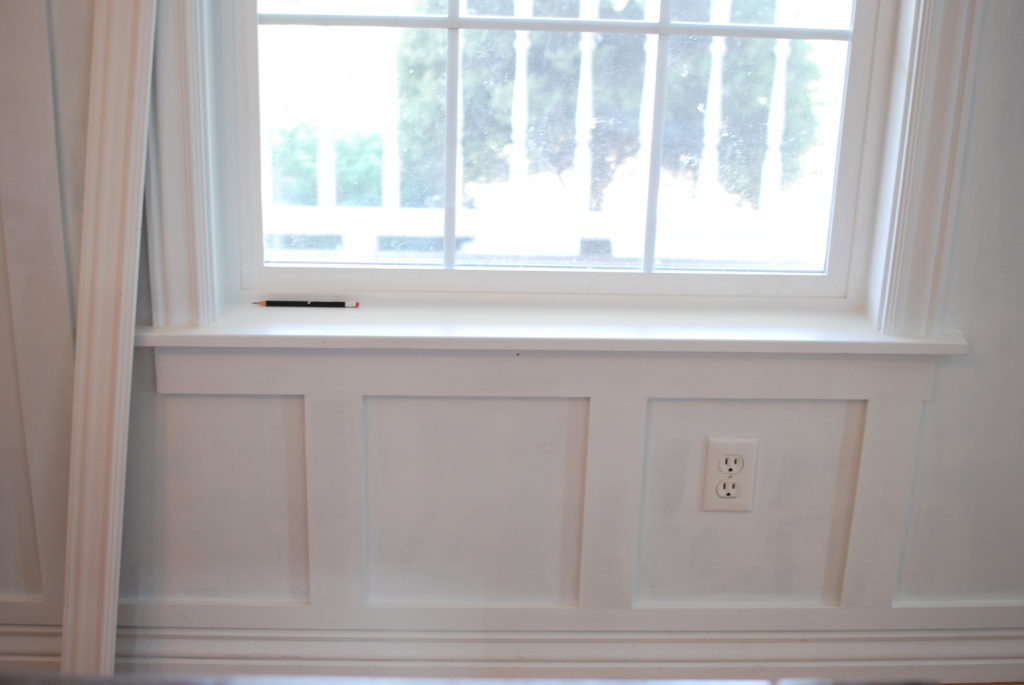
I did not like how the vertical pieces were not centered under the window even though they were spaced correctly.
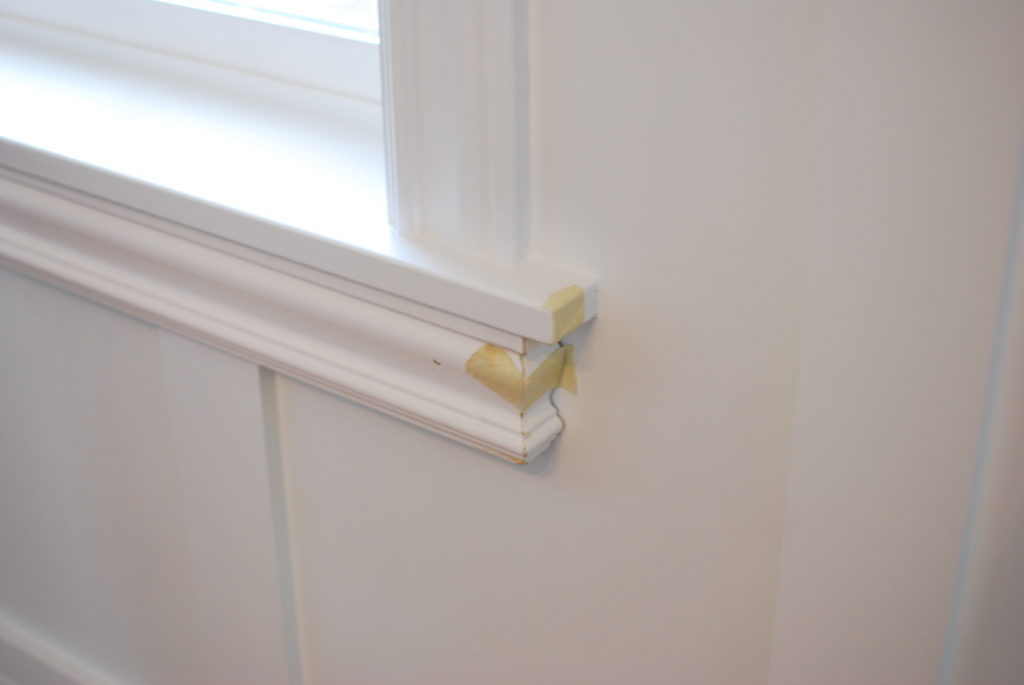
Added a trim piece with return (taped and glued in picture) over the existing mdf board that was under the window. Much better!
8. Caulk and fill holes
This step is so important to make all the hard work payoff!
- Take your time and fill each nail hole with wood filler or spackling.
- When the filler is dry sand smooth with fine sandpaper (220 is good)
- Use a paintable caulk along all the seams. (vertical pieces and horizontal)
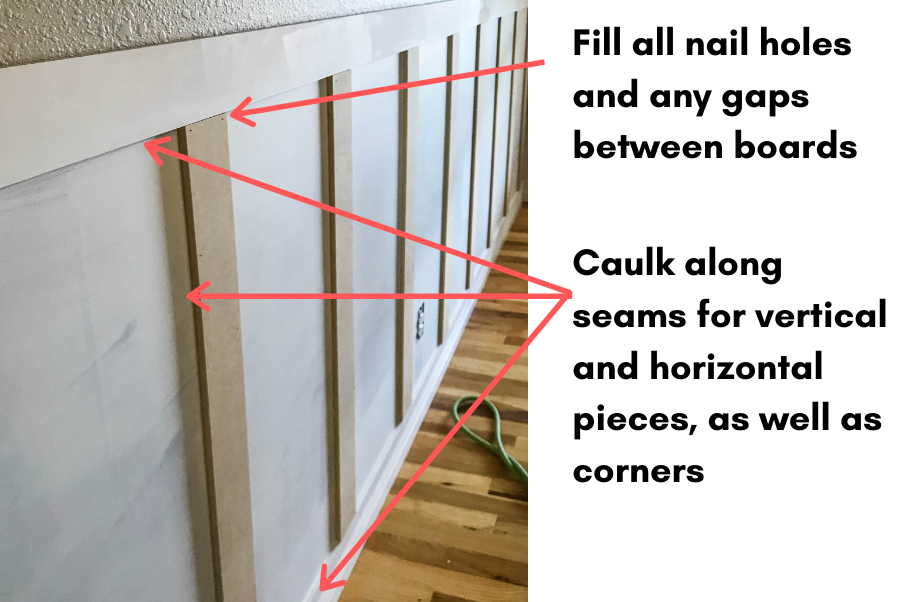
Use caulk in corners where hardboard meets each other.
9. Paint and paint!
I used a brush for corners and the same mini roller from earlier to apply 2-3 coats of paint. I chose a satin finish because this is a dining room and wanted something that would clean up a bit easier than an eggshell finish.
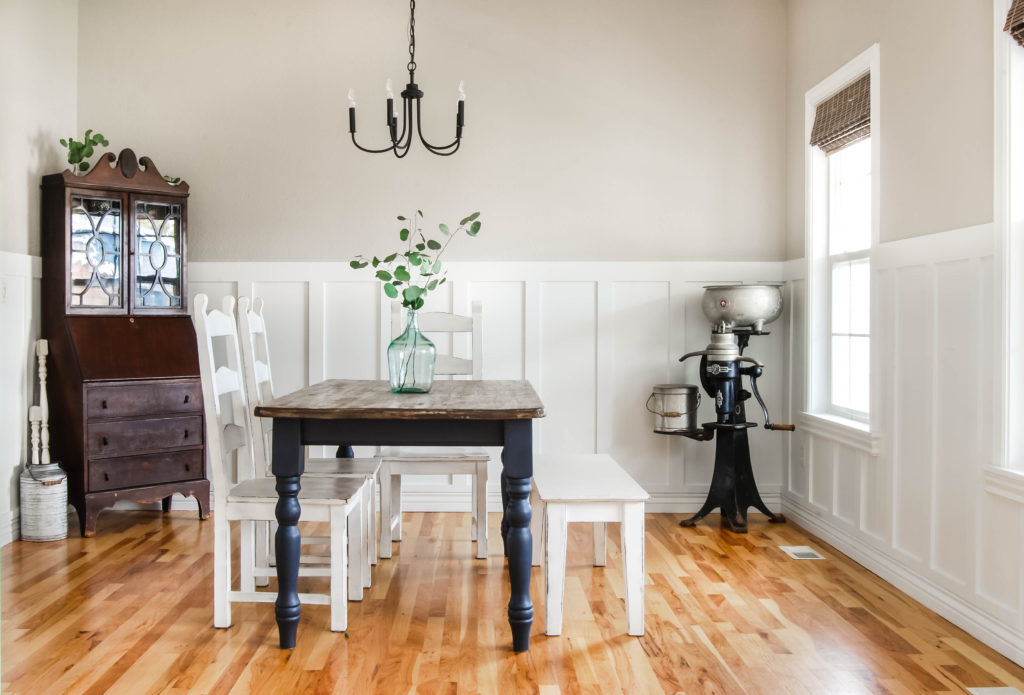
And the finished board and batten…
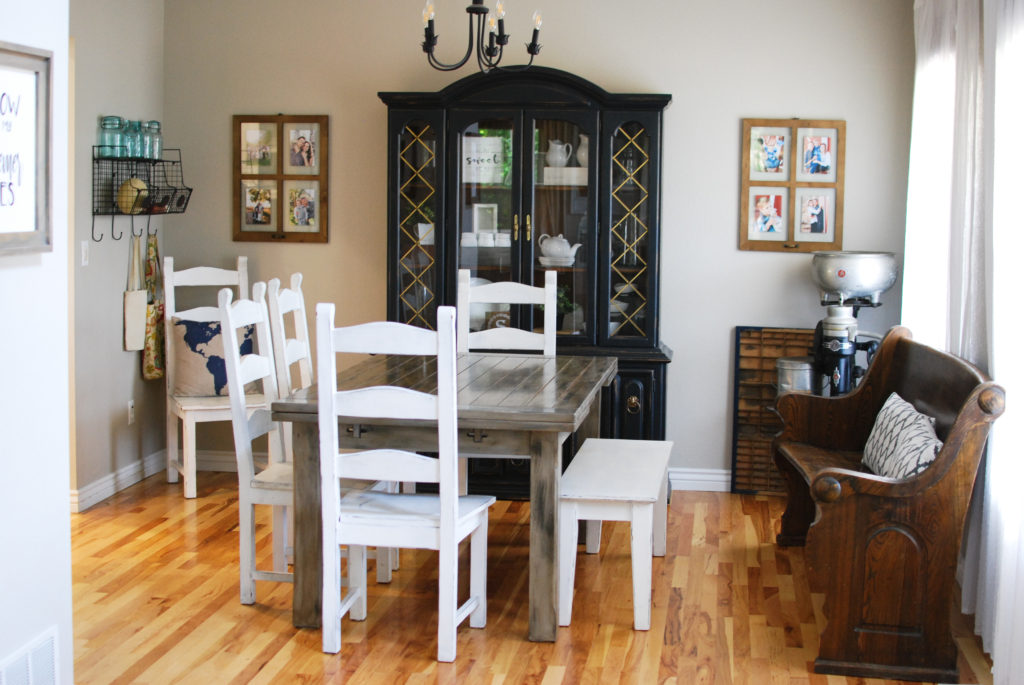
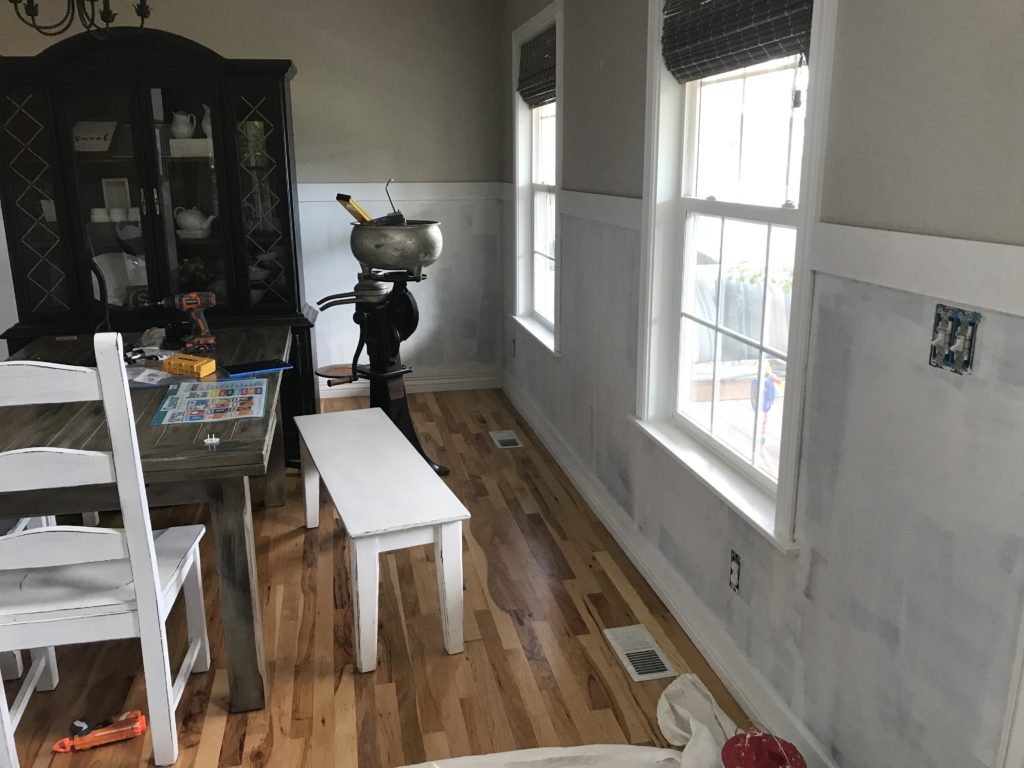
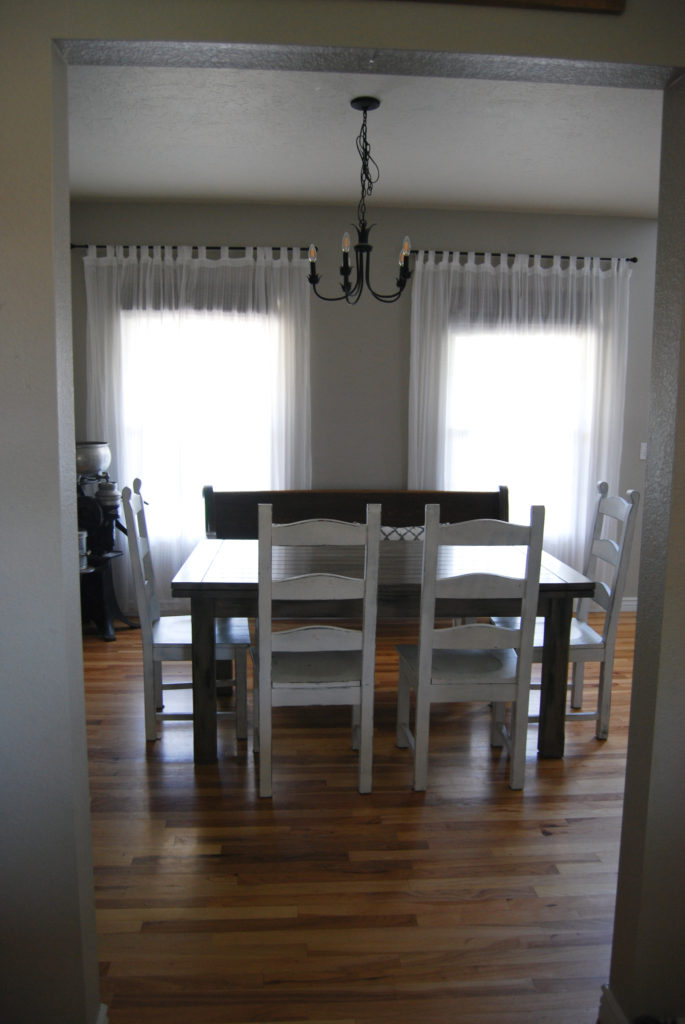
Some looks of the before…
AND AFTER…
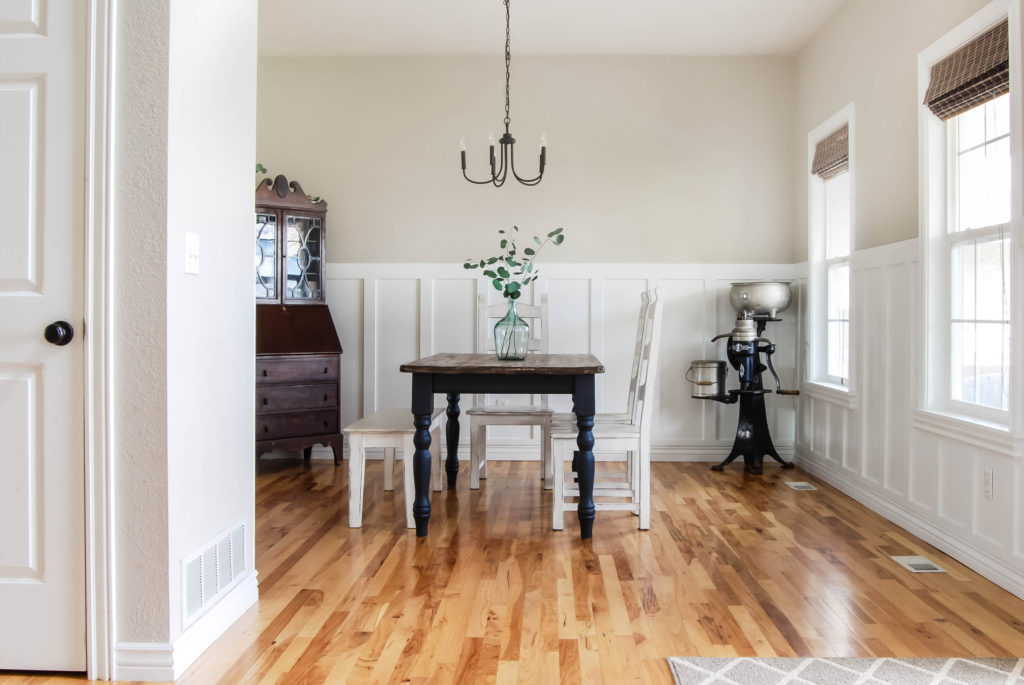
The room is significantly brighter!
Board and batten dining room update summary
I am thrilled with how this project turned out! This space is brighter, more inviting, and has a simple clean look. My takeaway thoughts…
- Project cost: board and batten cost me less than $140. Our dining room is roughly a 13×13 room. If you chose to NOT use hardboard but installed straight on top of drywall this could have been done for closer to $90 bucks.
- Tools: very few tools necessary (tool list below)
- Difficulty: once past the initial design of a layout plan, this is a very easy project. Straight cuts, easy install.
- Time: this project took me about 2 weeks. Keep in mind I have a very full schedule, little children to care for, other responsibilities and worked on it alone.
What do you think? Would you considering adding board and batten to a space in your home?
Emily
This looks great! I am working on a similar project – i’m wondering, did you space your hardboard panels exactly so that a batten would cover and seams? I’m not sure how to cover the place where two hardboard panels meet on one wall (not in a corner where caulking would work)
I did not exactly space the hardboard seams to be covered by a vertical piece, I tried to get a couple of them covered but could not get every one. I have a couple seams that you can see a bit if you are really looking for them but they are smaller because they are under the windows. If I did it over I would try to space it out better to ensure all the seams were covered. Putty and caulk hides them pretty well though.
Hey! Would love to know the color of the top part of this wall – its aweseom!
Sorry for the slow response. I wish I could give you a name for the paint. It’s a custom color based off of Behr color “Wheat Bread”. It had a little too much of a pink undertone so I had the store tint it, which makes it hard to tell you for sure what it is. I would suggest Wheat bread or I think its also similar to SW Agreeable Gray.
Absolutely beautiful! I especially love how you met up with the baseboard. I have read countless tutorials and really like that idea. We are in the planning phase right now and your article really helps. Thank you.
Did you 45 the MDF and hardboard where it meets in the corners of the room?
I did not do a miter in the corner with the hardboard or the MDF. If there was an outside corner I probably wood have though.
Why did you choose 12 inches between vertical boards? My studs are 16 inches on center so I measured 16 inches between vertical boards. Does that work?
Hi! I chose to space my vertical pieces 12″ because I liked the look of that gap and also it worked the best for where my outlets and air returns were located along the wall. I think you can pick whatever spacing suits you the best. I was not concerned about nailing into a stud for the vertical pieces. Good luck with your project.