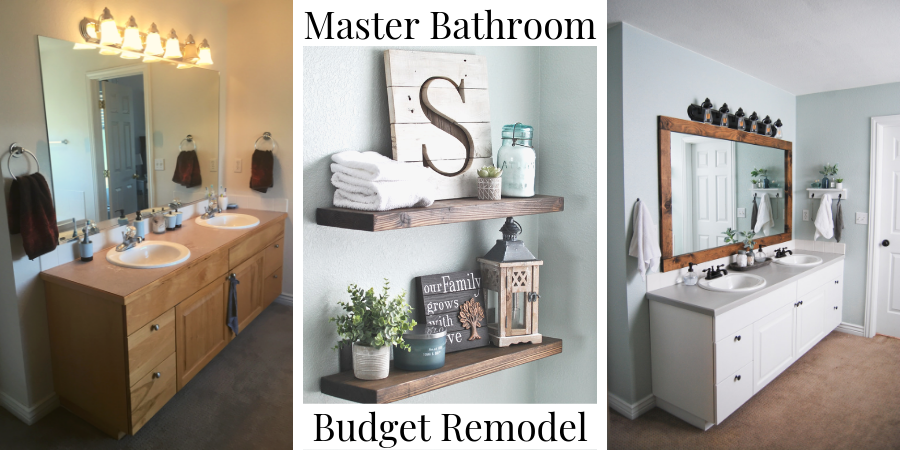
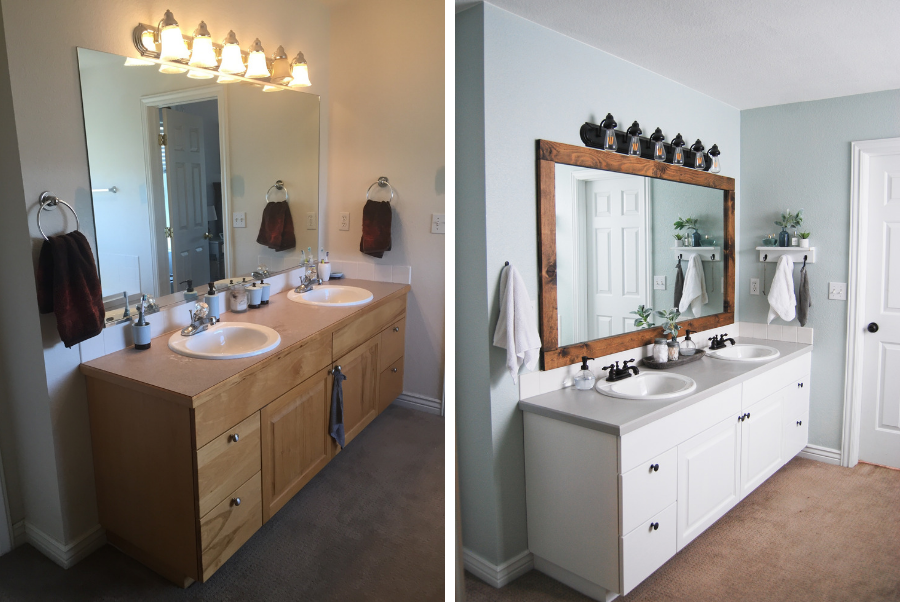
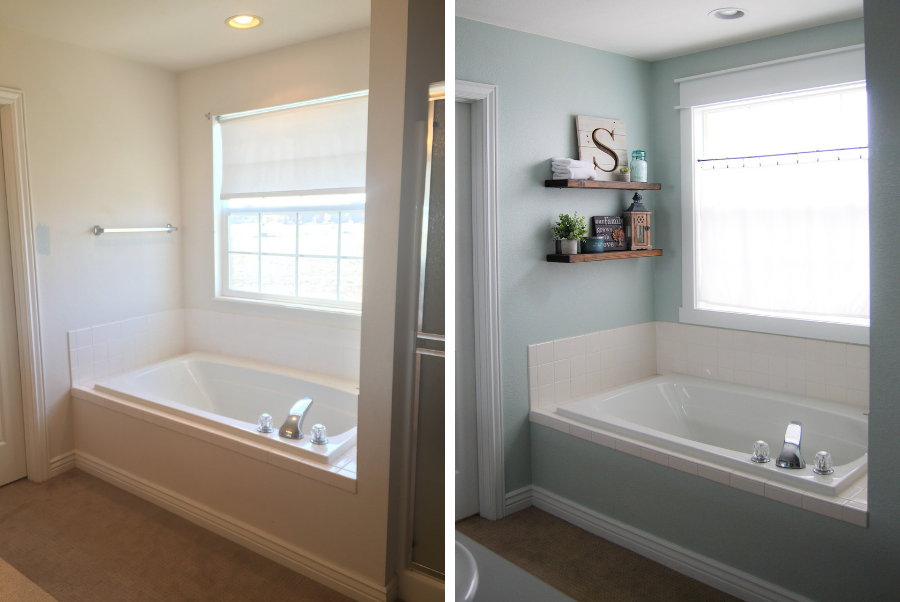
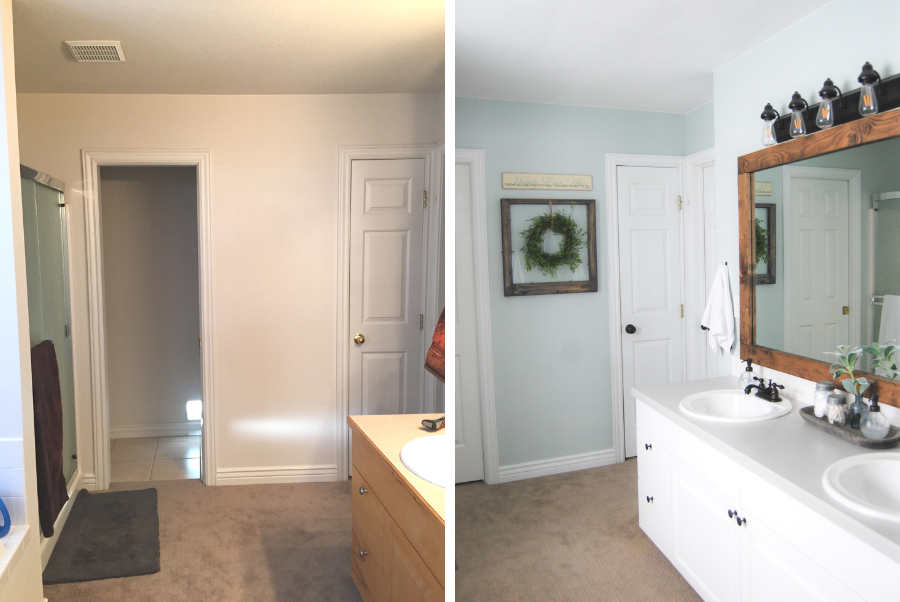
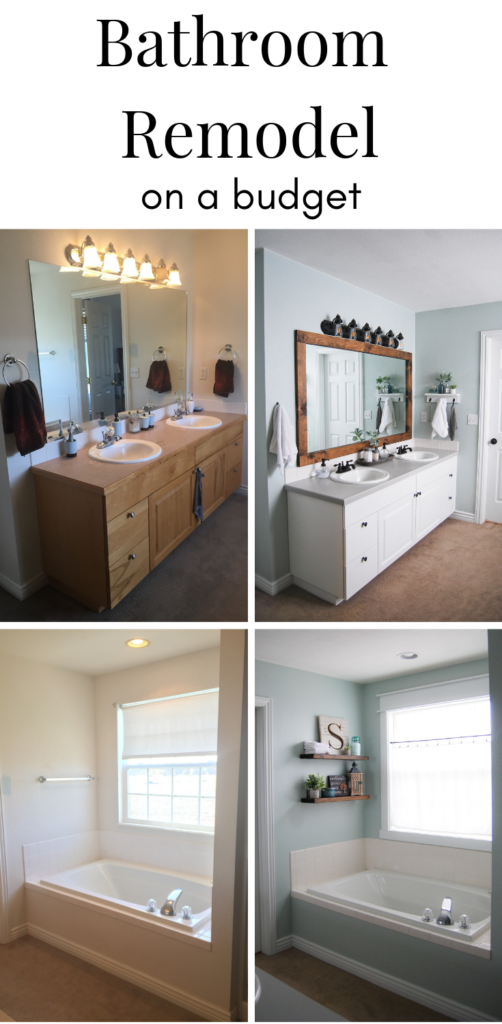
I am slowly chipping away on my Master Bathroom Remodel project list. The list is a long one, but working on a tight budget and a limited amount of time, always helps prioritize a list. First, take a look at the before photo below!
My starting point…
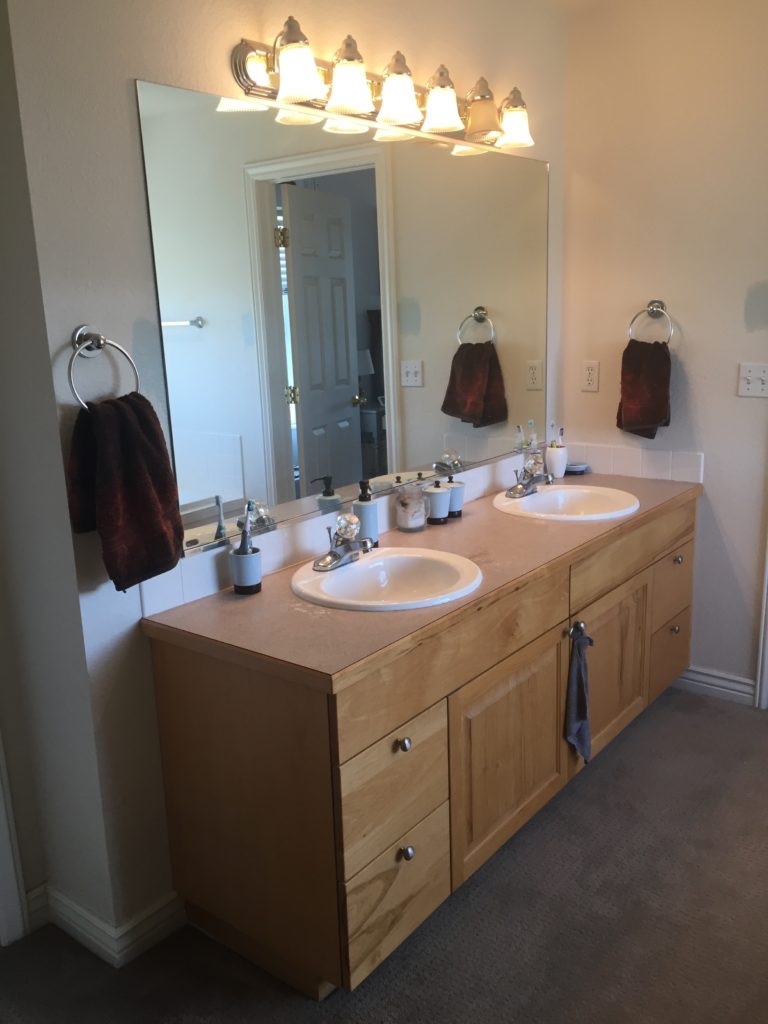
Okay my dream master bathroom remodel would have a new vanity, light fixtures, double mirrors, definitely not pinkish counter tops and NO CARPET IN THE BATHROOM! However, I don’t have enough money in the budget to do all those things today.
With every remodel or update project, it is important to determine what you can change and what may need to stay. In addition to a budget, I let my time and skill set determine what stays as is, what is replaced and what gets a facelift. Look at how I divided my list for our Master Bathroom Remodel.
What stays as is?
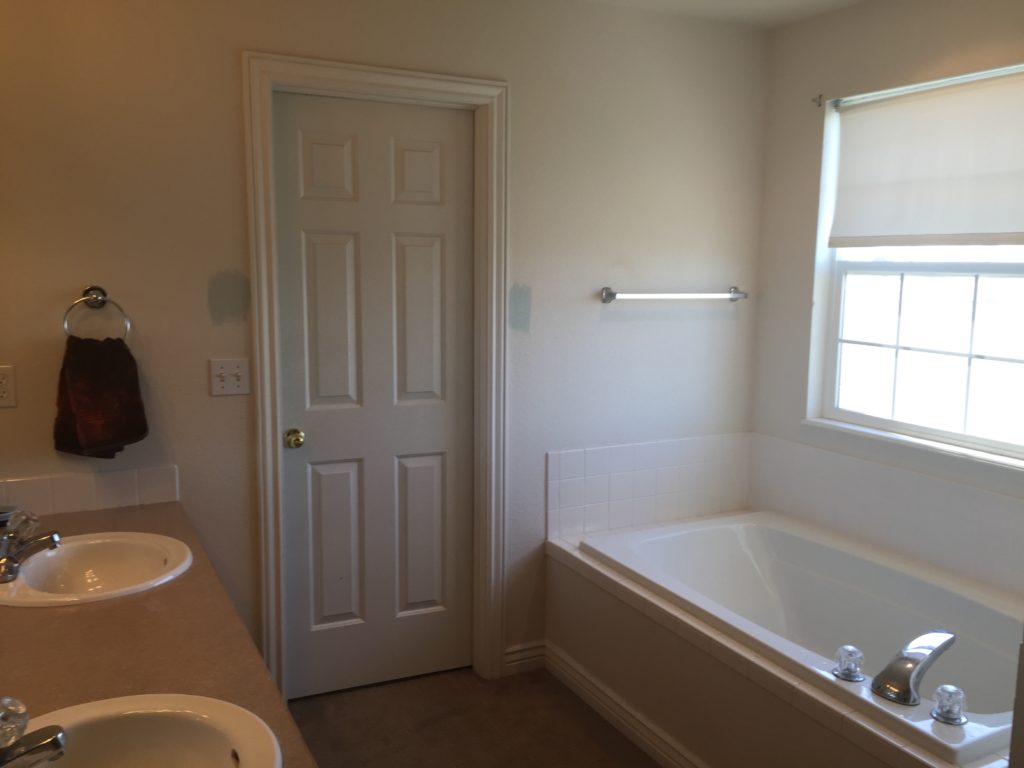
- Big fixtures. As a result of a tight budget we won’t be replacing the tub, sink, toilet, etc. Plus they are all in good working condition, so there is no need!
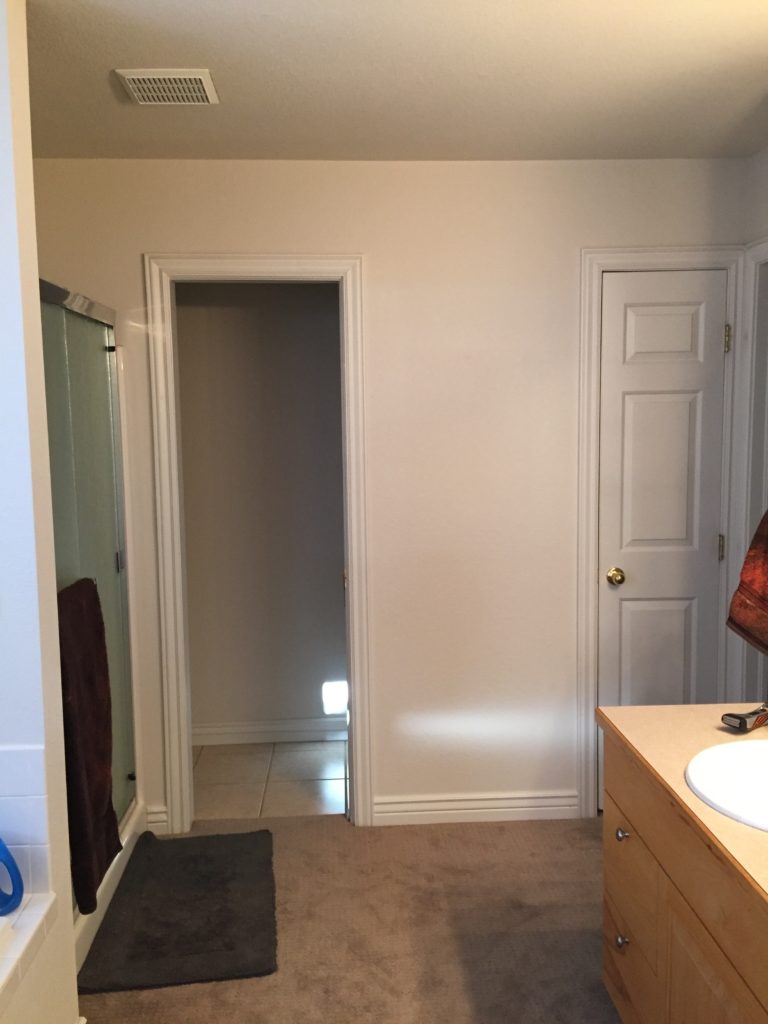
- Flooring. This kills me but for the time being the carpet stays. Hopefully, this will change over the next several months, in the meantime I will live with it like I have for the past 3 years!
- Shower. A tiled shower would be beautiful, but for now we will keep the builder grade shower.
- Tub faucet. Would love to get a new faucet to match the sinks, but other updates take priority.
What get’s a facelift?
There are so many easy ways to update existing things in a space that don’t break the budget. This is what I chose to update in the space instead of fully replace with something new:
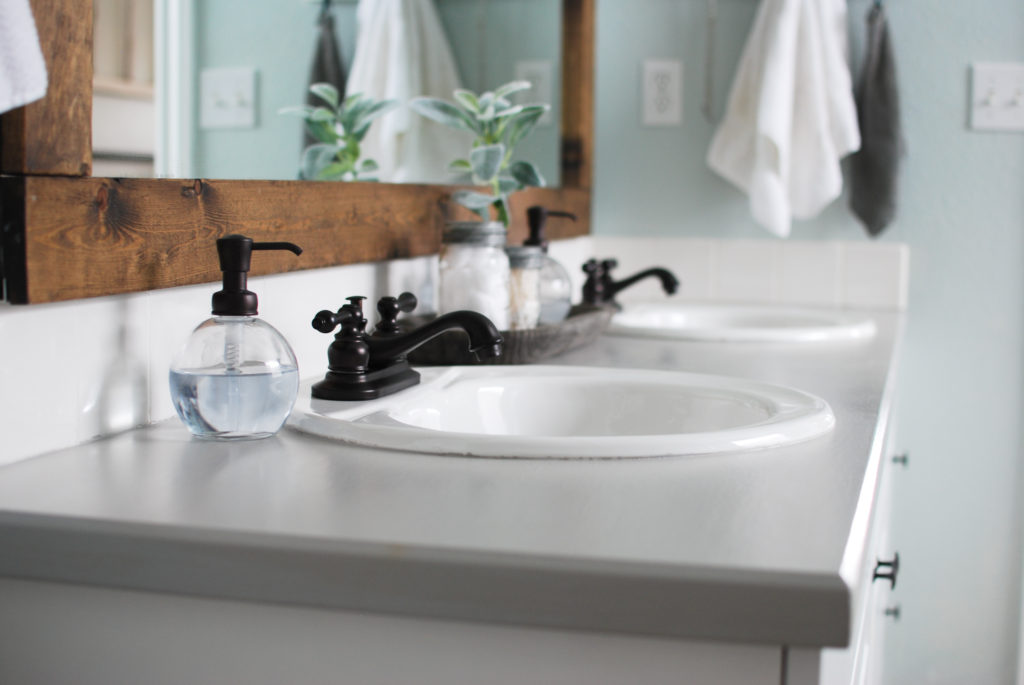
- Counter top. I painted the existing laminate and wood trim edge with Rustoleum Countertop Coating. This is not my forever choice, but it sure beats the pinkish laminate. And you can’t beat the price for $20.98
- Vanity. I used Valspar Cabinet Enamel to update the vanity to white. So much nicer! Although I had relative success with this product I prefer the process I used for my kitchen cabinet update.
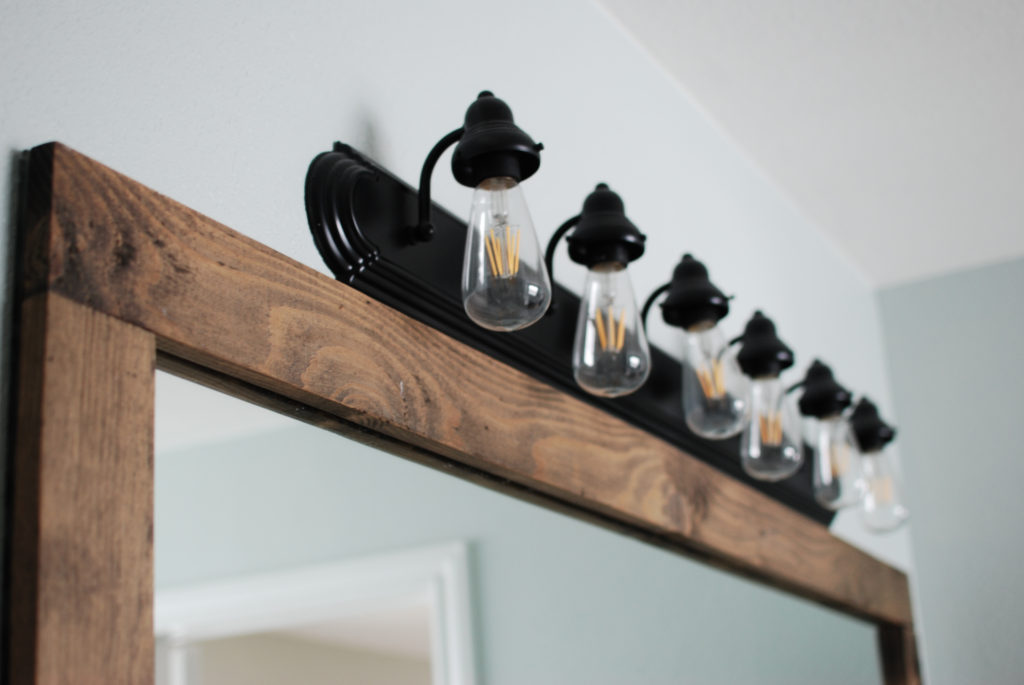
- Light fixture. I would love to replace the existing fixture with two new ones. But, I do not have the money right now nor do I feel comfortable with the electrical work to split the wiring to two fixtures instead of one. Therefore, I removed the glass globes and spray painted the existing light fixture.
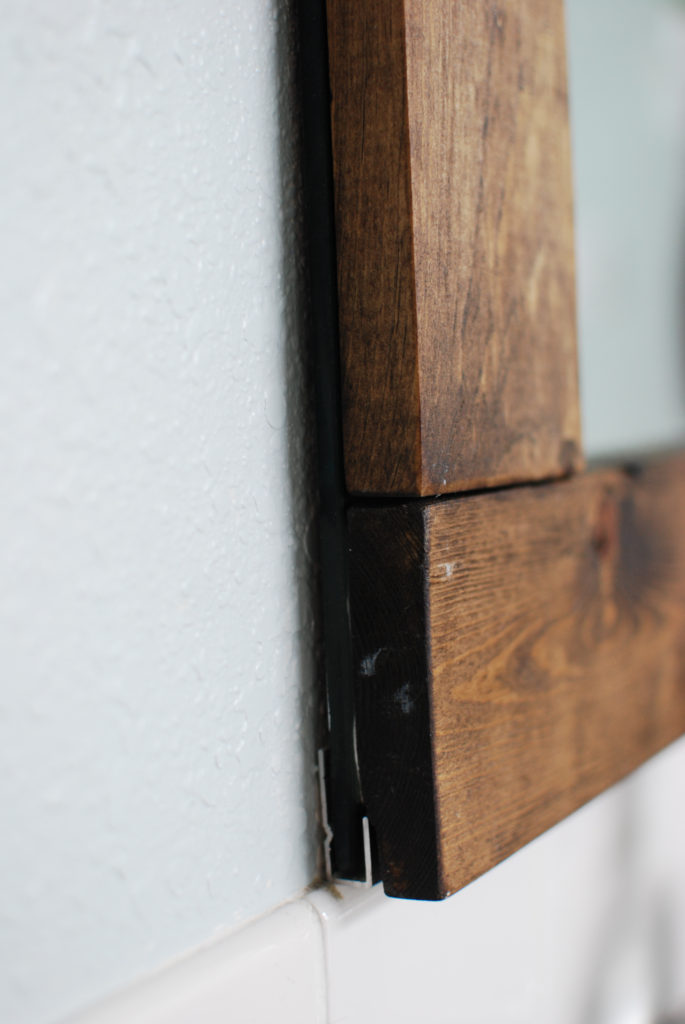
- Mirror. I glued a wood frame onto the existing builder grade mirror and will call it good for now.
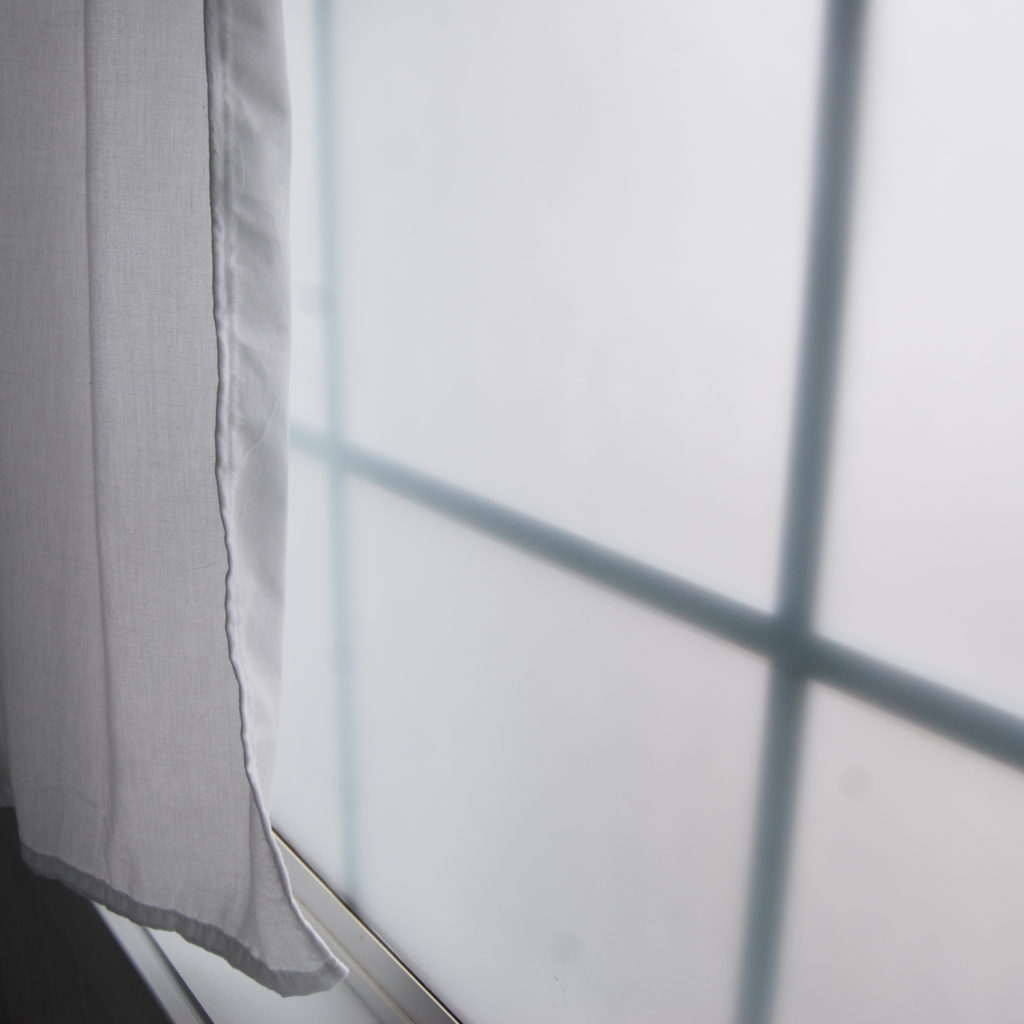
- Frosted window. We wanted a little more privacy, however we did not want to lose any light. I sprayed the window over the tub with Krylon Frosted Glass. I finished the window out with a half curtain made from an old sheet.
What is new in the Master Bathroom Remodel?
- New sink faucets! There is not much you can do in way of updating the existing chrome with crystal knob faucet, as a result they have to be replace completely. I found these new ones on wayfair. I used the same ones in my hall bathroom mini update.
- Wall color. I painted all of the walls Sherwin Williams Sea Salt.
- Towel hooks. I removed the chrome towel bars and rings then added hooks for our hand towels.
- Trim around window. I added white trim around the window over the tub, which certainly was not necessary but I think added a lot of interest!
- Vanity hardware. I bought a large pack of black knobs for another project and had extra to use in here!
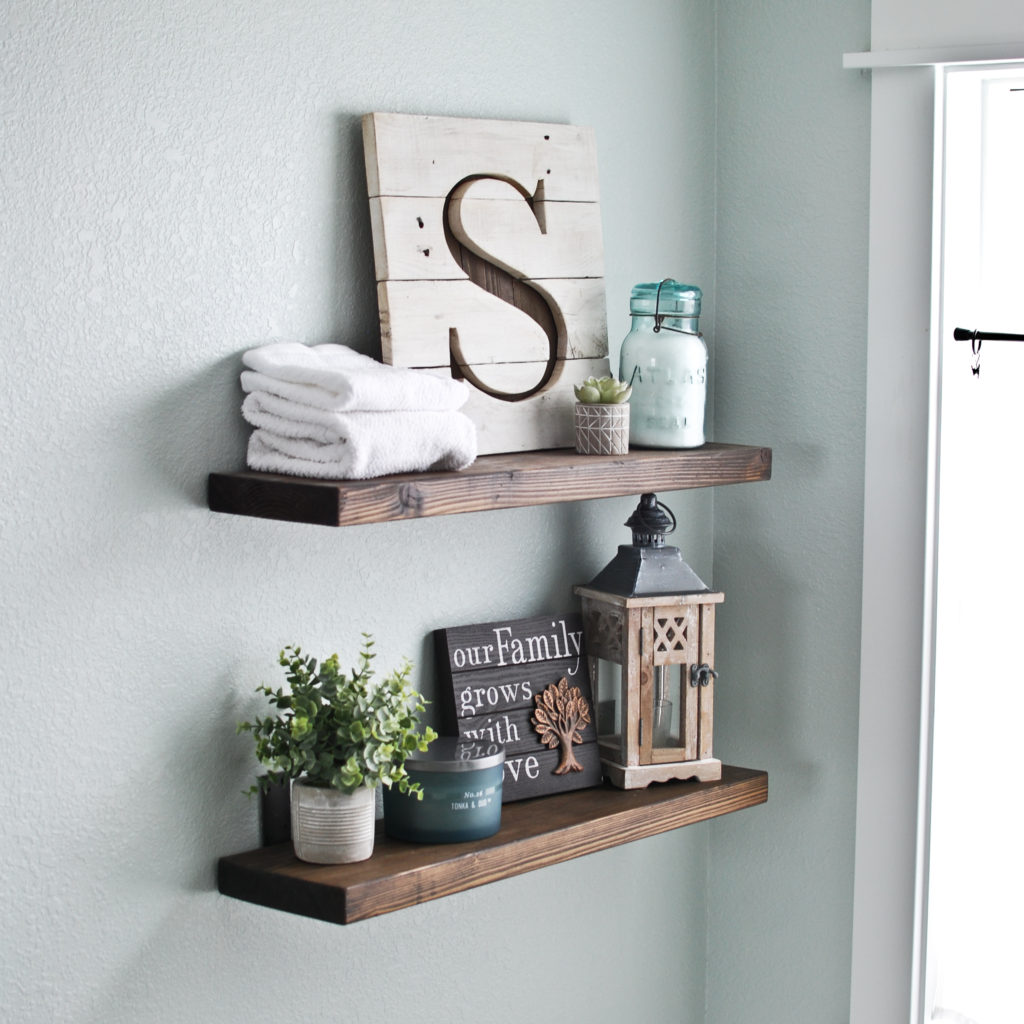
- Floating shelves. Some scrap wood and metal corner brackets are all it took to add decor shelves above the shower.
After pictures…

My budget so far
I ran some rough numbers on what I spent so far in this remodel. So far I have spent less than $300! I consider this a huge win. After all, I spent a third of my budget on new faucets!
What is next?
I have several other ideas in mind for this space and will try to give some more detailed explanations and tutorials moving forward. Often I am guilty of starting a project on a whim and don’t always take pictures or write down the steps I followed. If you have any questions about any part of this remodel so far, let me know!
Next priority for this space is new flooring! Stay tuned!
Emily
I LOve, loVE, LOVE your remodel! Our homes must have been built in the same era. I have the same fixtures and can’t wait to apply your ideas. Thanks so much for posting this!
Thank you! Yes it’s amazing how some small changes like updating fixtures can change the space.
I love seeing the before and after comparisons! It’s crazy how big of a difference those changes made. It’s so beautiful and feels really calming now
Thanks! Before and after pictures are my favorite because I can easily lose sight of the progress that has been made!
What kind of glue did you use to attach the frame to the mirror?
I believe I used liquid nails, but it might have been loctite power grab. Both are sold at lowes or home depot and are similar. Sorry I wish I could remember exactly.
Love what you have done. Did you take down the light fixture to spray paint it or did you carefully tape paper around the area before spray painting.
Thanks in advance.
I took the light fixture down to spray paint. It seemed like the easier option for this type of light fixture.
What color gray is your countertop?
Hi! I believe it is the Light Ash. It is the lightest gray color.
I love love love the remodel!!! Did you stain the wood frame? If so, what color or where did you purchase it? Can’t wait to get started on ours!
Yes! I did stain the wood frame! Minwax Dark Walnut I believe from Lowes. Best luck on your own remodel!
How is the countertop paint holding up?? Did you have to prime it or put a top coat on?
Hi! Overall the countertop is holding up okay. It is not perfect. There are a couple spots where I have chipped it. Also a spot I stained because something spilled at sat there for maybe a week before I cleaned it. For the amount of effort and cost I put into it I am still pleased, even though it has some imperfections. I did not prime it or top coat. The rustoleum product was an all in one specifically for laminate countertops. Let me know if you have other questions!
LOVE this!! When gluing the wood to the mirror, did you have to take the mirror down?
I left the mirror in place and glued the wood straight to it, using masking tape to hold it in place while the glue dried.
This turned out beautiful Emily! I love how you were able to work with the existing fixtures tom completely freshen up this space. Great job!
I absolutely love what you did with the mirror and light fixture. I’m definitely going to do something similar. We actually came into a little bit of money with our tax return this year so we brought in a cabinet door replacement service to fix up the cabinets for us. Now we just want to make a few more updates on our own to complete the look, and your blog has definitely given us some inspiration and motivation to get it done. I can’t thank you enough for sharing.