DIY Shiplap Sign
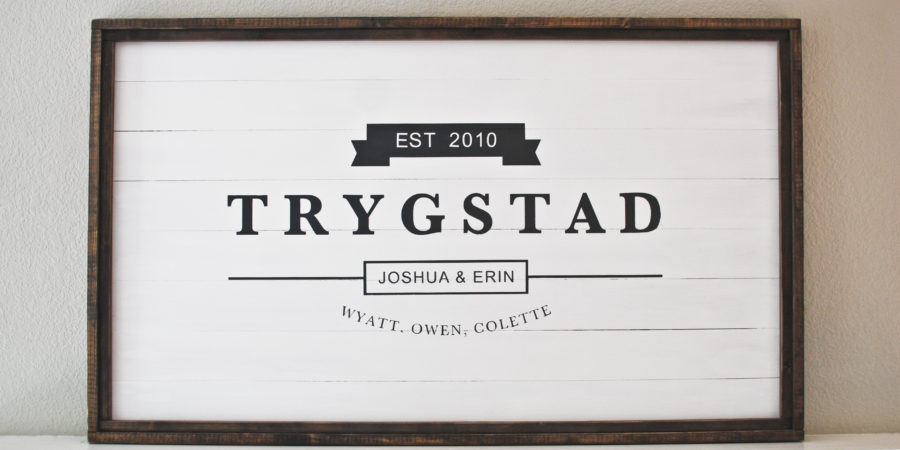
Hello! It is time to share the latest sign in the Sign Series! This particular one, may be my favorite yet because it is another shiplap sign! A really dear friend asked me to make a family sign for her new home and I was honored to do so.

(The design itself was inspired by a picture she sent me of a similar sign she found, so I take no credit for the design. ***Update: the design came from Two Daughters Heirlooms. They have beautiful work you should all go check out!***
I love the farmhouse look of this sign, with its crisp black lettering on a white shiplap background! The last sign I made “Always and Forever” also had shiplap planks, but they were the real deal. This sign uses fake shiplap, which you will learn about down below.
This tutorial will show you how to make the shiplap background and wood frame. I used my silhouette cameo to cut a stencil on contact paper for the lettering. I won’t be sharing the cut file or a pdf template like I have for other designs, simply because this sign is personalized for a specific family with their names.
How much will this cost?
Before jumping into a new project you may want an idea of how much it will cost you. Take a moment and look at my cost sheet HERE. ( I try to include everything you may need, but there is always a chance I miss something)
On average, I think this will cost most people around $18-27 to make. I have an embarrassing amount of scrap wood in my garage so I was able to make this for roughly $12.
Supplies/Materials:
- Hardboard
- (3) 1x2x8 Pine boards or (3) 1x2x8 furring strips
- 5mm plywood/underlayment- cut to 3.5 strips for “shiplap”
- Wood glue
- White paint: I used white primer
- Wood stain: I used Minwax Dark Walnut
- 3/4″ brad nails (optional)
- 1.5″ finishing nails
Tools:
- Chop saw or hand saw
- Table saw (will show an option for those who do not have one)
- Nail gun/hammer
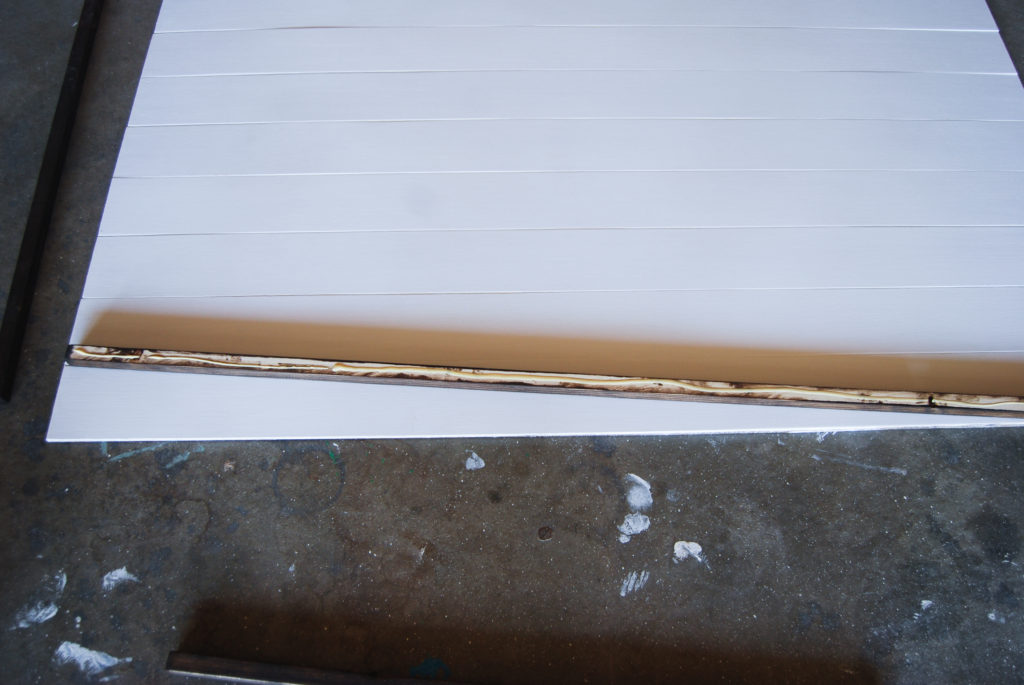
Step 1: Cut 8 shiplap strips 3.5″ x 48″
Use a table saw to cut 3.5″ strips of the thin plywood/underlayment. If you do not have scrap wood laying around this stuff comes in 4’x8′ sheets. I cut 4 strips 8′ long and then cut those in half to 48″.
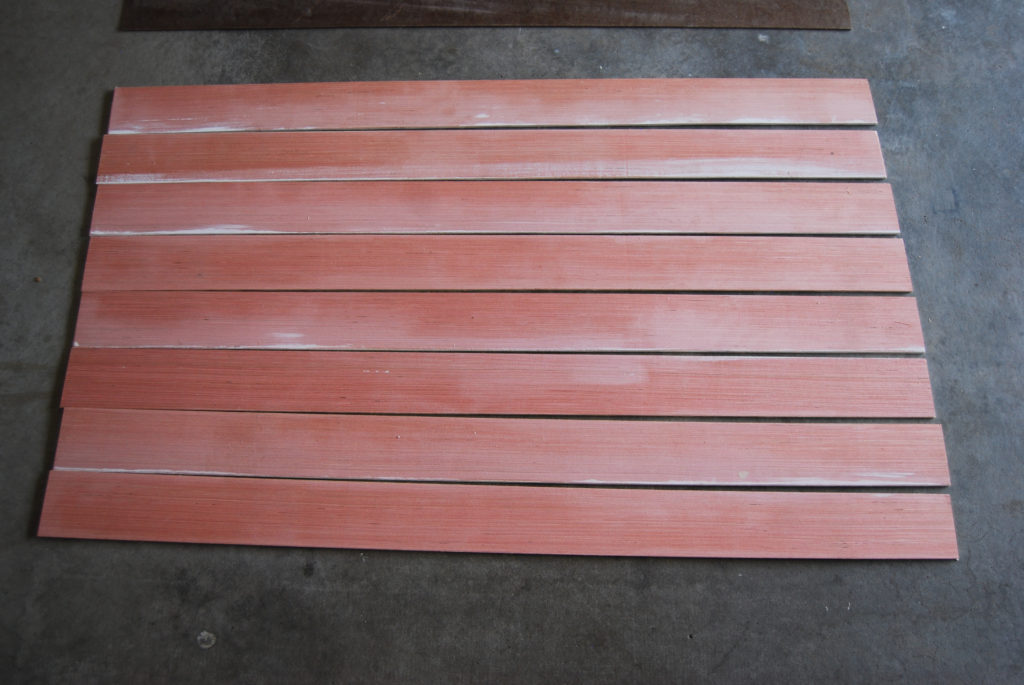
Step 2: Cut Hardboard 27 7/8″ x 48″
Next, cut hardboard to fit the size of your shiplap strips. When I pushed my pieces together they measured 27 7/8″ wide by 48″ long. Technically, if each strip is 3.5″ each it should be 28″ wide, but some of the pieces were a little thinner. This is why I suggest cutting the strips first so you can make sure you get the best and most accurate fit.
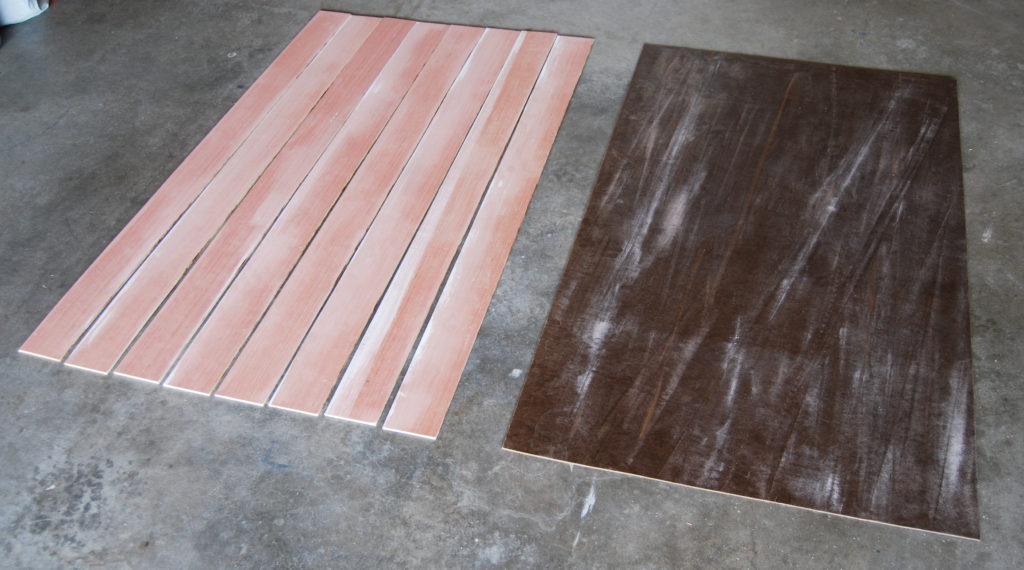
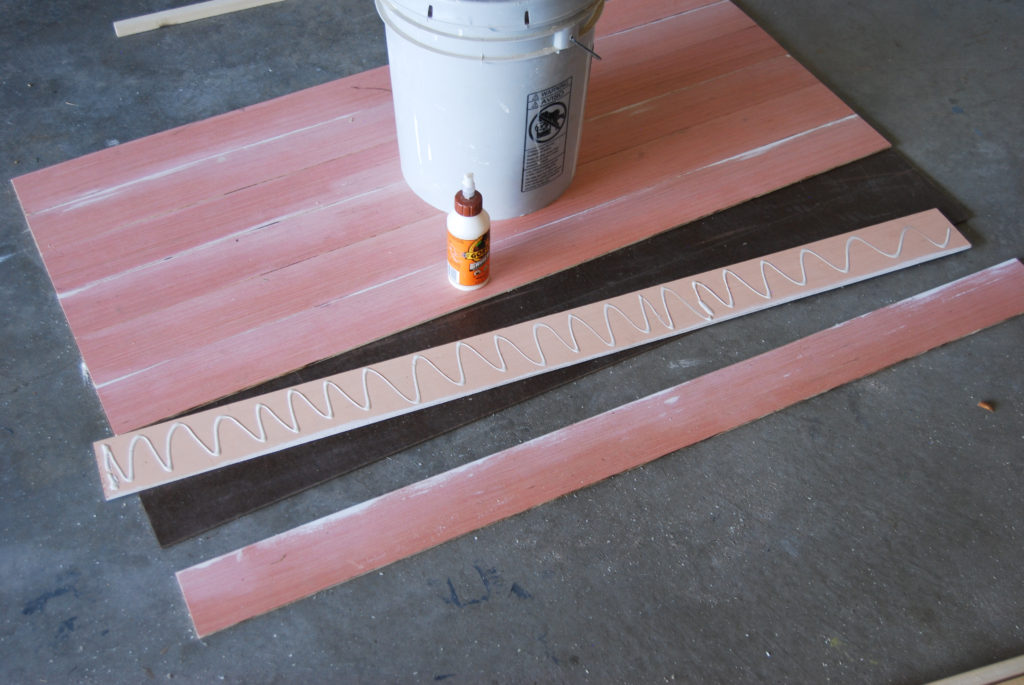
Step 3: Glue shiplap strips to hardboard
Use wood glue and attach all 8 strips to hardboard. I used a heavy paint bucket to add weight to a couple areas while the glue dried. You have now created your shiplap sign base!
Step 4: Paint shiplap
If there are any rough spots that need sanding on the shiplap, go ahead and sand those now. Then paint the whole thing white. I used some leftover white primer I had leftover from another project.
Step 5: Cut frame pieces
This frame design is simple and easy to make. No miter or angled cuts!
- Rip one 1x2x8 in half, giving you two 3/4″ pieces 8′ long. These pieces will be used for the “inner” frame. (If you do not have a table saw to rip a piece down you can just use the 1×2 as is and have a thicker frame. I made this type of frame for How Great Thou Art
- Cut the inner frame pieces: (2) 48″ and (2) 26 3/8″
- Cut outer frame pieces (2) 49.5″ and (2) 27 7/8″
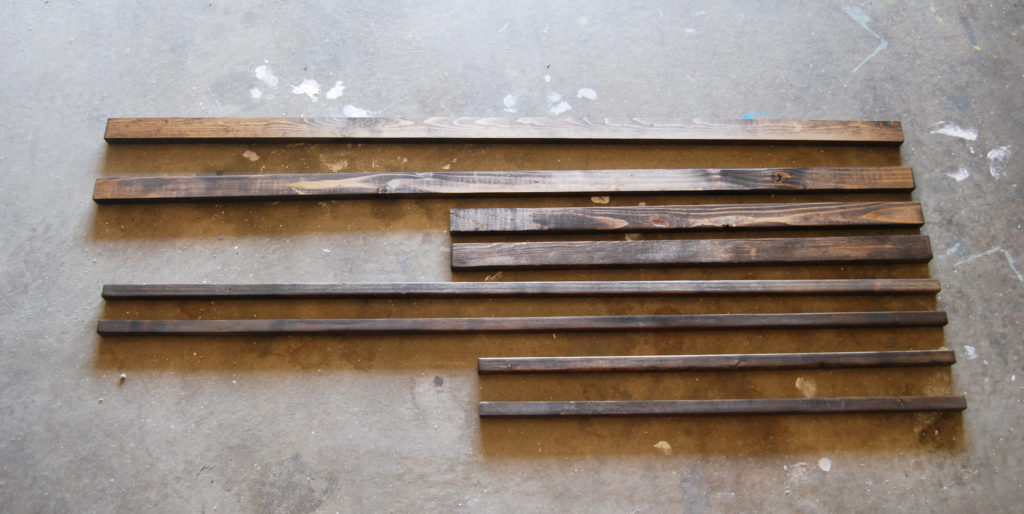
Step 6: Stain frame pieces
Stain the frame pieces. I used Minwax Dark Walnut
Step 7: Attach inner frame
Use wood glue to attach the inner frame pieces to the shiplap sign.
After attaching each piece with glue I flipped the frame over and used a couple 3/4″ brad nails through the backside to secure the frame pieces. This is an optional step. You could just let the glue dry, but I was impatient to get the outer trim pieces attached. 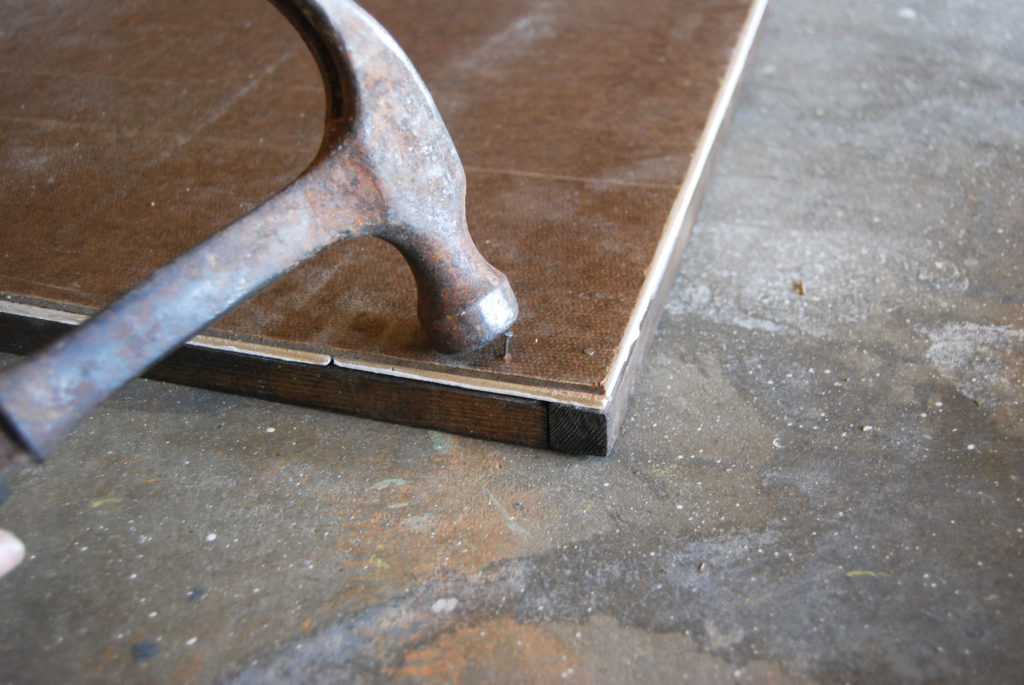
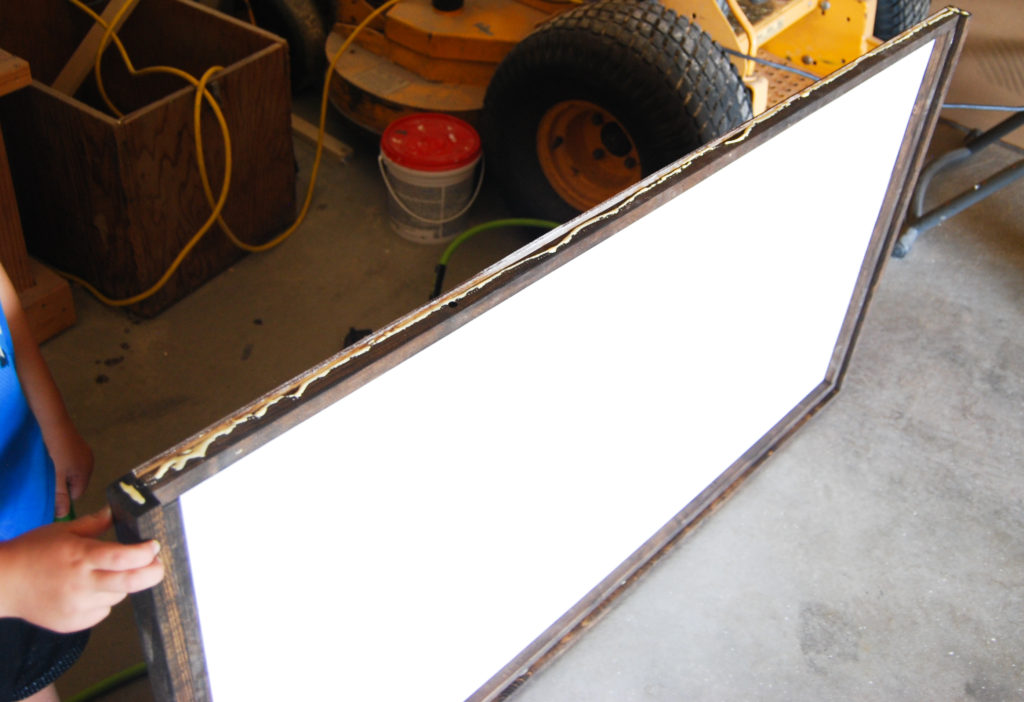
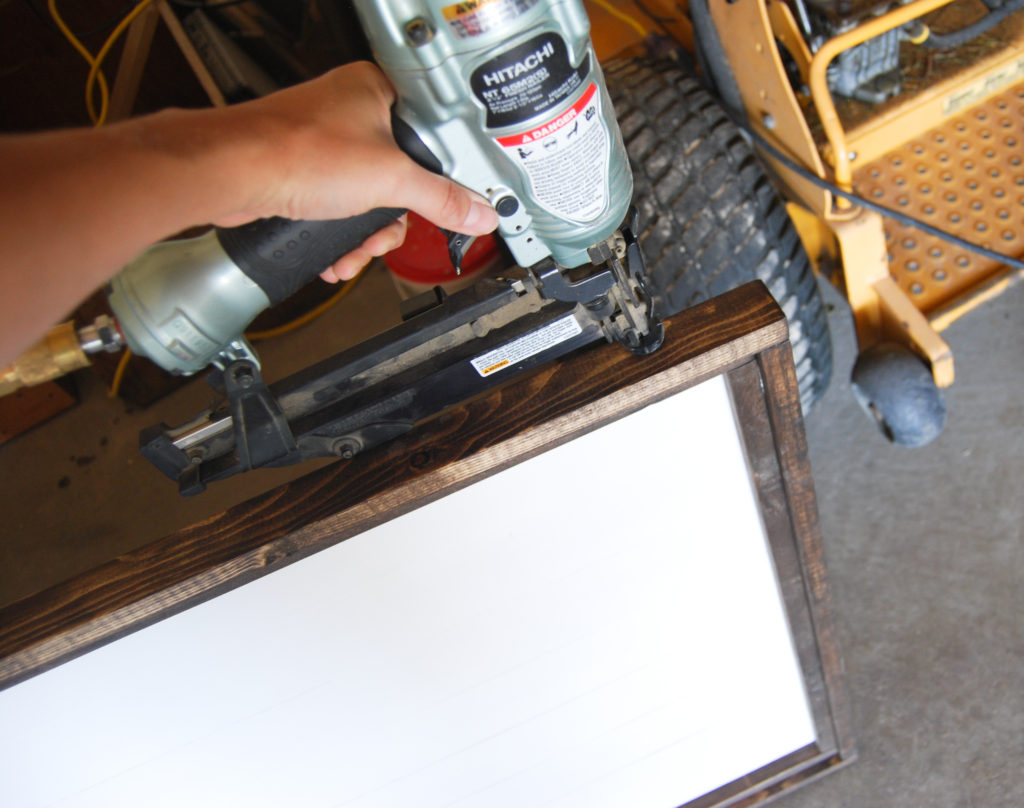
Step 8: Attach outer frame
Glue and nail on the 4 remaining 1×2 trim pieces. I placed the sign on its side, ran a bead of glue and then used my nail gun to attach the pieces. You do not need many nails, just a couple in each corner and a few along the edge.
Step 9: Add lettering
Like I said at the beginning of the post, I am not going to share the silhouette cut file or pdf template for this sign. This is a personalized sign, so I doubt you would want that anyway.
I did use the same technique I did for this sign Great is thy faithfulness so if you are interested in how I achieved this look you can check out that tutorial.

I hope you enjoy this sign and feel encouraged and motivated to try one of your own shiplap sign!
Have a great day!
Emily
The credit for the design should be given to the original maker of this sign. Two Daughters Heirlooms.
Hi!Thank you so much for sending a comment and letting me know where I should give credit for the sign design.
I did not know where the design came from and would love to give Two Daughters Heirlooms credit. I will update the post immediately.